NET Series
Appendix B
Page 144 Firmware Ver. 1.00.42/Software Ver. 1.0.2.6 LEIGHTRONIX, INC.
2010-07-09
pin connectors. Refer to your PRO-BUS interface’s manual for more information on
connecting the interface to a device.
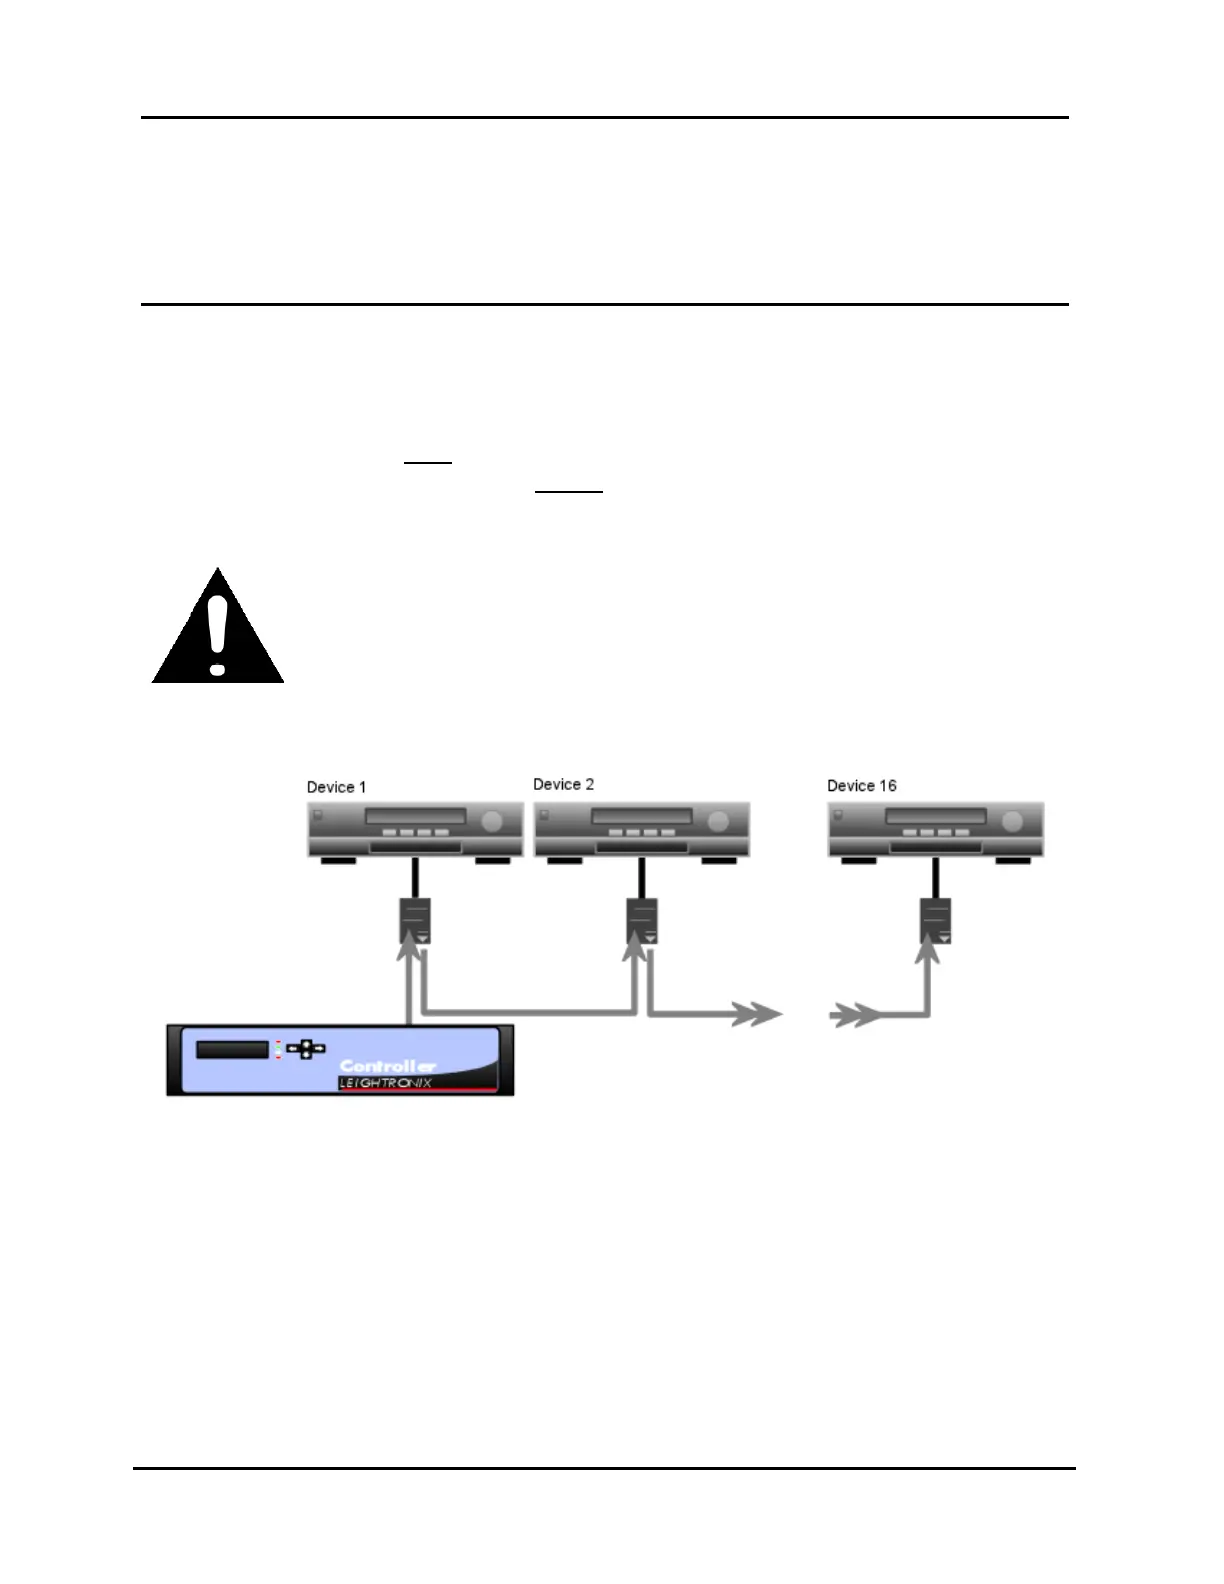
CONNECT PRO-BUS TO CONTROLLER AND OTHER PRO-BUS
INTERFACES
Starting from the PRO-BUS port on your LEIGHTRONIX Controller, daisy-chain the
provided RJ-11 cables between interfaces as shown in Illustration 110, PRO-BUS
Daisy Chain, observing the "IN" and "OUT" labels on the interfaces. These labels
indicate the signal path from the Controller. Do not loop the last interface back to
the Controller! It should have an OPEN “OUT” connector. Some LEIGHTRONIX
Controllers have more than one PRO-BUS port, allowing you to create separate
interface chains. Only 16 interfaces may be connected in a chain.
CAUTION
Interfaces will not work and equipment may be damaged if the “IN” and
“OUT” labels are not observed!
Illustration 110, PRO-BUS Daisy Chain