NET Series
Controller Installation and Configuration
Page 22 Firmware Ver. 1.00.42/Software Ver. 1.0.2.6 LEIGHTRONIX, INC.
2010-07-09
CONNECTING SIGNAL WIRING
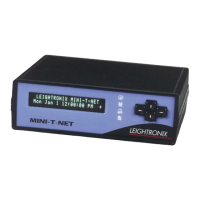
Throughout the following instructions, refer to Illustration 4, MINI-T-NET Rear Panel;
Illustration 5, NET-164 Rear Panel; Illustration 6, NET-EC Rear Panel; Illustration 7,
MINI-T-NET Typical Playback System Diagram; Illustration 8, NET-164 Typical
Playback System Diagram; and Illustration 9, NET-EC Typical Playback System
Diagram.
1. NET-EC only: the NET-EC controls external routers and comes standard with
control cables for the PESA and SIGMA routing switchers. The NET-EC will also
control SIERRA VIDEO SYSTEM and KNOX routing switchers (contact
LEIGHTRONIX or your local dealer for more information). Connect the NET-EC
“SWITCHER” connector to the serial input on the respective routing switcher.
2. NET-164 and NET-EC only: if using, connect digital DVD players with title:chapter
access to the DVply connectors on Controller with included cables (contact
LEIGHTRONIX for more information on applicable DVD players).
3. Route the video/audio from your sources that require switches (VCRs, DVD
players, studio/satellite feeds, character generator, etc.) to the switch input
connectors on the MINI-T-NET/NET-164 or switcher connected to the NET-EC.
LEIGHTRONIX recommends starting with Input 1 and successively
connecting your devices to the Controller’s internal switcher (MINI-T-NET
and NET-164) or external switcher (NET-EC) inputs to ensure your switcher
input numbers correspond to the PRO-BUS interface numbers. This will
make it easier to determine whether each of your devices is
communicating with the appropriate PRO-BUS interface.
MINI-T-NET and NET-164: Input 8 on the MINI-T-NET is the designated
fallback input, while the NET-164 has configurable fallback inputs. If valid
video is lost on an output and a fallback time has been set, the MINI-T-NET
and NET-164 will switch the fallback input to that output when video has
been absent for the entered time. For this reason, place a continuous
source of video such as a character generator, bulletin board, or satellite
feed on your fallback input(s) to act as the fallback in case of source
equipment malfunction.
NET-EC: connect your video/audio as outlined in your routing switcher
manual.
4. Connect the output connector(s) on the MINI-T-NET/NET-164 or NET-EC-
controlled switcher to the desired destination(s) (such as a modulator).
5. Attach PRO-BUS interfaces in a daisy chain from the PRO-BUS connector on the
Controller. See “Appendix B: PRO-BUS Interface Connections,” on page 142 for
more details.