4A-14 90-13645--2 495POWERHEAD
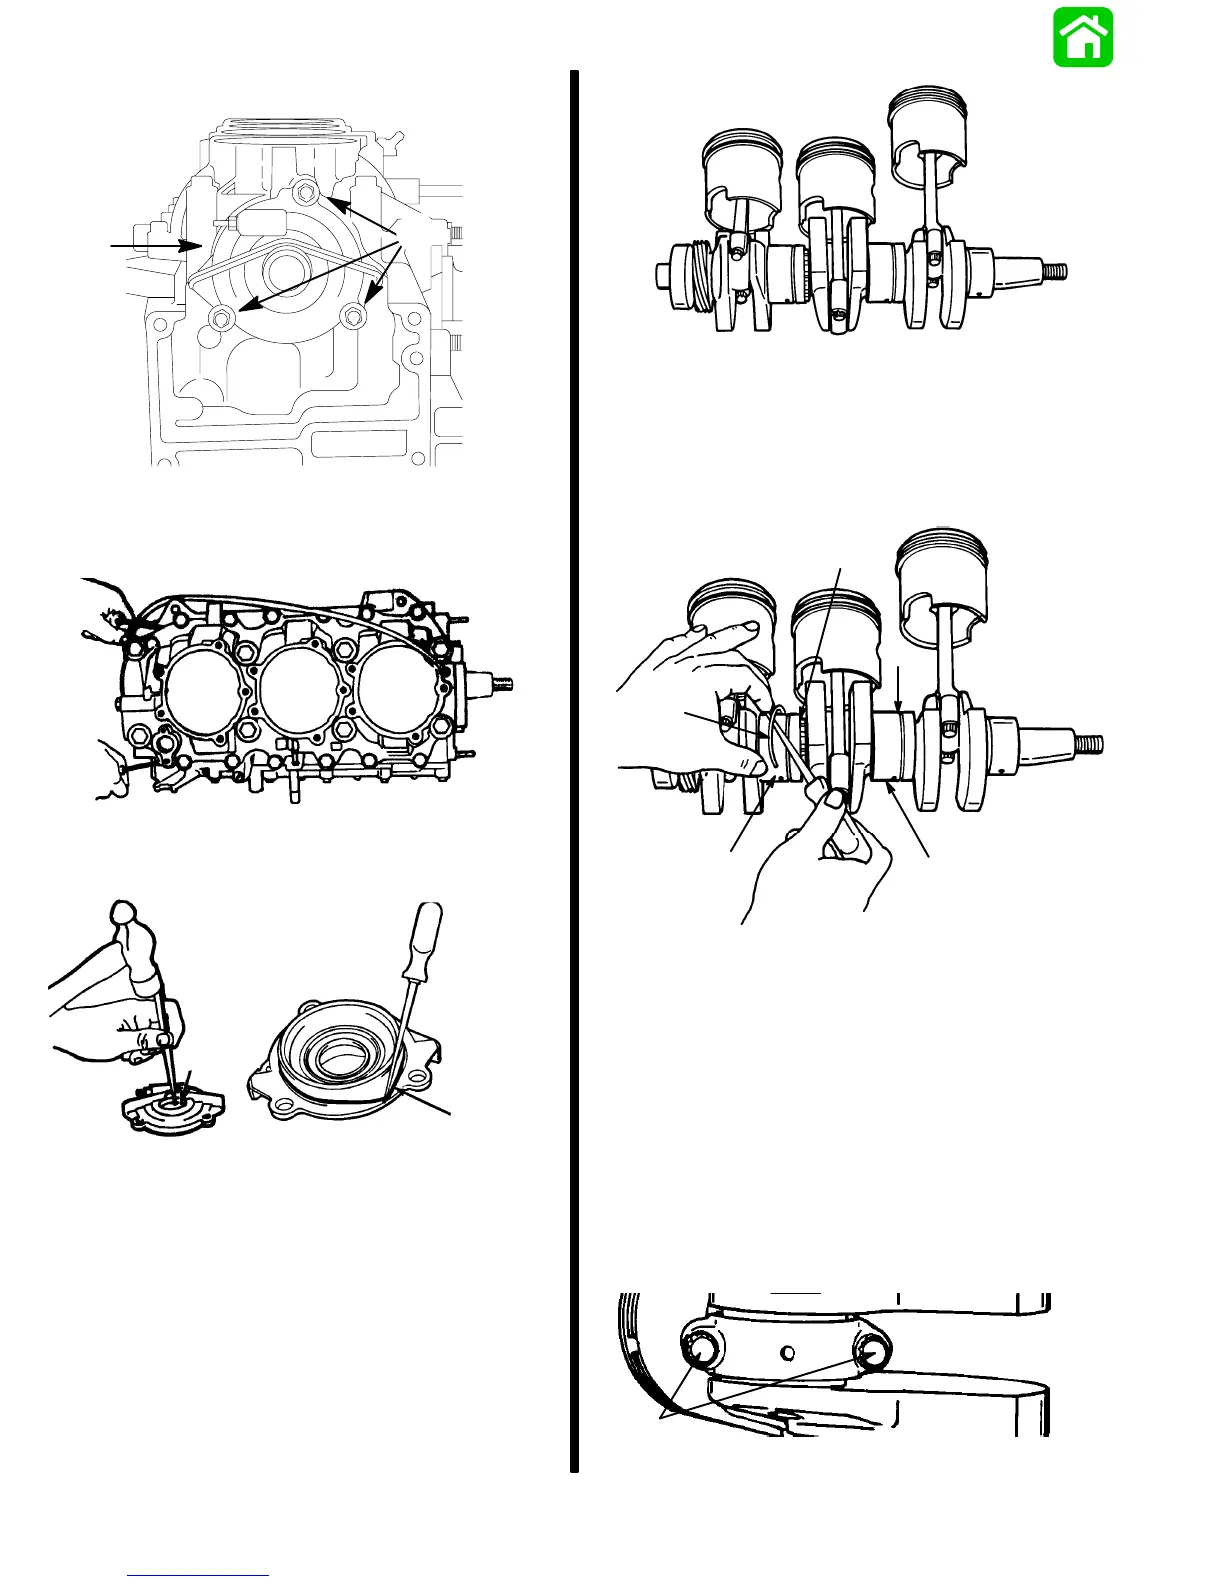
8. Remove 3 bolts from crankcase end cap (lower).
20020
a
b
a - Bolts
b - End Cap
9. Remove crankcase bolts, and cover.
20032
10. Remove crankcase endcap (lower).
11. Remove oil seal and O-ring seal.
20341
20342
a
b
a - Oil Seal
b - O-Ring
Some models may have a wear sleeve with an O-ring
seal. See page 4A-16.
12. Crankshaft may be removed as an assembly, or
by component parts.
IMPORTANT: If removed by components, rod
caps MUST be reassembled on the same rod - in
the dame direction. (Each mating surface is
slightly different), so rebolt cap to rod immediate-
ly, or mark rods and caps.
19314
13. Remove main roller bearing assemblies (2) from
crankshaft as follows;
S Remove retaining ring.
S Remove race.
S Remove main roller bearings.
27649
a
b
c
a
c
a - Retaining Ring
b - Race
c - Main Roller Bearings
14. Remove 2 bolts, each rod cap, using a 3/8”, 12
point socket.
IMPORTANT: Before disassembly, use a carbide-
tip scriber to mark caps and rods, to return pis-
tons to proper cylinder.
15. Remove piston assembly from crankshaft; reat-
tach caps to respective rods, as each is removed.
CAPS MUST BE INSTALLED IN SAME DIREC-
TION ON SAME ROD, or mating surfaces will not
seat properly.
19328
a
a - Bolts