4A-990-13645--2 495 POWERHEAD
Tools for Powerhead Repair
Part No. Tool Description
91-52344 Flywheel Holder
91-24161 Protector Cap
91-73687A1 Flywheel Puller
91-90455 Lifting Eye
91-24697 Piston Ring Expander
91-74607A1 Piston Pin Tool
91-77109A1 Locking Installation Tool
91-812549 Powerhead Stand
SEALANTS/LOCTITES NEEDED
Loctite 271 (Obtain Locally)
Master Gasket Sealant Kit
Quicksilver
No. 92-12564 1 (Loctite Kit)
Quicksilver
Perfect Seal No. 4 (92-34227-1)
General Information
DISASSEMBLY AND REASSEMBLY
If complete disassembly is not necessary, start at
appropriate spot; start reassembly at point
disassembly stopped.
If major powerhead repairs are being done, remove
powerhead from lower unit. It is not necessary to
remove powerhead for:
a. Visual check for scoring or broken rings
(cylinder walls and pistons), by viewing through
exhaust ports.
b. Minor external repair (i.e. - ignition system, car-
buretors, reed blocks, thermostat checks, etc.).
Powerhead Component
Removal
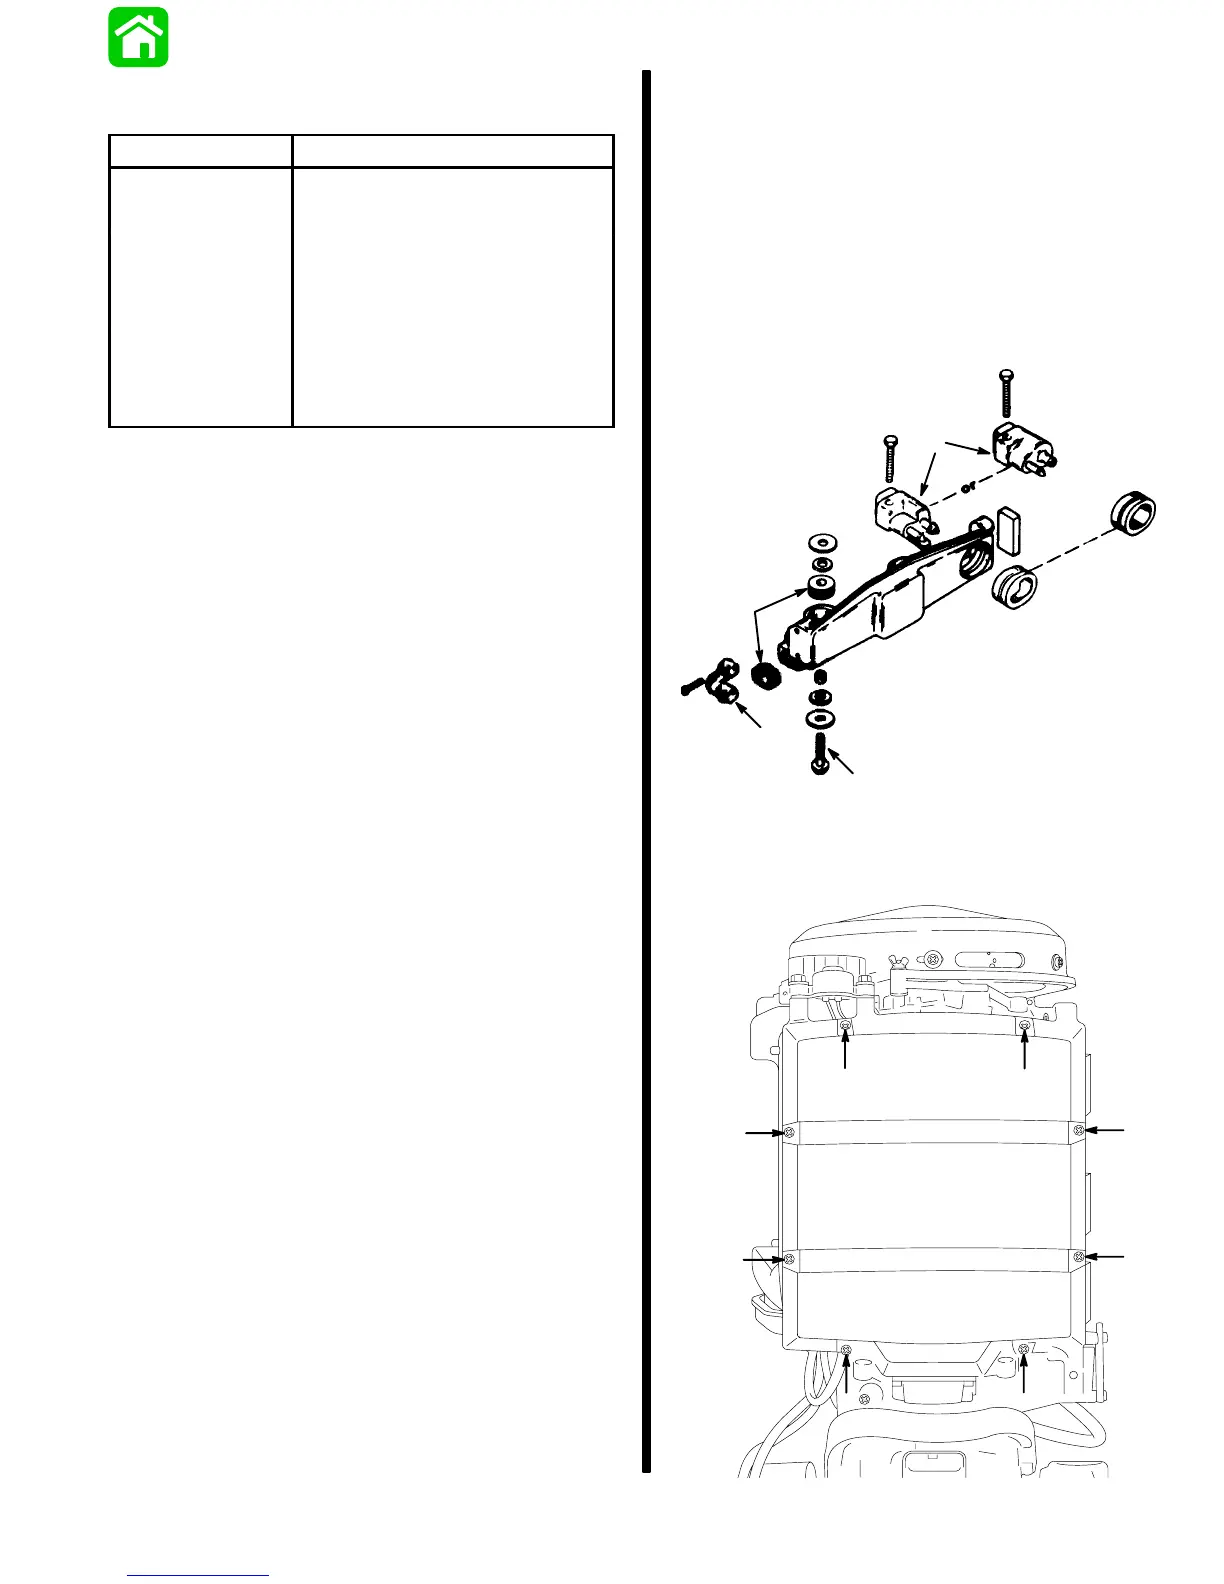
1. Remove Front Cowl Bracket before removing
air box cover, by removing 2 bolts, cable retainer,
and fuel connector. Bushings normally remain in
brackets. Cowl and bracket seals/bushings stay
attached to respective locations. If seal replace-
ment is necessary, remove old seals at time of re-
placement.
a
b
c
d
a - Bolts
b - Cable Retainer
c - Fuel Connector
d - Bushings
2. Remove Air Box Cover by removing 8 screws.
20335