5A-20 LOWER UNIT 90-13645--2 1095
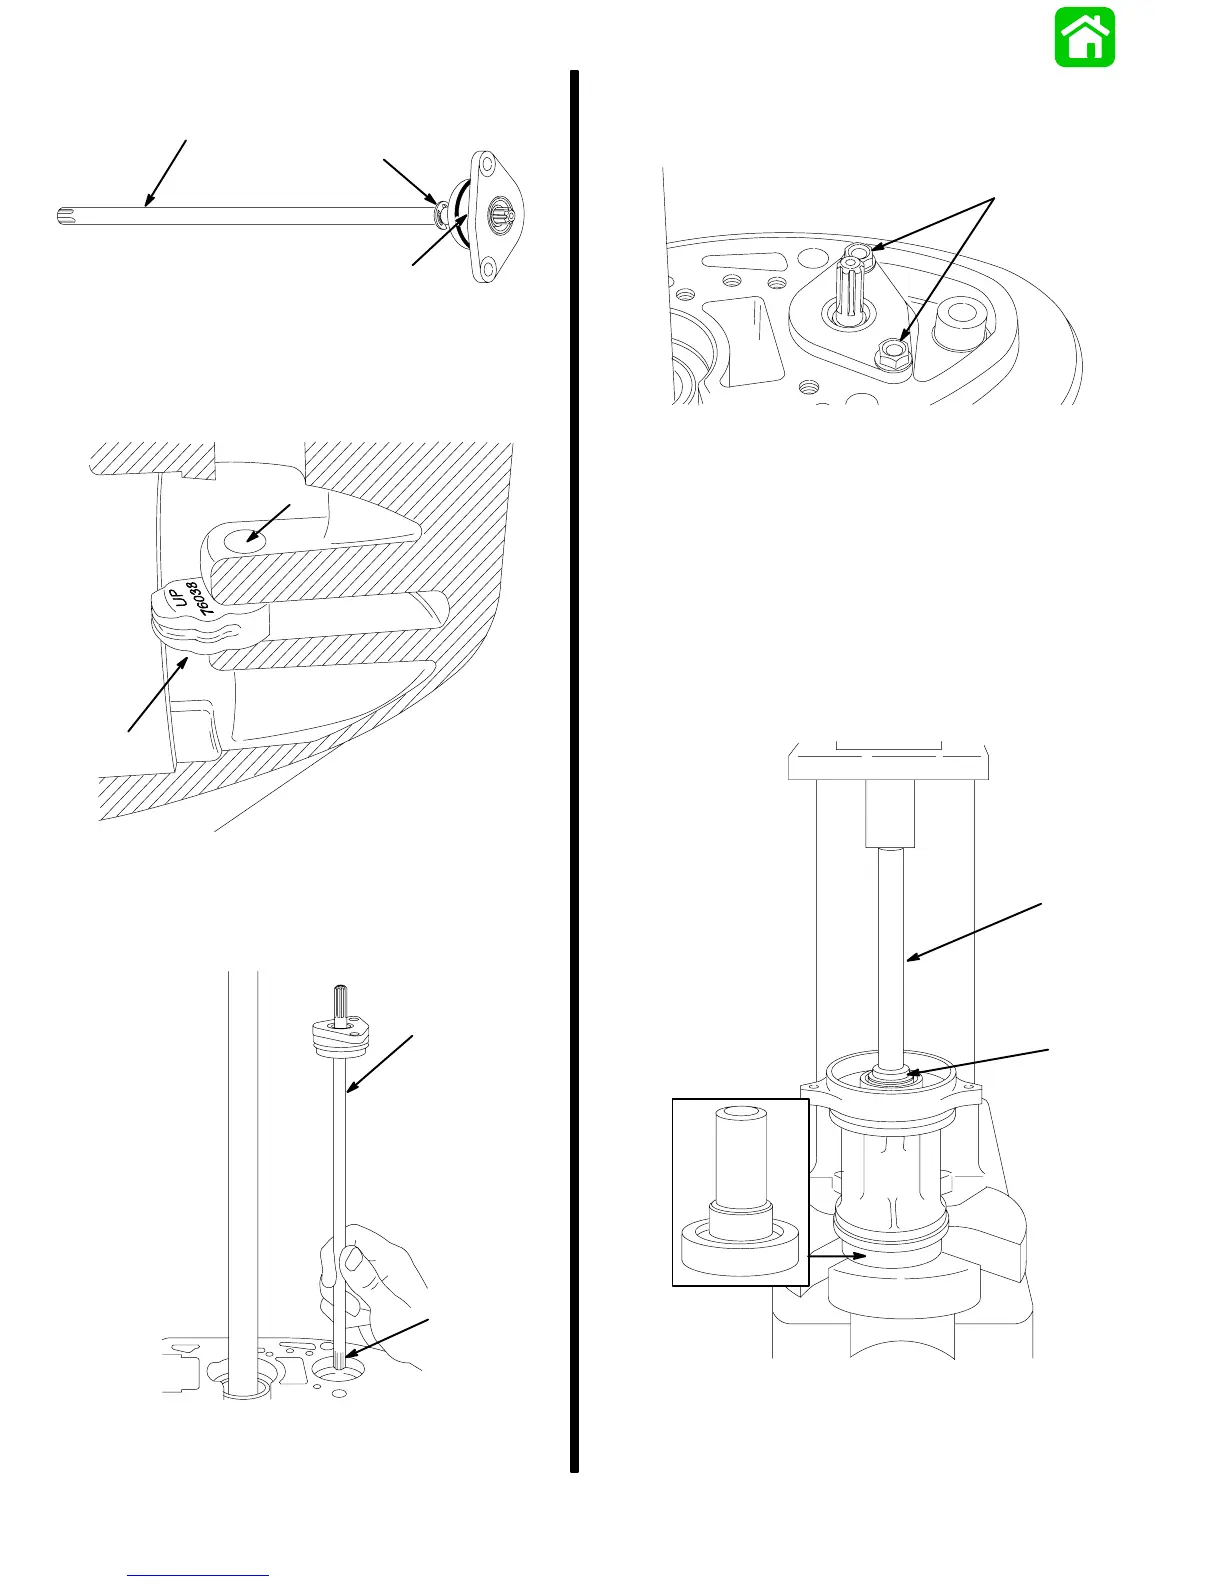
5. Assemble components as shown.
19200
a
b
c
a - Shift Shaft
b - “E” Clip
c - Shift Shaft Bushing
6. Install shift cam (numbers toward top of gear
housing); align hole in shift cam with hole.
51117
a
b
a - Shift Cam (Numbers UP)
b - Hole
7. Install shift shaft assembly; insert splines into shift
cam.
19227
a
b
a - Shift Shaft Assembly
b - Splines
8. Apply Loctite 271 on bottom 1/2 of threads of
bolts; install bolts and torque to 60 lb. in. (6.8
N·m).
19216
a
a - Bolts [Torque to 60 lb. in. (6.8 N·m)]
Bearing Carrier Reassembly
1. Lubricate O.D. of bearing and bearing carrier bore
with Quicksilver 2-4-C w/Teflon.
2. Protect lip on forward side of bearing carrier, using
bearing installation tool (91-13945).
3. Press propeller shaft needle bearing (number
side toward mandrel) into carrier, until bearing
bottoms out.
21042
b
c
a
a - Bearing Installation Tool (91-13945)
b - Mandrel (91-37263)
c - Suitable Driver Rod