139
C
ONFIGURING SOFTKEYS PAGING KEY
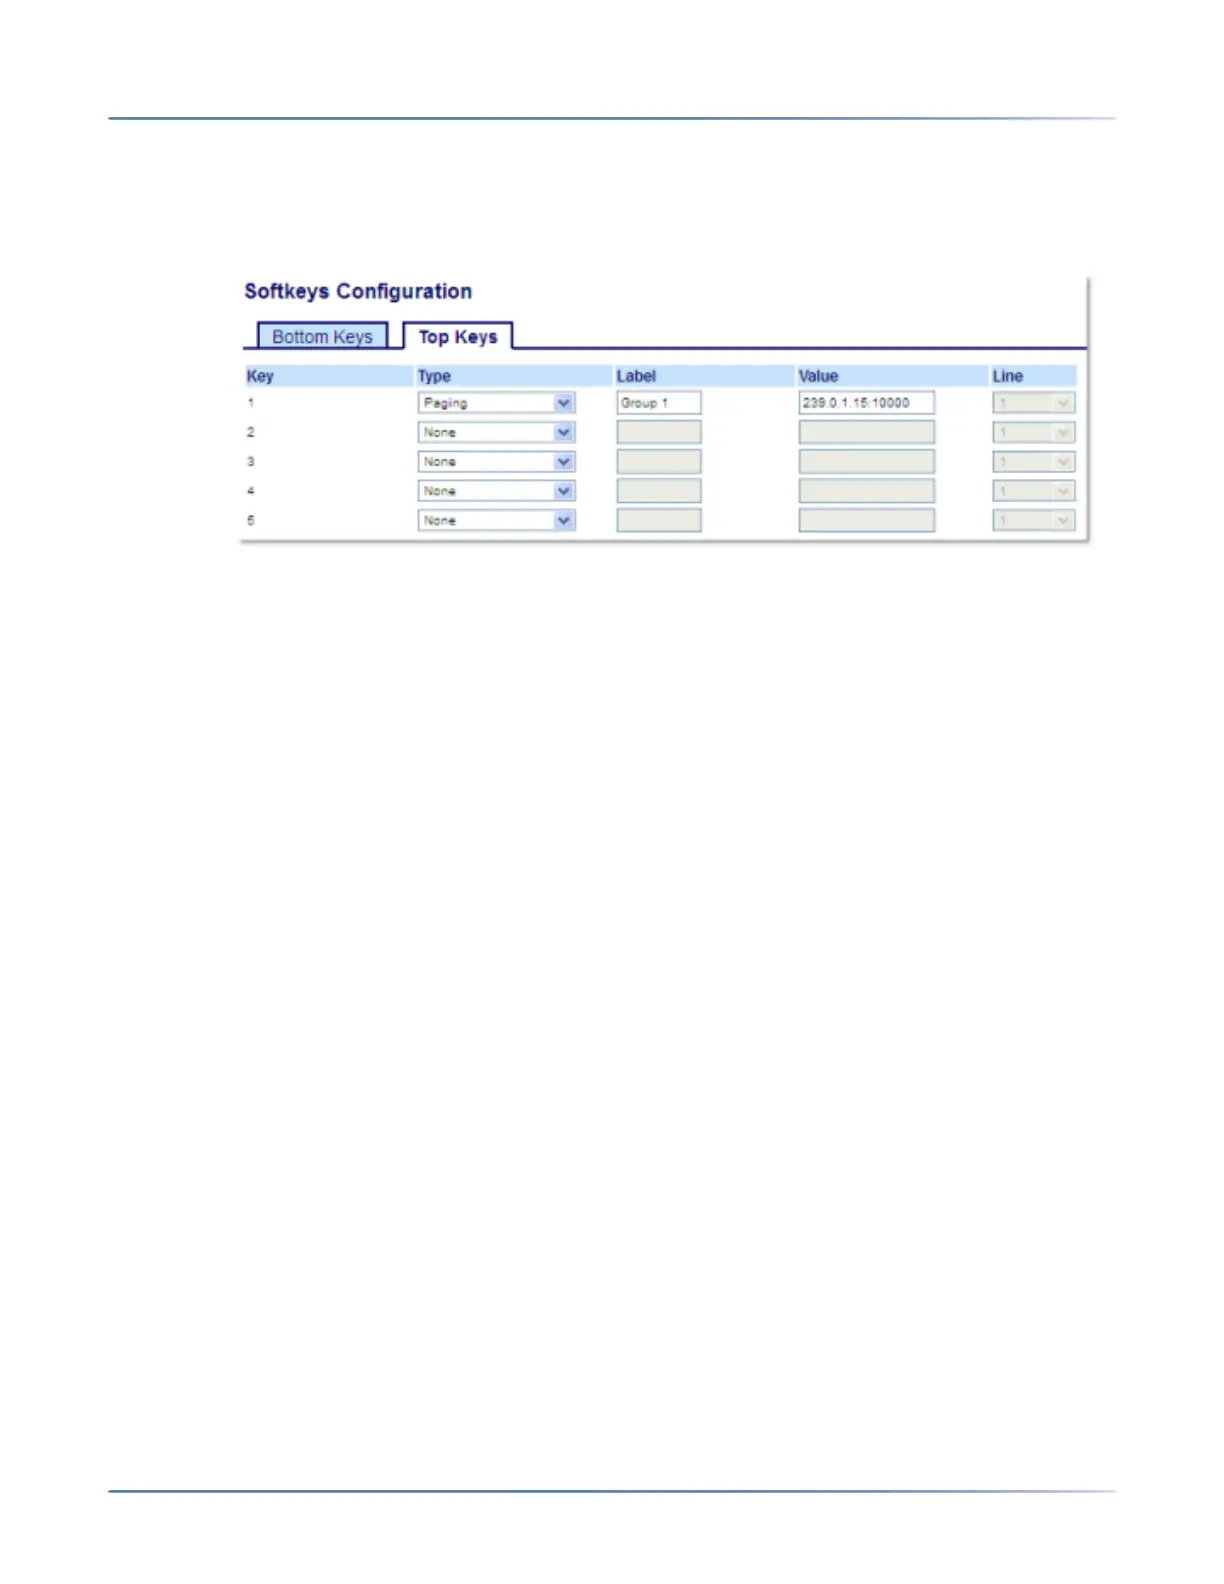
Configuring a Paging Key Using the Mitel Web UI
1. Click on Operation > Softkeys and XML.orClick on Operation > Expansion Module <N>.
Softkeys
2. Select from Key 1 through Key 48 on the Top keys.orSelect from Key 1 through Key 30 on the Bottom
keys.
3. In the Type field, select Paging.
4. In the Label field, enter a label to apply to this key.
5. In the Value field, enter a multicast IP address and a port number for the Paging key. When you press
this key, the phone initiates an outgoing multicast RTP session to the specified address using the
specified port (e.g. 239.0.1.15:10000).
NOTE:
a. When you select Paging for the Type field, the Linefield is disabled.
b. TheValue field allows for one multicast address entry only.
6. To receive RTP steams for group paging, you must also configure the Paging Listen Addresses
parameter at the path, Basic Settings > Preferences > Group Paging RTP Settings. For more infor-
mation about setting this parameter, see “Group RTP Paging” on page 219.
Expansion Module Keys
7. Select from Key 1 through Key 84(M695).
8. In the Type field, select Paging.
9. In the Value field, enter a multicast IP address and a port number for the Paging key. When you press
this key, the phone initiates an outgoing multicast RTP session to the specified address using the
specified port. (For example, 239.0.1.15:10000).
NOTE:
a. When you select Paging for the Type field, the Linefield is disabled.
b. TheValue field allows for one multicast address entry only.
10. To receive RTP steams for group paging, you must also configure the Paging Listen Addresses
parameter at the path, Basic Settings > Preferences > Group Paging RTP Settings. For more infor-
mation about setting this parameter, see “Group RTP Paging” on page 219.
11. Click Save Settings to save your changes