Wireless Configuration 6 - 5
6.1.1 Basic WLAN Configuration
Wireless LANs
When creating or modifying a WLAN, the Basic Configuration screen is the first screen that displays as part of the WLAN
configuration screen flow. Use this screen to enable a WLAN, and define its SSID, client behavior and VLAN assignments.
1. Select the Configuration tab from the Web UI.
2. Select Wireless.
3. Select Wireless LANs to display a high level display of existing WLANs.
4. Select the Add button to create an additional WLAN, or select Edit to modify selected WLAN’s properties. WLANs can also
be removed as they become obsolete by selecting Delete.
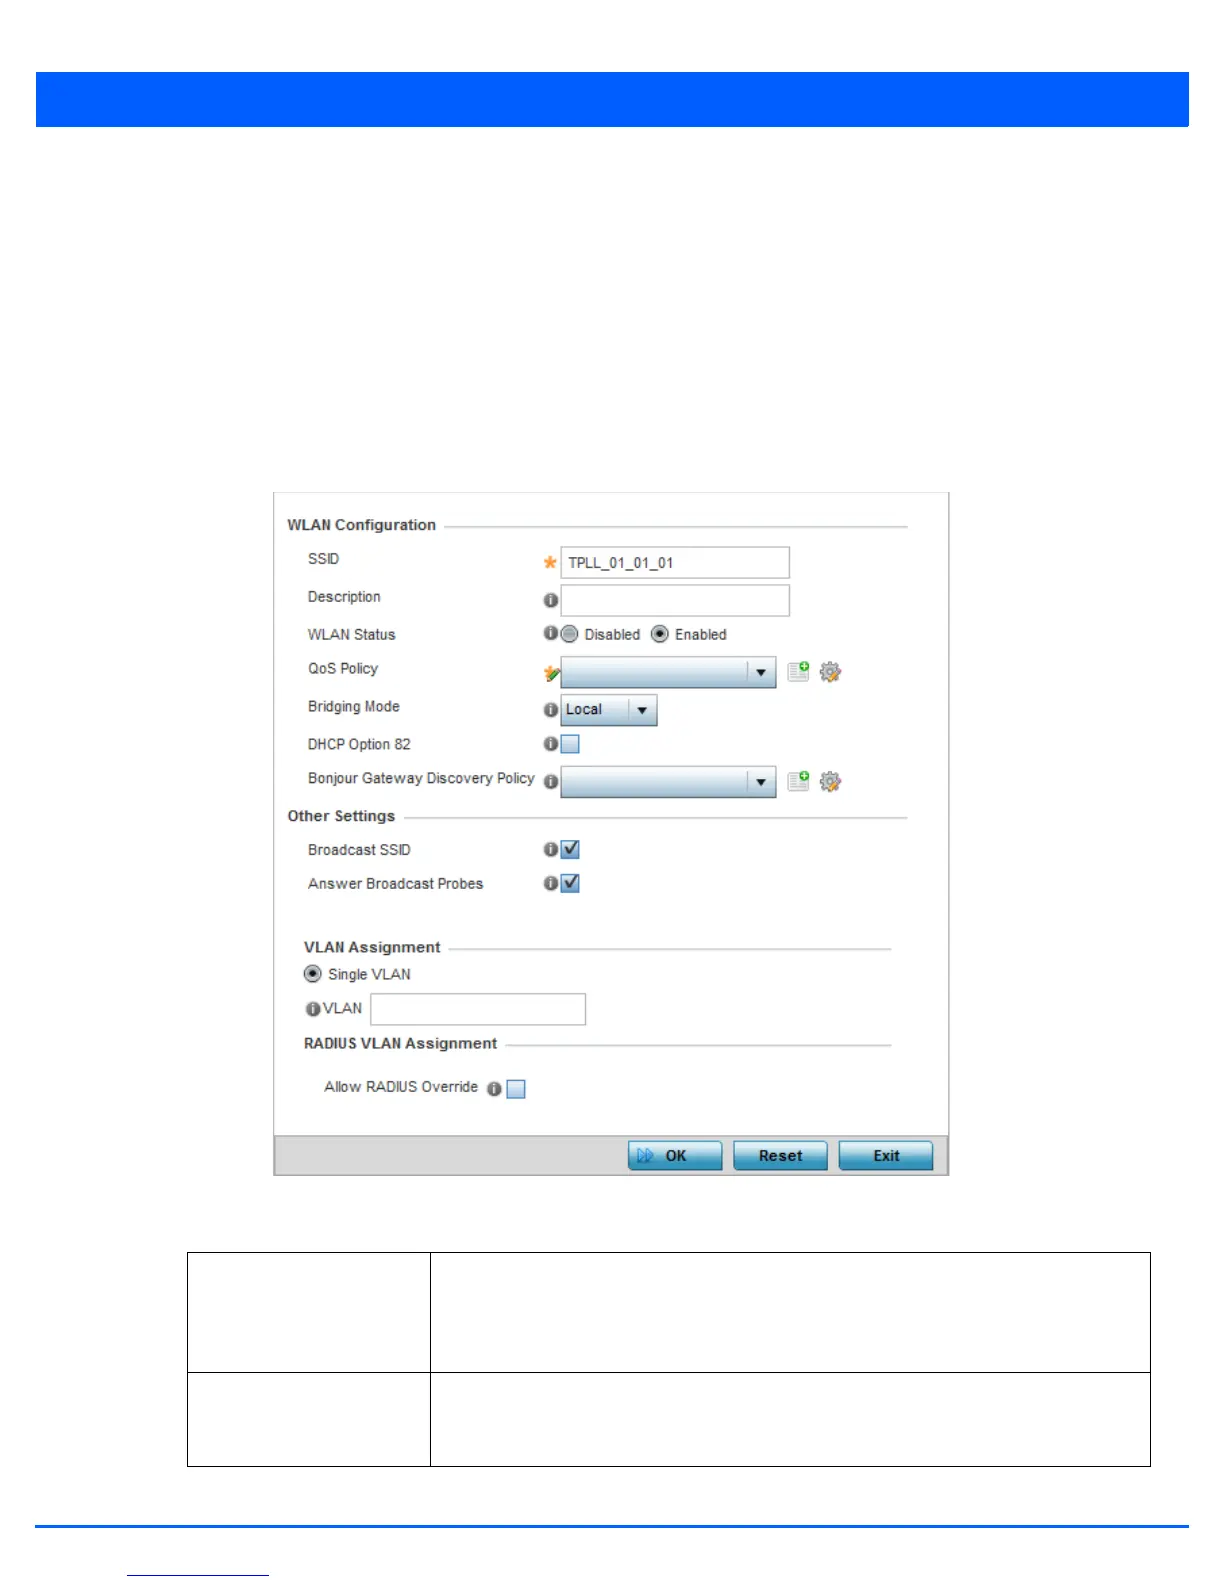
Figure 6-3 WLAN Basic Configuration screen
5. Refer to the WLAN Configuration field to define the following:
WLAN If adding a new WLAN, enter its name in the space provided. Spaces between words are
not permitted. The name could be a logical representation of the WLAN coverage area
(engineering, marketing etc.). If editing an existing WLAN, the WLAN’s name appears at
the top of the screen and cannot be modified. The name cannot exceed 32 characters.
SSID Enter or modify the Services Set Identification (SSID) associated with the WLAN. The
WLAN name is auto-generated using the SSID until changed by the user. The maximum
number of characters for the SSID is 32.
 Loading...