4 ENGIN E SY M PTOMS DIAGNOSTICS 107
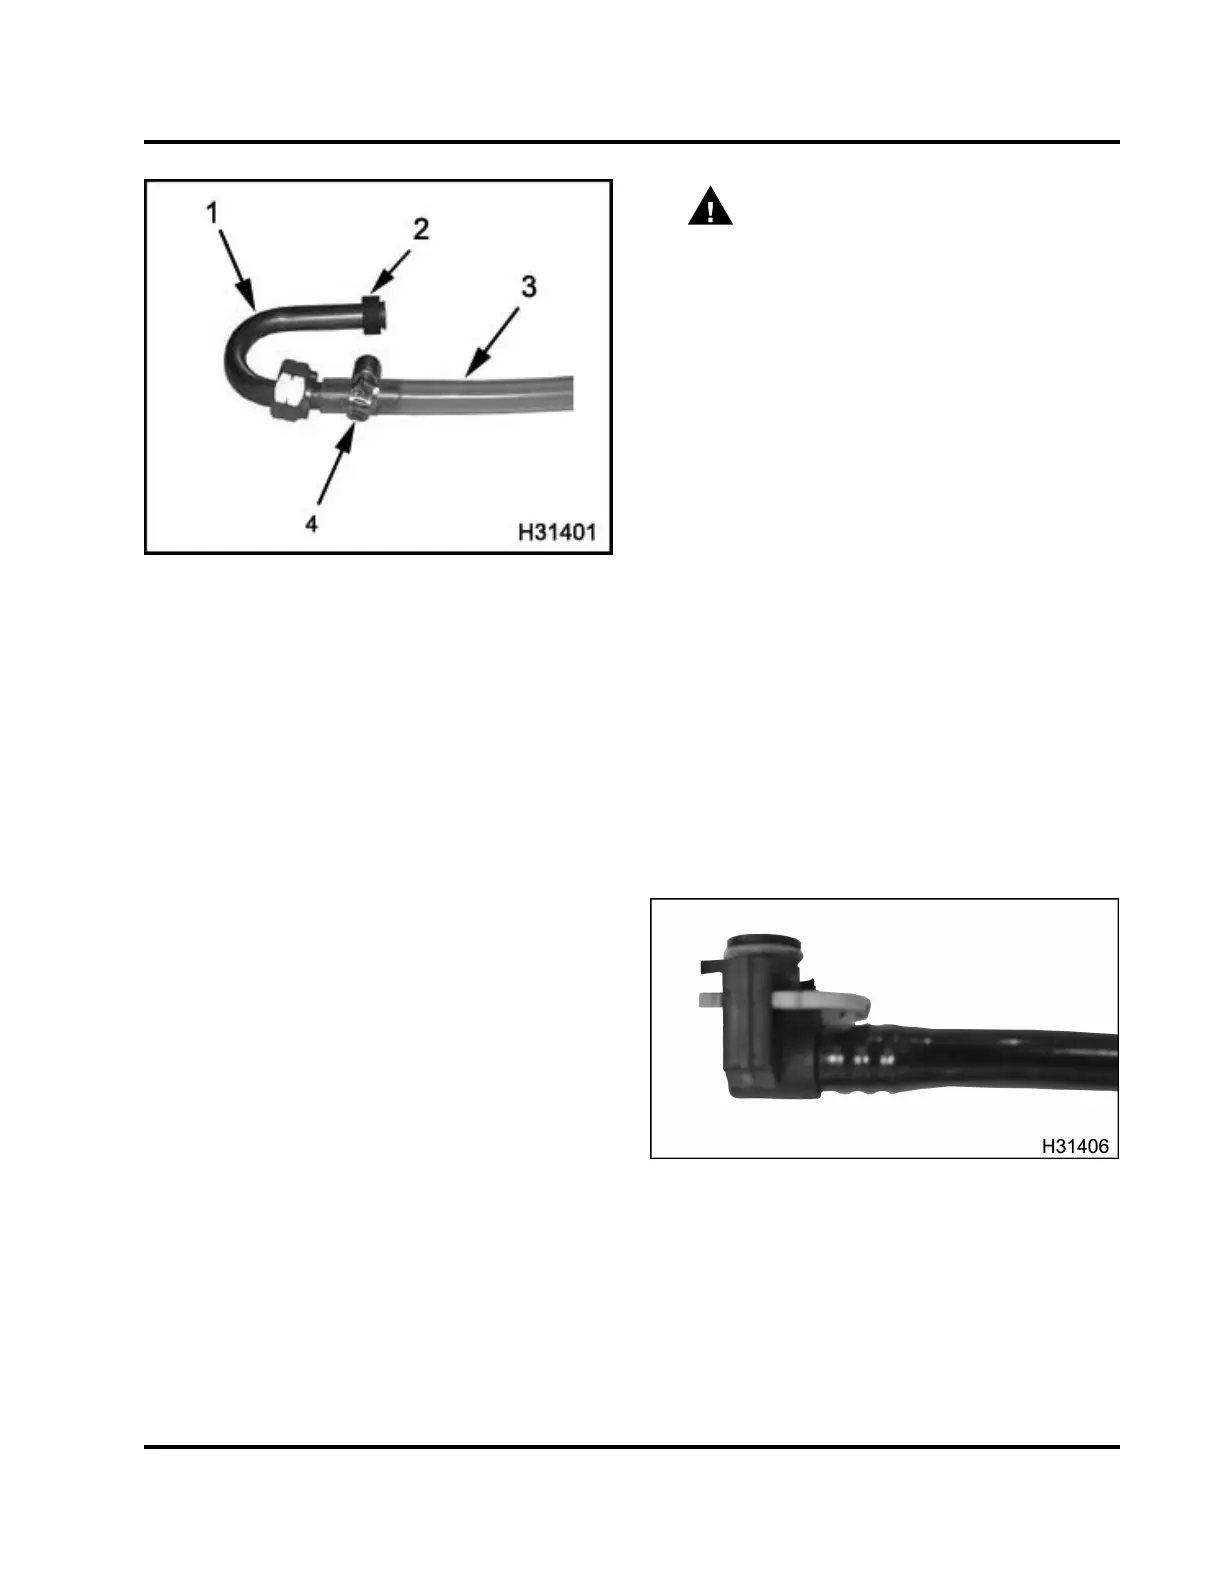
Figure 120 Test fuel line
1. F uel line
2. Sleeve seal
3. Clear plastic tube
4. Clamp
2. Make a test fuel line.
• Use spare fuel line. (Make sure the sleeve
seal is in good condition.) Cut the line in half.
Use the test fuel line p ortion that supplies the
fuel pump. Install clear plastic line in place of
removed section and secure plastic line with
aclamp.
NOTE: The mechanic is expected to keep the fuel
test line for future diagnostics. Expense the fuel
test line as an essential tool and keep it with other
diagnostic tools. Warranty will not cover the cost
of the fuel test line.
3. Connect the fuel test line between the fuel pump
inlet and an alternate fuel source.
WARNING: To avoid serious personal
injury, possible death, or damage to the
engine or vehicle – comply with the following:
When routing test line, do not crimp the line,
run the line too close to moving parts, or let
the line touch hot engine surfaces.
4. Start or crank the engine for 20 seconds. Measure
fuel pressure with the shut-off valve closed. Open
the shu t-off valve to check for aera tion.
NOTE: Breaking any fuel system joint will induce
air into the fuel system. The air should pass in a
short period of time. As fuel pressure is relieved, a
steady stream of fuel without air bubbles indicates
the fuel is not aerated.
• If the fuel is aerated, go to “Combustion Leaks
to Fuel” (page 108) in this section.
• If the fuel is not aerated, remove test setup
from the fuel pump inlet. Connect the fuel
pump supply lin e. Go to “Alternate F uel
Source Supply to Fuel Filter Housing” in this
section.
Alternate Fuel Source Supply to Fuel Filter
Housing
Figure 121 Fuel filter inlet test line
EGES-270-1
Read all safety instructions in the "Safety Information" section of this manual before doing any procedures.
Follow all warnings, cautions, and notes.
© August 2008 Navistar, Inc.
 Loading...


