184 5 HARD START AND NO START DIAGNOSTICS
Figure 217 Fuel supply line
1. Remove fuel supply line from suction side of fuel
pump and fuel filter housing.
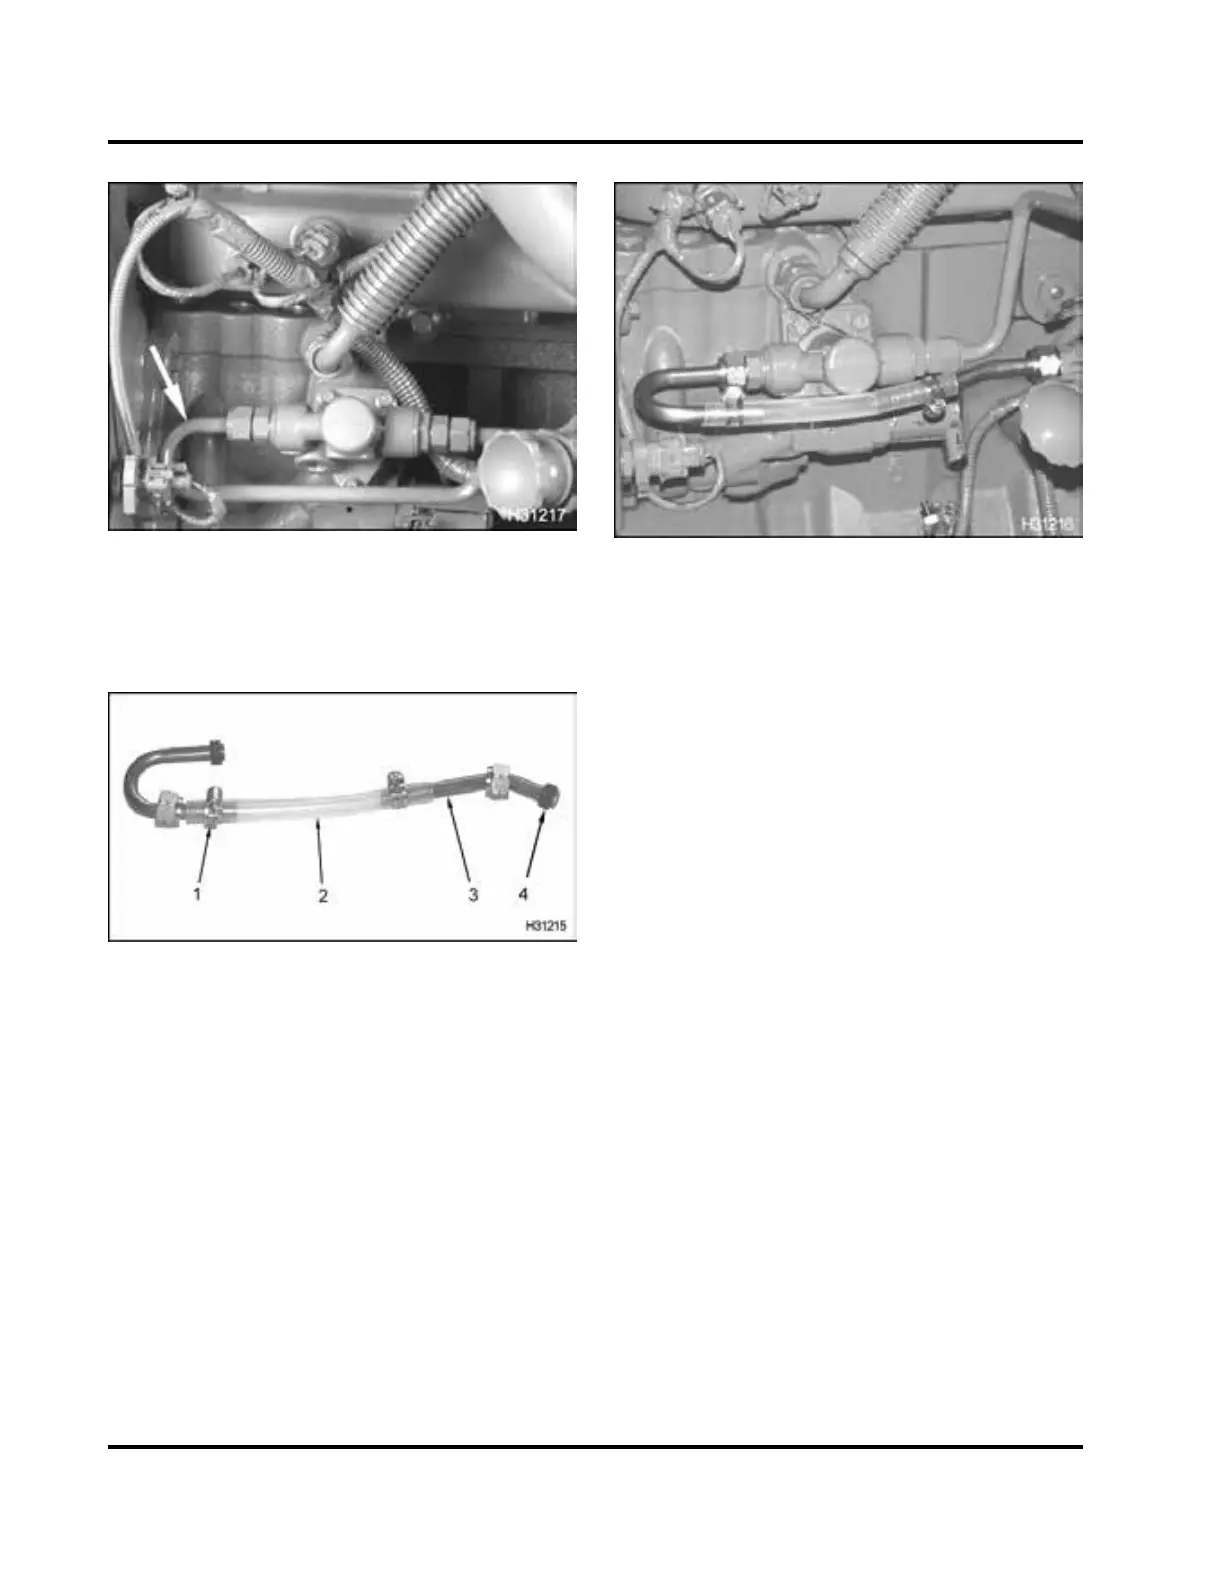
Figure 218 Test fuel line
1. Clamp (2)
2. Clear plastic tube
3. Spare fuel li ne (half)
4. Sleeve seal (2)
2. Make a test fuel line.
• Usesparefuelline. (Makesurebothsleeve
seals are good.) Cut a 3 inch section from
the center of the fuel line. Install clear plastic
lineinplaceofremovedsectionandsecure
plastic line with clamps.
NOTE: The mechanic is expected to keep the fuel
test line for future diagnostics. Expense the fuel
test line as an essential tool a nd keep it w ith other
diagnostic tools. Warranty will not cover the cost
of the fuel test line.
Figure 219 Test line installed
3. Install test fuel line.
NOTE: Verify that sleeve seals are in good
condition.
4. Do one of the following:
•ForHard Start and No Start Diagnostics,
crank engine for 20 seconds and check for air
bubbles in the clear plastic line.
•ForPerformance Diagnostics, run engine at
high idle, no load and check for air bubbles in
the clear plastic line.
5. Record results on Diagnostic Form.
NOTE: Initially, fuel will be aerated due to draining
fuel from filter housing and strainer in previous
test.
• If fuel is aerated check for a leak in the suction
side of fu el system . Se e “Aerat ed Fuel” in
Section 4.
• If fuel is not aerated and fuel pressure is good,
continue with next test.
• If fuel is not aerated and fuel pressure is low,
do “Operation of Fuel Pump”.
6. Remove fuel test line and install original fuel line.
NOTE: Verify that sleeve seals are in good
condition.
EGES-270-1
Read all safety instructions in the "Safety Information" section of this manual before doing any proced ures.
Follow all warnings, cautions, and notes.
©August 2008 Navistar, Inc.
 Loading...


