Creating a New Alarm SECTION 8 Alarms
117
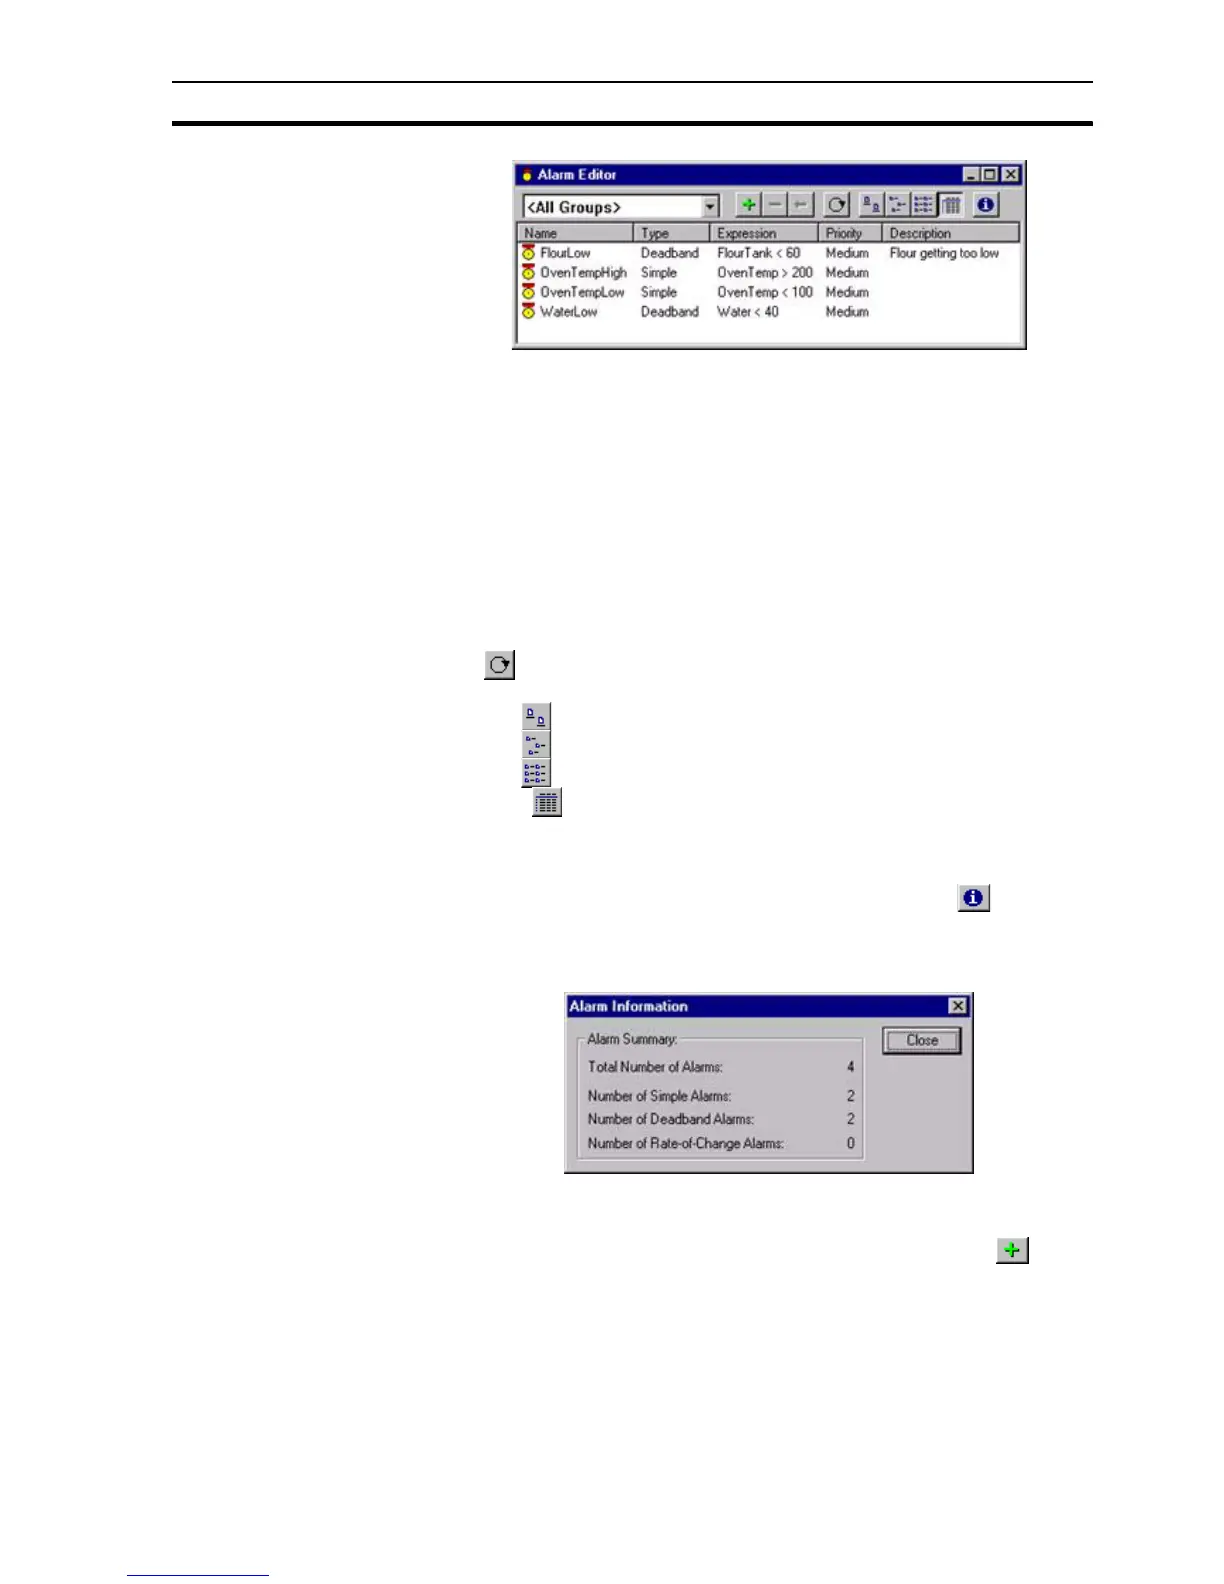
Alarms may be segregated into groups. To select a group, pick an entry from
the Group field.
All alarm definitions can be displayed by selecting <All Groups> from this list.
Individual listed alarms are sorted, based on a designated field type: name,
type or description. By selecting the Name field, the alarms are sorted
alphanumerically by name. The Type and Description fields, once selected,
react in the same way. The Alarm Editor dialog box shows the alarms in name
order.
The widths of the alarm fields can be widened or narrowed as required using
the mouse to drag the column boundaries.
The typeface of the editor can be amended by selecting Preferences from the
File menu. This is especially useful when printing.
The button displays the Alarm Settings dialog box, which allows global
alarm settings to be modified. Refer to chapter 8, Alarm Header Information.
Click the button to view details with large icons.
Click the button to view details with normal icons.
Click the button to view details as a list.
Select the button to view details as a list including name, type, expression,
priority and description information. The details can be sorted in ascending
order by clicking once or in descending order by clicking twice, in the
appropriate field.
A summary of alarm information is available by selecting the button. The
resultant dialog box shows an overall summary and a breakdown on the
number of alarms per type. To exit the dialog box, click the Close button. The
Alarm Information dialog box is shown as follows:
8-4 Creating a New Alarm
Open the Alarm Editor dialog box, as described in chapter 8, Viewing the
Contents of the Alarm Database. To add a new alarm, select the button.
This results in the Add Alarm dialog box being displayed.