While holding the motherboard mid-wall handle and small plastic motherboard handle, tilt
the motherboard to the right side to fit it under the power supply assembly, and level the
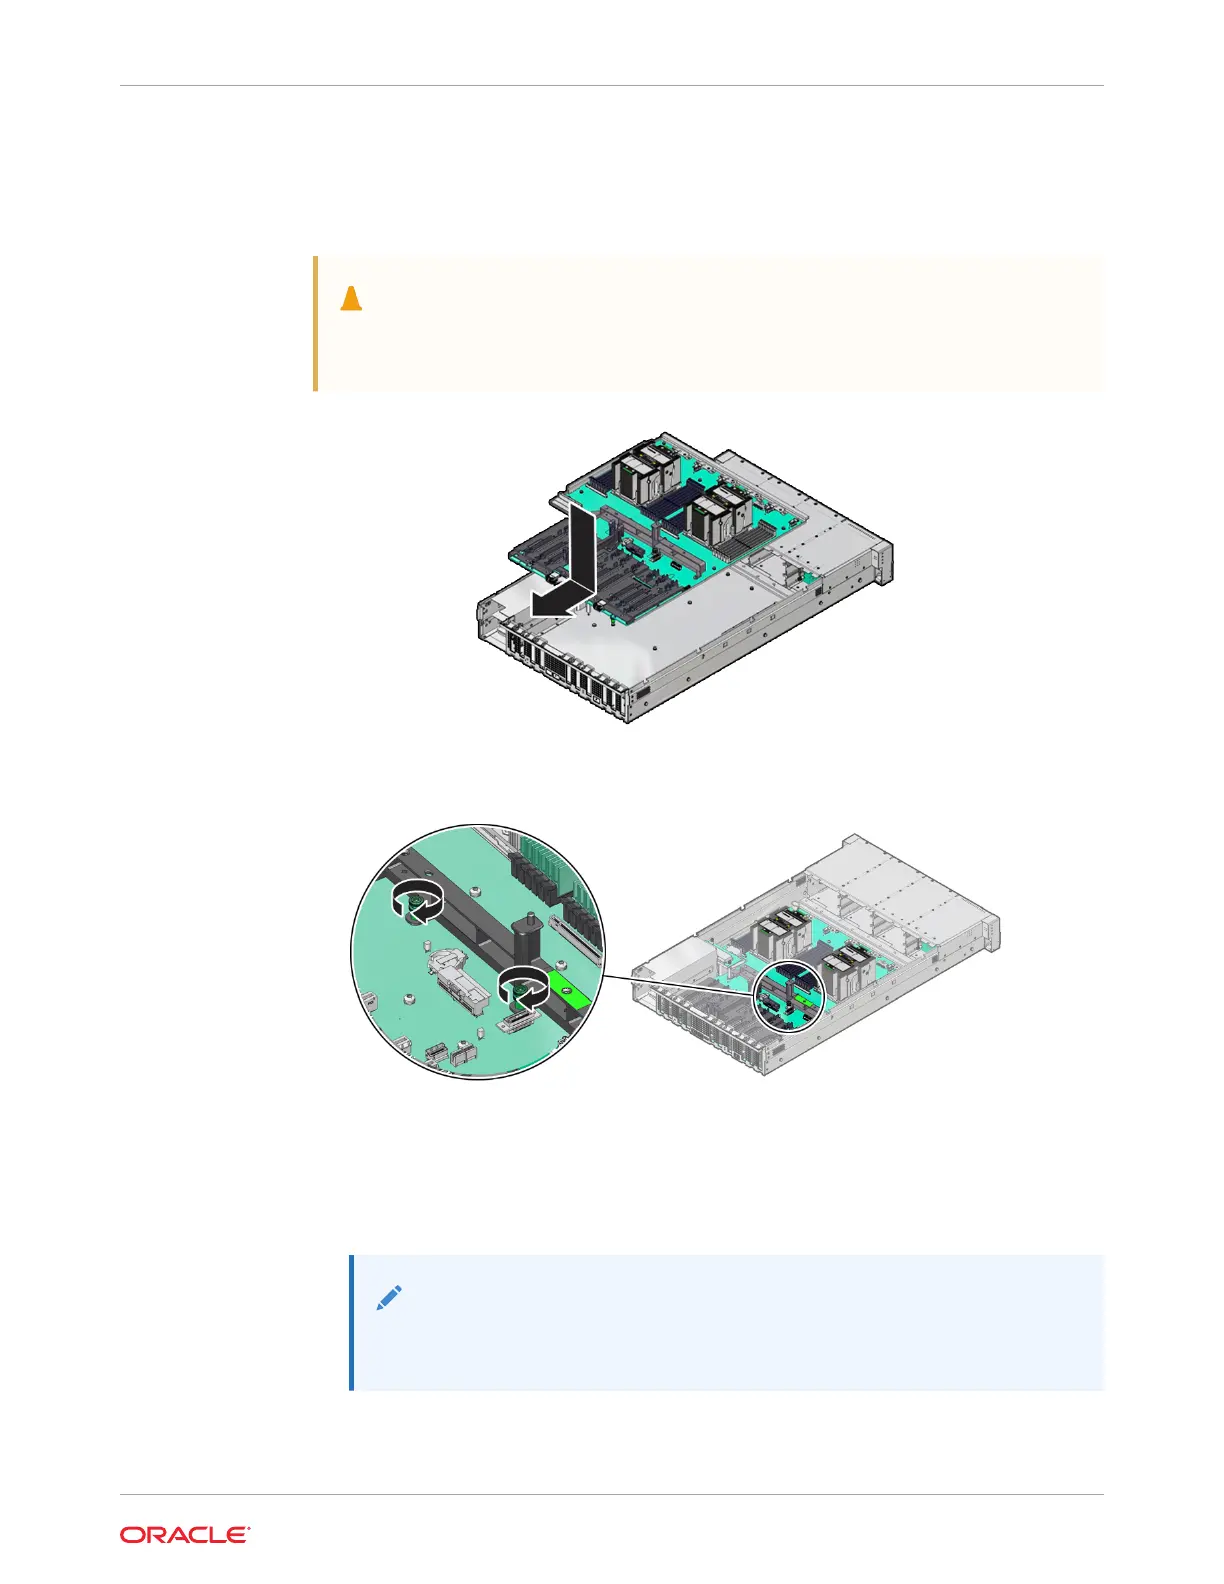
motherboard and place it into the server chassis. Slide the motherboard to the back of
the server to engage the raised standoffs.
Caution:
Be careful not to damage the rear Locate Button/LED when placing the
motherboard into the chassis.
3. Using a Torx T25 screwdriver, tighten the two captive screws to secure the motherboard
mid-wall to the chassis.
4. Reconnect the following cables to the motherboard:
a. Disk backplane power (DBP PWR) cable
Reconnect the power cable to the motherboard and the disk backplane. Reinstall the
cable guide holding the cables
Note:
NVMe four-disk backplanes use single power cables. SAS twelve-disk
backplanes use two power cables.
See Servicing the Disk Backplane.
Chapter 12
Install the Motherboard Assembly
12-13