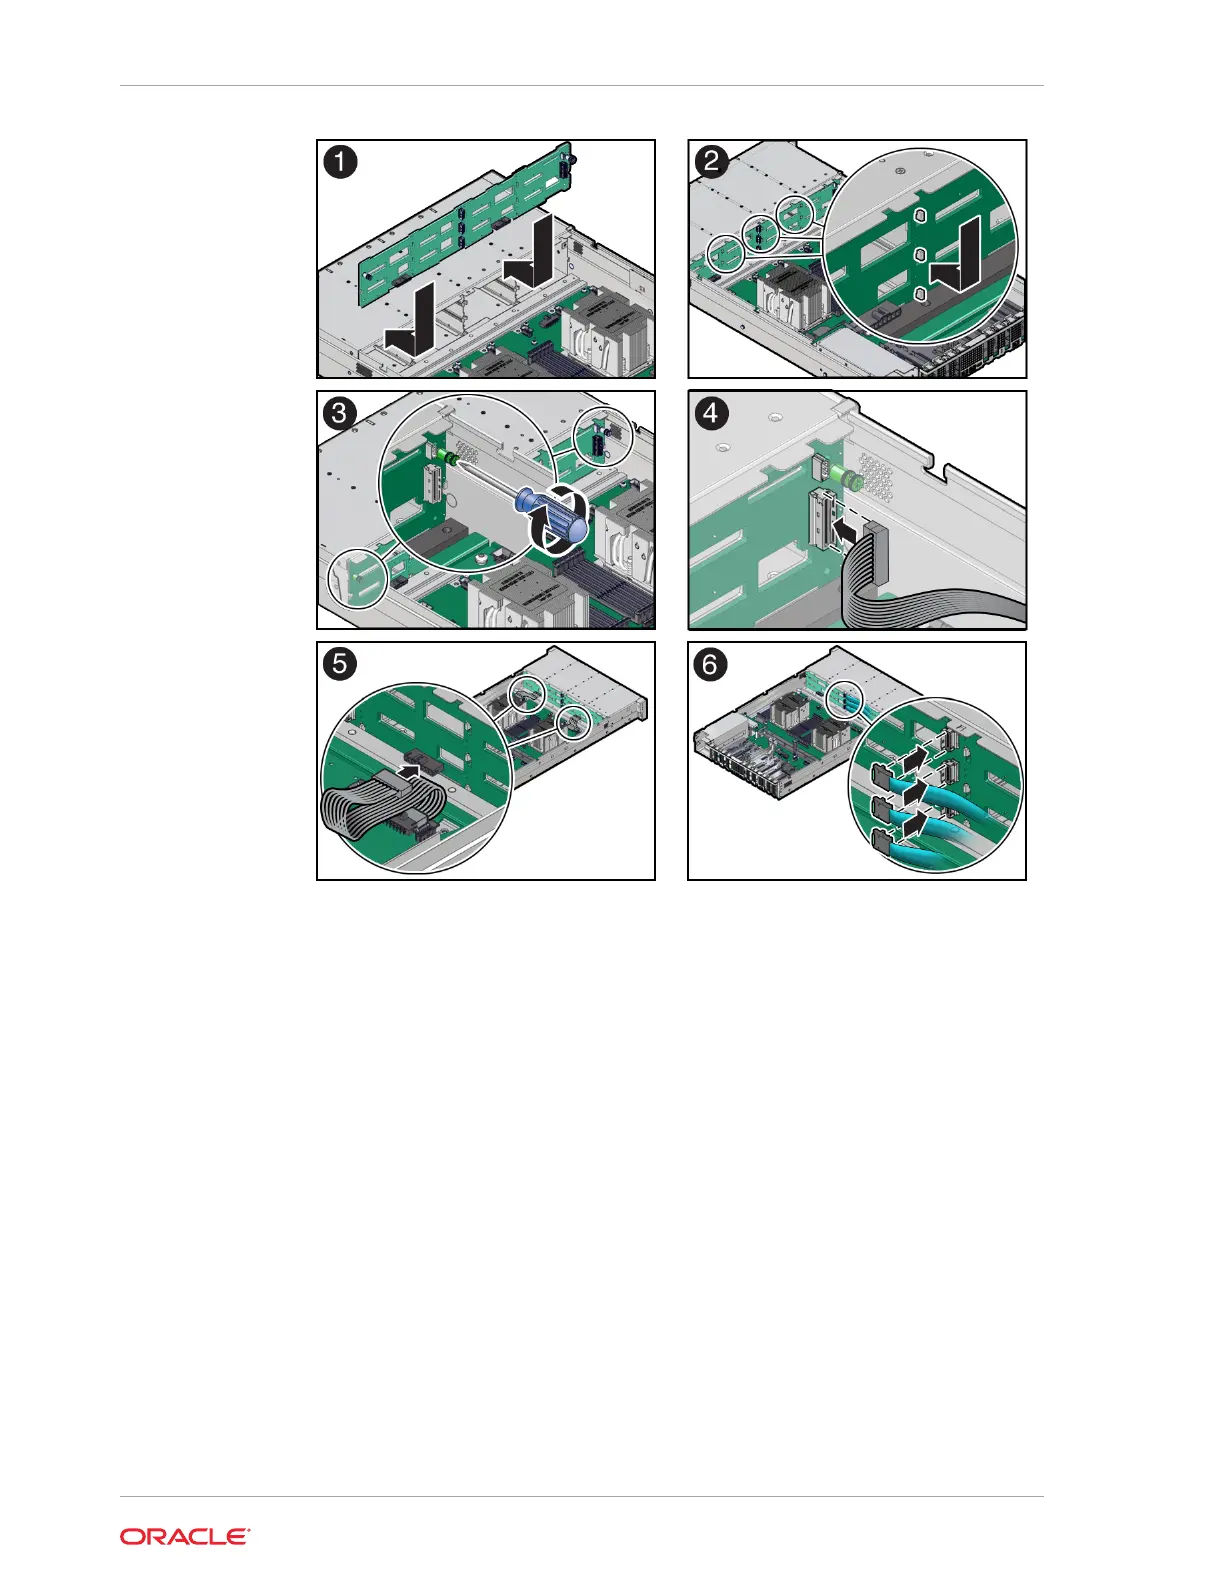
2. Using a Torx T15 screwdriver, tighten the right-side and left-side spring-mounted
screws to secure the 12-Drive backplane to the chassis [3].
3. Reconnect the cables to the disk backplane.
a. Reconnect the DBP auxiliary signal cable to the 12-Drive backplane [4].
See also Install the Disk Backplane Signal Cable.
b. Reconnect the two power cables to the disk backplane [5].
c. Reconnect the three SAS cables to the 12-Drive backplane [6].
To ensure proper SAS cable connections, see the SAS cabling reference table
in Step 3 in Install SAS Storage Drive Cables.
4. Return the server to operation.
a. Install the fan tray.
See Install the Fan Tray.
b. Install the fan modules.
See Install a Fan Module.
c. Install the air baffle.
See Install the Air Baffle.
Chapter 14
Install the 12-Drive Backplane
14-8