4: Repair Closing the Case
152
6 Inspect the tubing gasket on the perimeter of the Front Case.
7 If the gasket is cracked, frayed, damaged, or there is a gap between the gasket ends, then replace the
gasket. See “Tubing Gasket Replacement” on page 96.
8 Position the device display side down, Rear Chassis Shelf facing you.
9 Put your right hand fingers through the AC mains and LAN openings of the Rear Case and lower
the Rear Case on the device to a level about 2" (5 cm) above the Front Case.
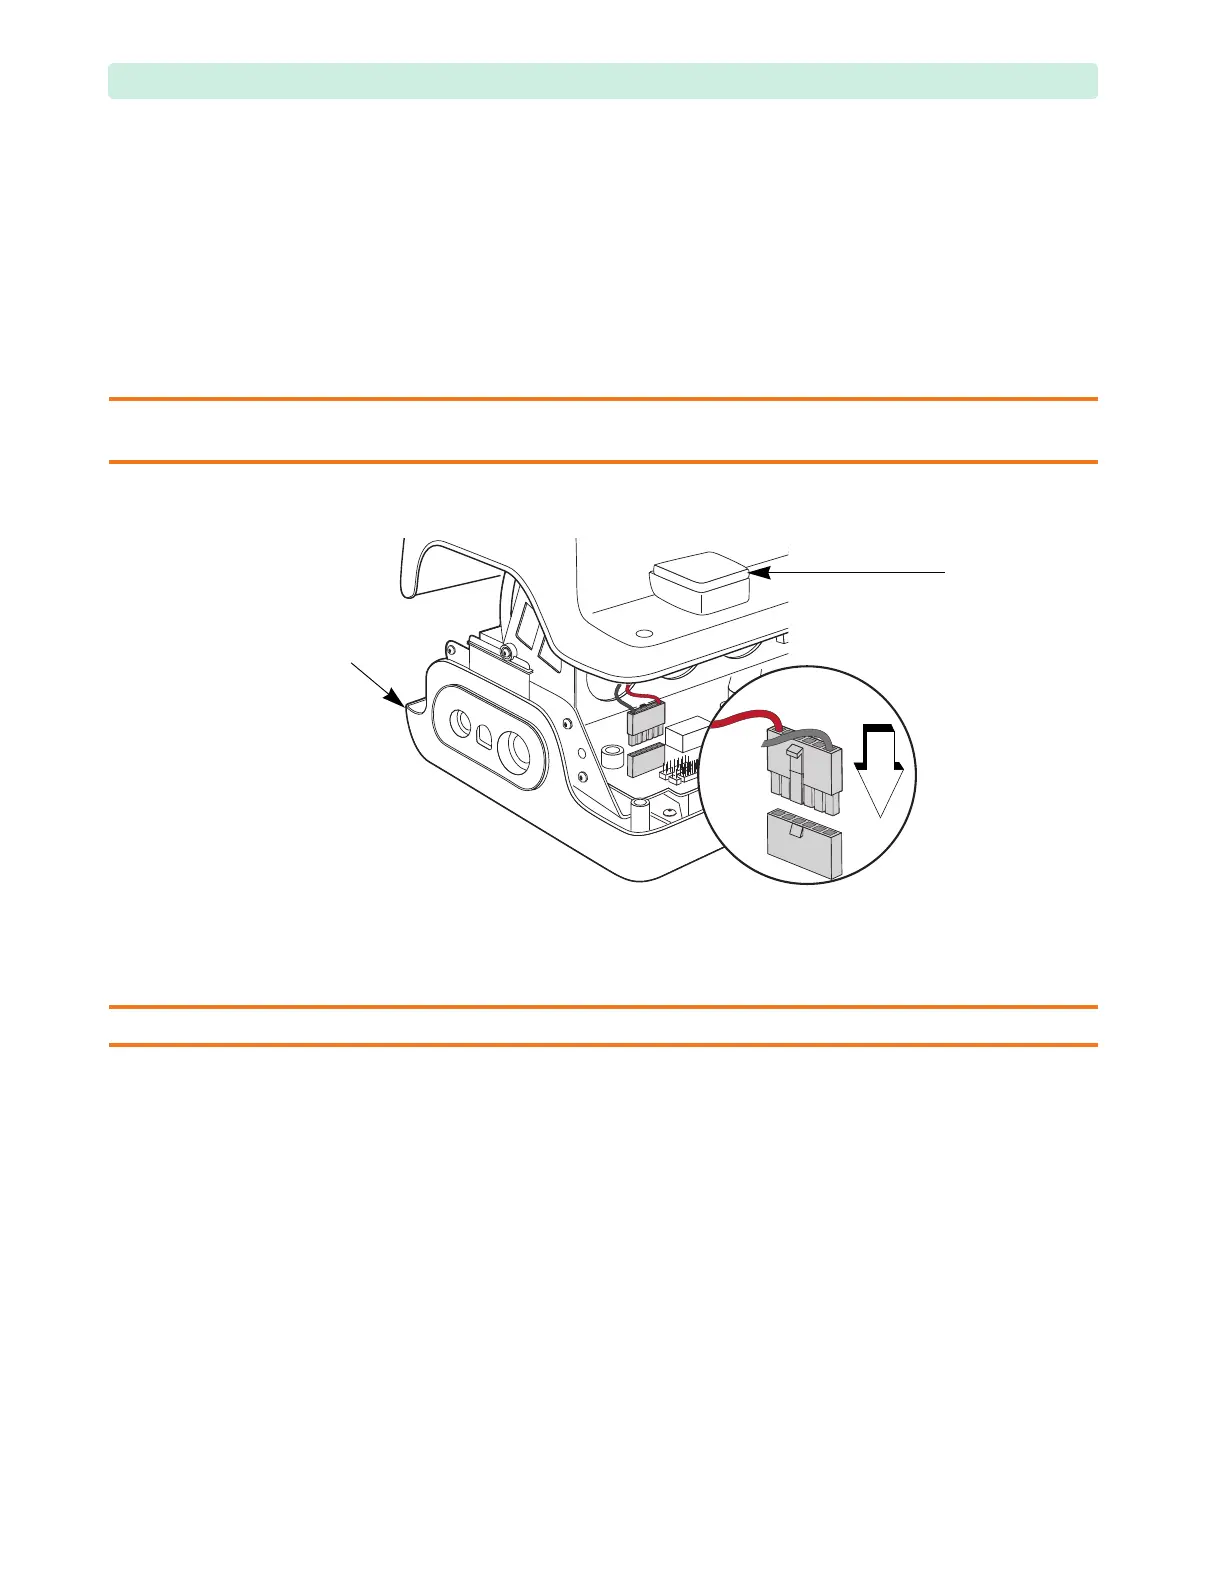
10 Reconnect the paddle connector with your left hand, see Figure 103.
Make sure the latch behind the connector clicks to lock.
CAUTION: Be careful not to bend or damage the pins in front of the paddle connector. You may remove the factory
access plug to observe positioning of the paddle connector. Replace the factory access plug if removed.
11 Align the cases and carefully lower the Rear Case on the Front Case.
Make sure no wires are pinched between the Battery PCA and the Rear Case. Confirm that the
entire perimeter of the Front and Rear Cases have mated properly.
CAUTION: Be careful not to pinch any cables between the Rear Case and Battery PCA.
12 Install the case screws, see Figure 104.
a Install the four M3x12 (T10) screws in the back of the case (
➊
). Tighten to 6 inch-lb
(0.7 N m).
b Install the six M4 (T15) screws in the perimeter of the case in a criss-cross pattern (
➋
). Tighten
to 10 inch-lb. (1.1 N m).
Figure 103 Connecting the Rear Case Cover
tubing
gasket
factory
access
plug