Chapter 3 Calibration
Revision W HF Series X-ray Generators - Service Manual
3-56 Quantum Medical Imaging, LLC
1. Place a film cassette in the tray and collimate down to film size.
2. If not already done so, access the AEC Calibration Menu (see Figure
3-37).
3. Press the key next to the Film/Screen Combination field (upper
left field) to select a film/screen combination to calibrate. Verify the
receptor in which the film cassette is inserted is selected as indicated
on the AEC Calibration Menu screen.
4. The FILM SPEED field shows the current film speed setting for the
selected film/screen combination. To select a different film speed,
press the up or down keys next to the FILM SPEED field until the
desired film speed setting is displayed.
5. When film/screen combination name and film speed settings are cor-
rect, press the key next to the AEC OD Calibration field to proceed
with AEC Calibration. The AEC Optical Density Calibration Screen,
shown below, is displayed:
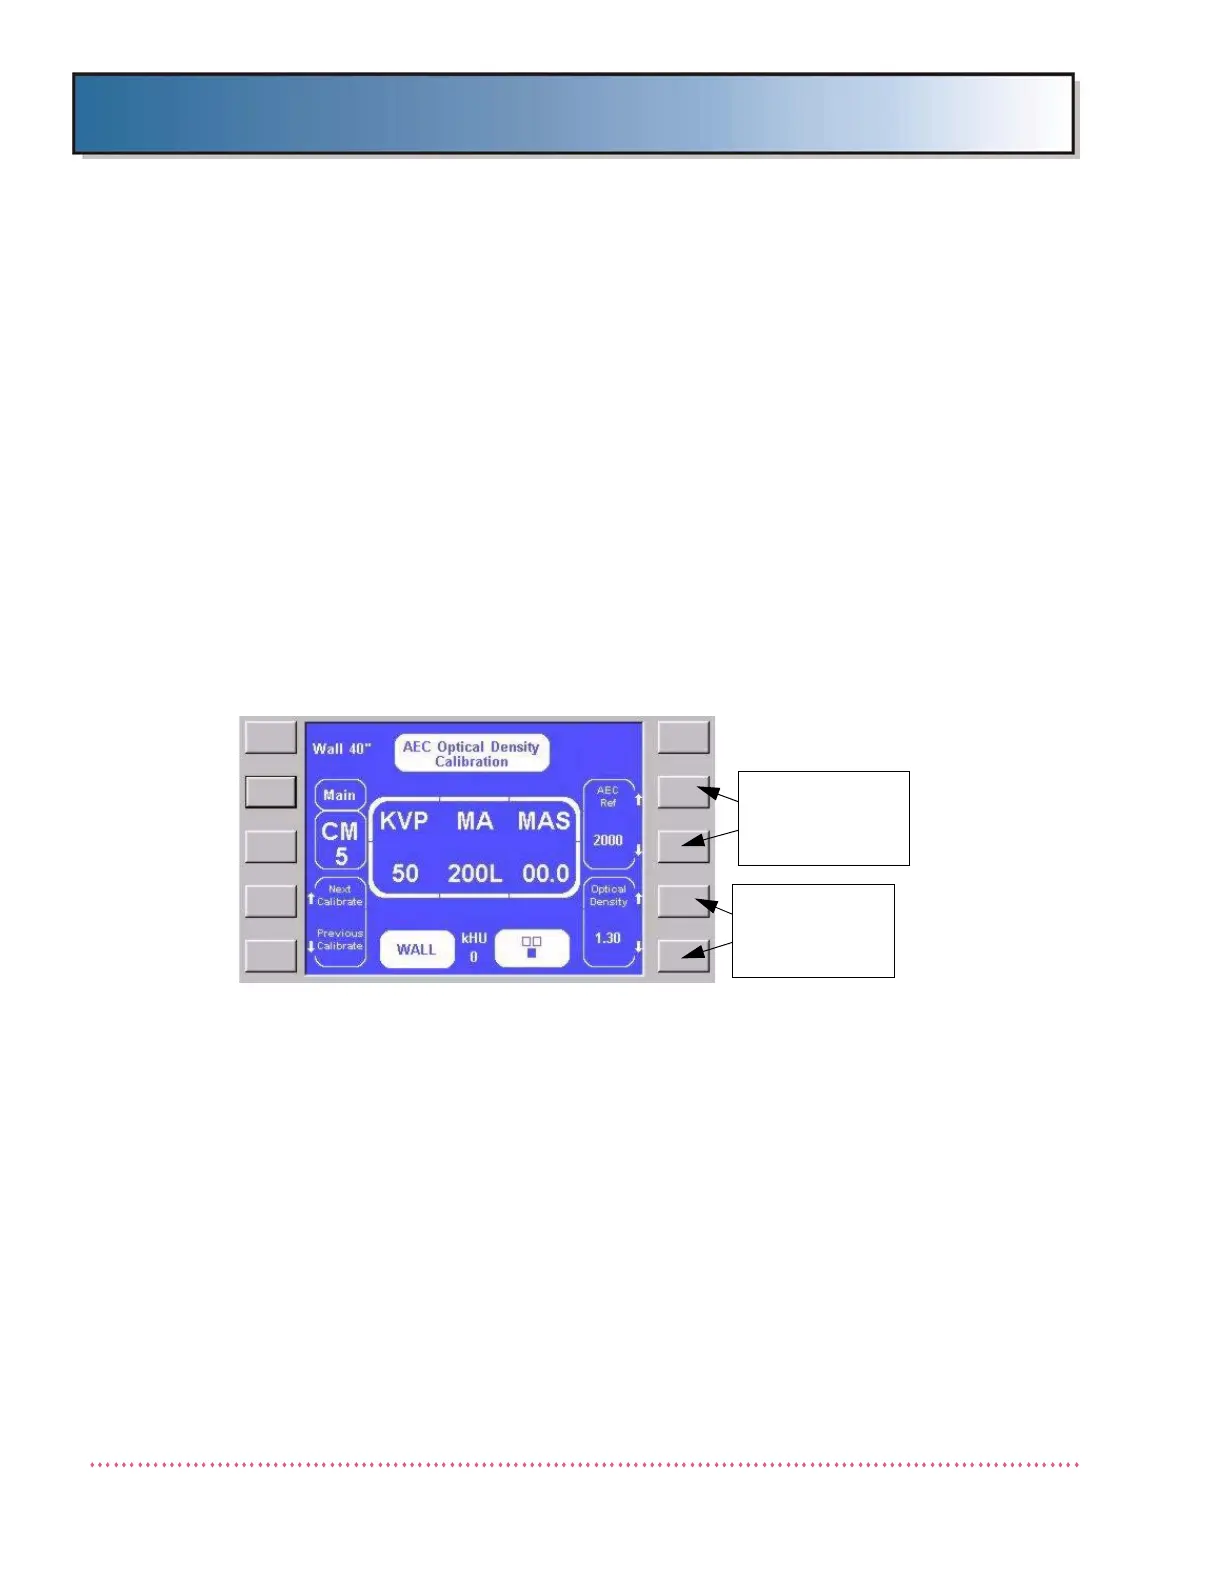
Figure 3-39. AEC Optical Density Calibration Screen
6. This screen is used to calibrate the selected film/screen combination
to a user defined optical density setting (e.g., 1.30). Set the receptor
and ion chamber detector selections to those that will be used with
this film/screen combination and ensure x-ray tube is at correct SID.
Ensure the ion chamber has been balanced.
7. Press the up or down key located next to the Optical Density field
until the desired "base" optical density setting is displayed. (Note:
The "base optical density" setting establishes the optical density of
the films produced when the operator selects this film/screen combi-
nation in either APR AEC or AEC mode.)
BASE
OPTICAL
DENSITY
SELECT KEYS
AEC REF
ADJUSTMENT
KEYS
 Loading...