Appendix D Calibration (Using Generator Service Tools)
Revision W HF Series X-ray Generators - Service Manual
D-60 Quantum Medical Imaging, LLC
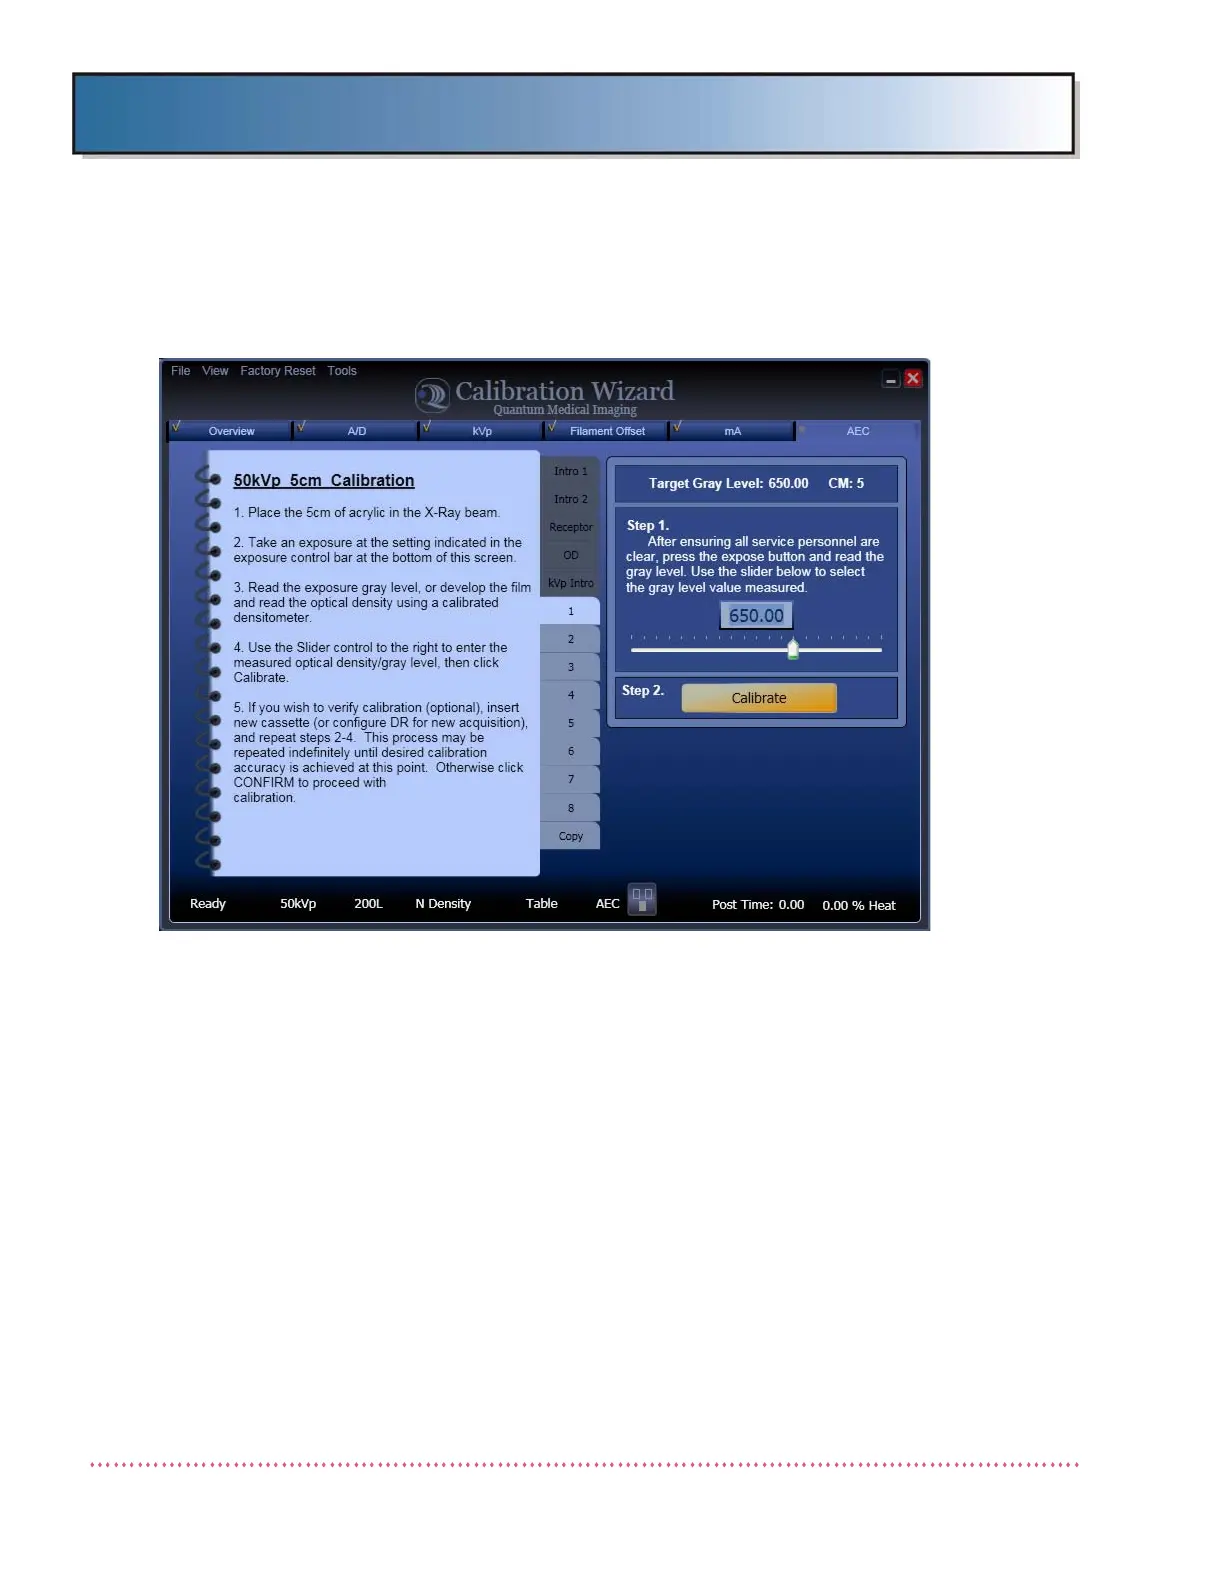
2. Press the Next button to proceed. The Calibration Wizard - 50 kVp 5cm
Calibration screen displays:
Figure D-33. Calibration Wizard - 50 kVp 5cm Calibration
3. Place indicated thickness of acrylic (5 CM for first calibration point) in the
X-ray beam.
4. Take an exposure at the setting indicated in the Calibration Wizard - 50
kVp 5cm Calibration screen (i.e., 50 kVp, 200L mA, normal density).
5. On film systems, develop the film and then measure its optical density.
On CR or DR systems, observe the density level displayed on the inte-
grated system’s workstation computer.
6. Enter the observed density value in the 50 kVp 5cm Calibration screen
(Step 1.) by adjusting the slide control, or by selecting the data entry box
and typing the value using a keyboard. The value entered should be to
the hundreths decimal place. Press the Calibrate button.
a. If the density value is within acceptable range of the Target Level (on
CR or DR systems, refer to manufacturer’s specifications), press the
Confirm button to proceed to the next AEC kVp calibration point.
b. If not within range, press the Repeat button to re-take the exposure
 Loading...