BRP-Rotax
REPAIR MANUAL
NNOOTTEE
Transfer the new con rod from the old con rod pin to the pressed–in (new) con rod
pin in the crankshaft repair jig. (note the installation position).
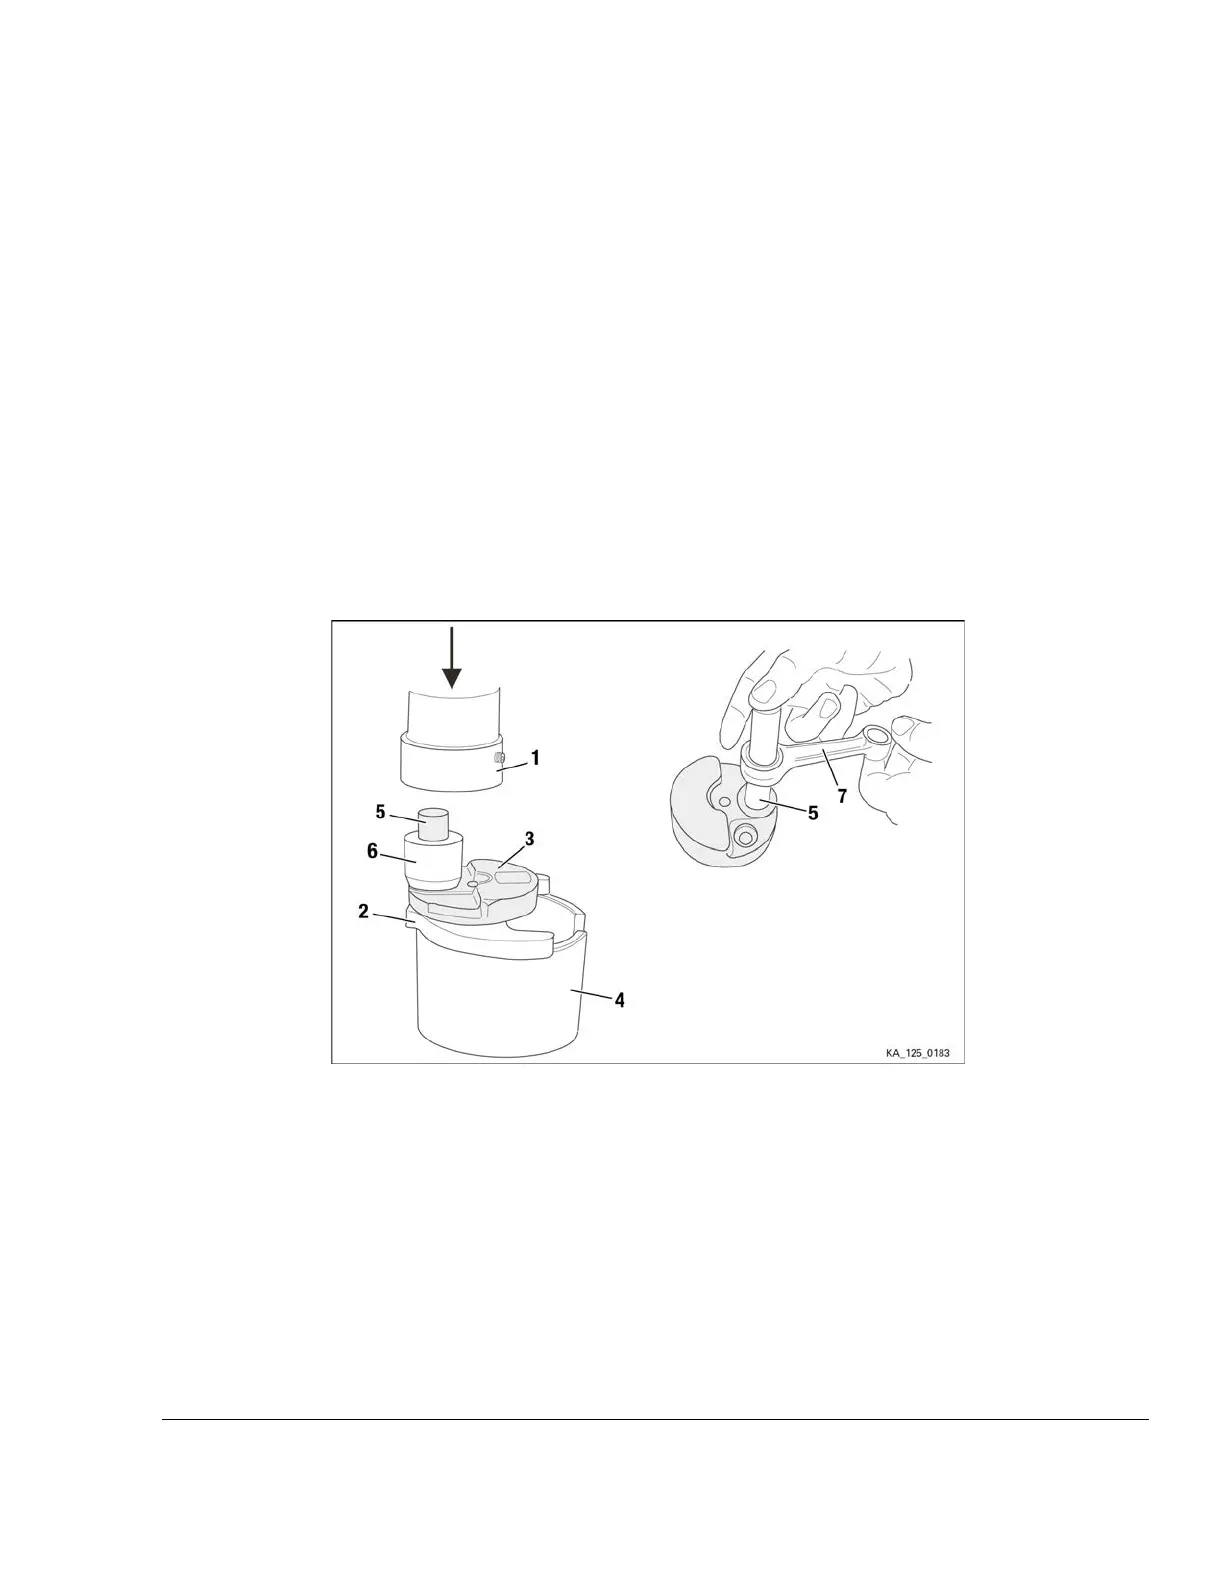
4. Position the drive end crankshaft half (3) on the thrust plate (2) and press the new con rod
pin (5) into the crankshaft until the con rod pin stops moving, then remove the sleeve (6).
5.
NNOOTTEE
Before positioning the con rod on the pressed-in con rod pin check for:
- no corrosion damage
- no dirt or dust particles
- check that all bearing needles are present
Slide the new crankshaft assy. (7) with cage from the con rod pin (mounting device) onto the
pressed-in con rod pin (5).
Figure 5.18: Crankshaft assembly
1 Press 2
Thrust plate
3 Drive end crankshaft half 4
Bottom section of the repair jig
5
Con rod pin
6 Sleeve
7 Crankshaft
______________________________________________________
Instructions See Figure: Crankshaft assembly.
6. Slide the gearbox-end crankshaft half (1) into the bottom section of the tool (2).
Effectivity: 125 MAX evo, Junior MAX
evo, Mini MAX evo, Micro MAX evo
Edition - February 01 2018 /Rev. 0
Chapter 5
Page 23

 Loading...


