85
4.
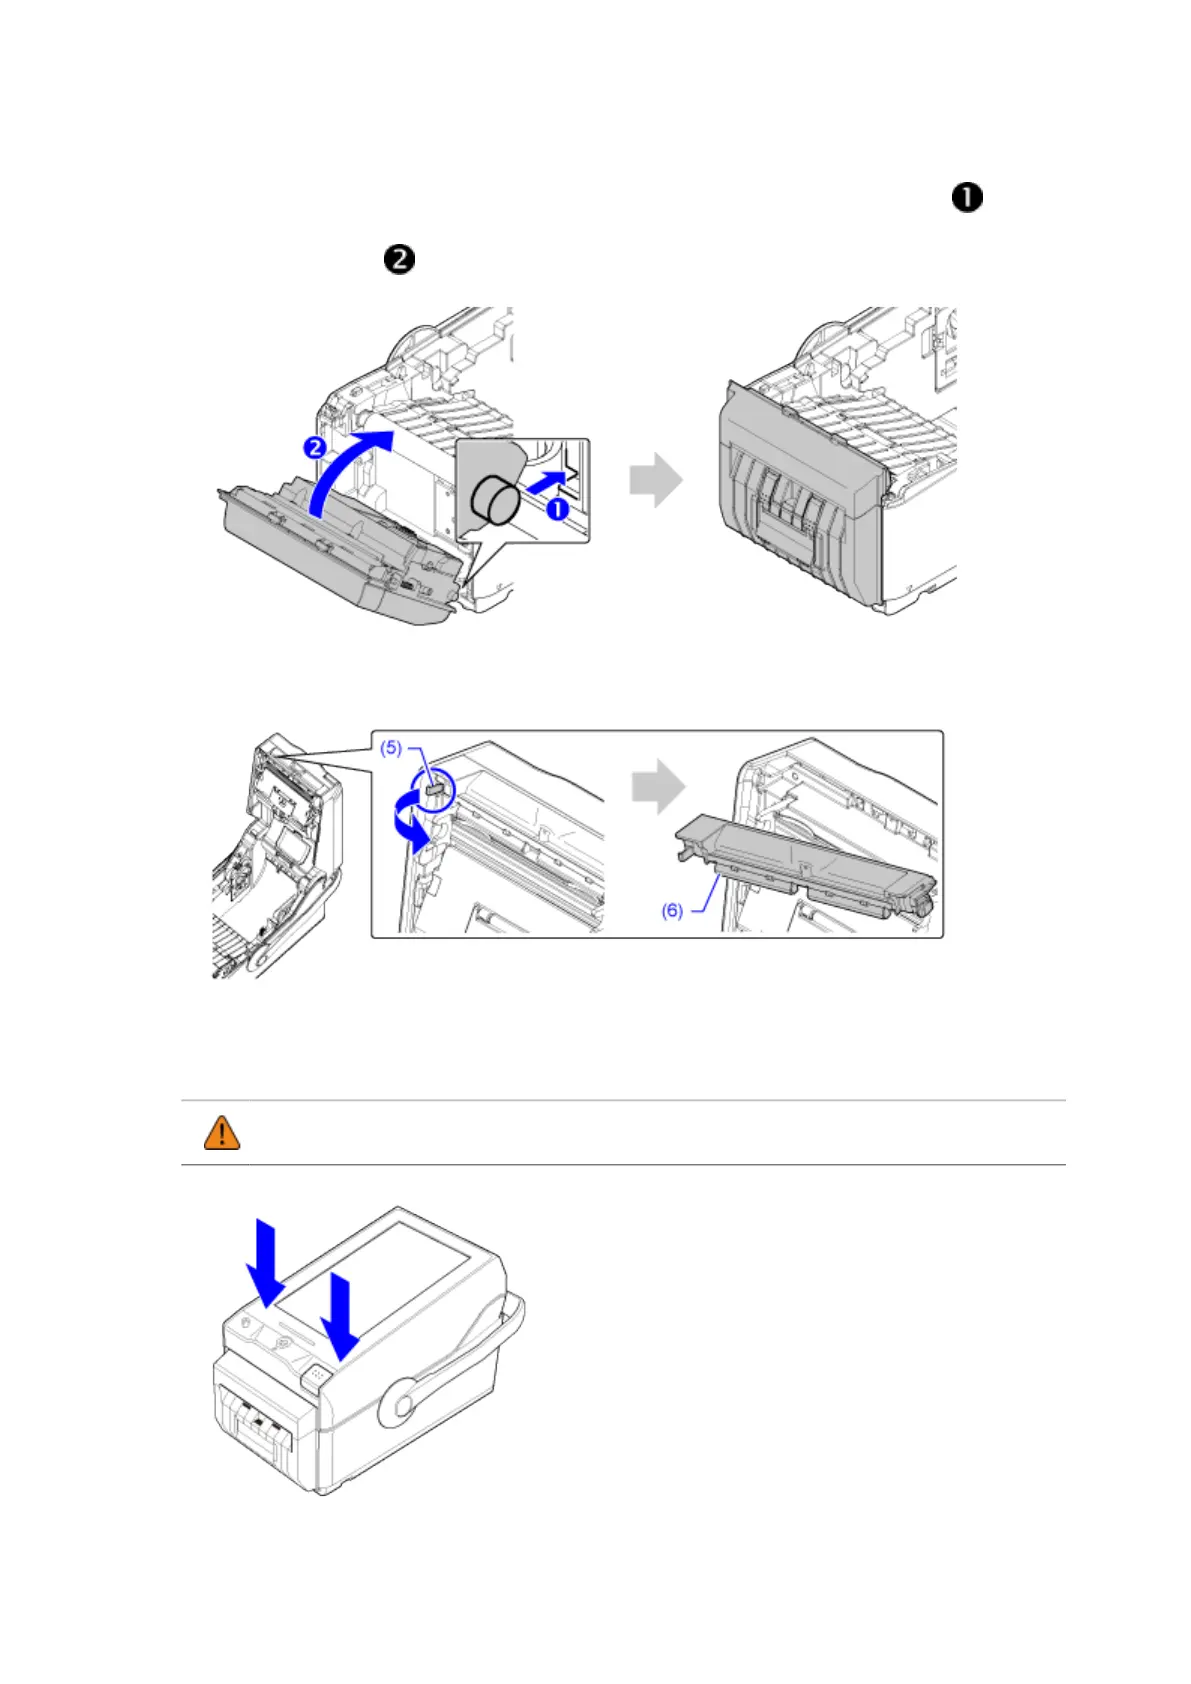
Insert the pins of the cutter kit so that they are aligned with the guides ( ), and
attach the top of the cutter kit so that it fits onto the printer and the buttons on
both sides click ( ).
5. Tilt the knob (5) on the left side toward the right to remove the front cover (6).
6. Close the top cover.
Push both ends of the top cover, and close it firmly until it clicks.
• When closing the top cover, be careful not to pinch your fingers.
 Loading...


