CD600 Plus - User’s Manual
1.2
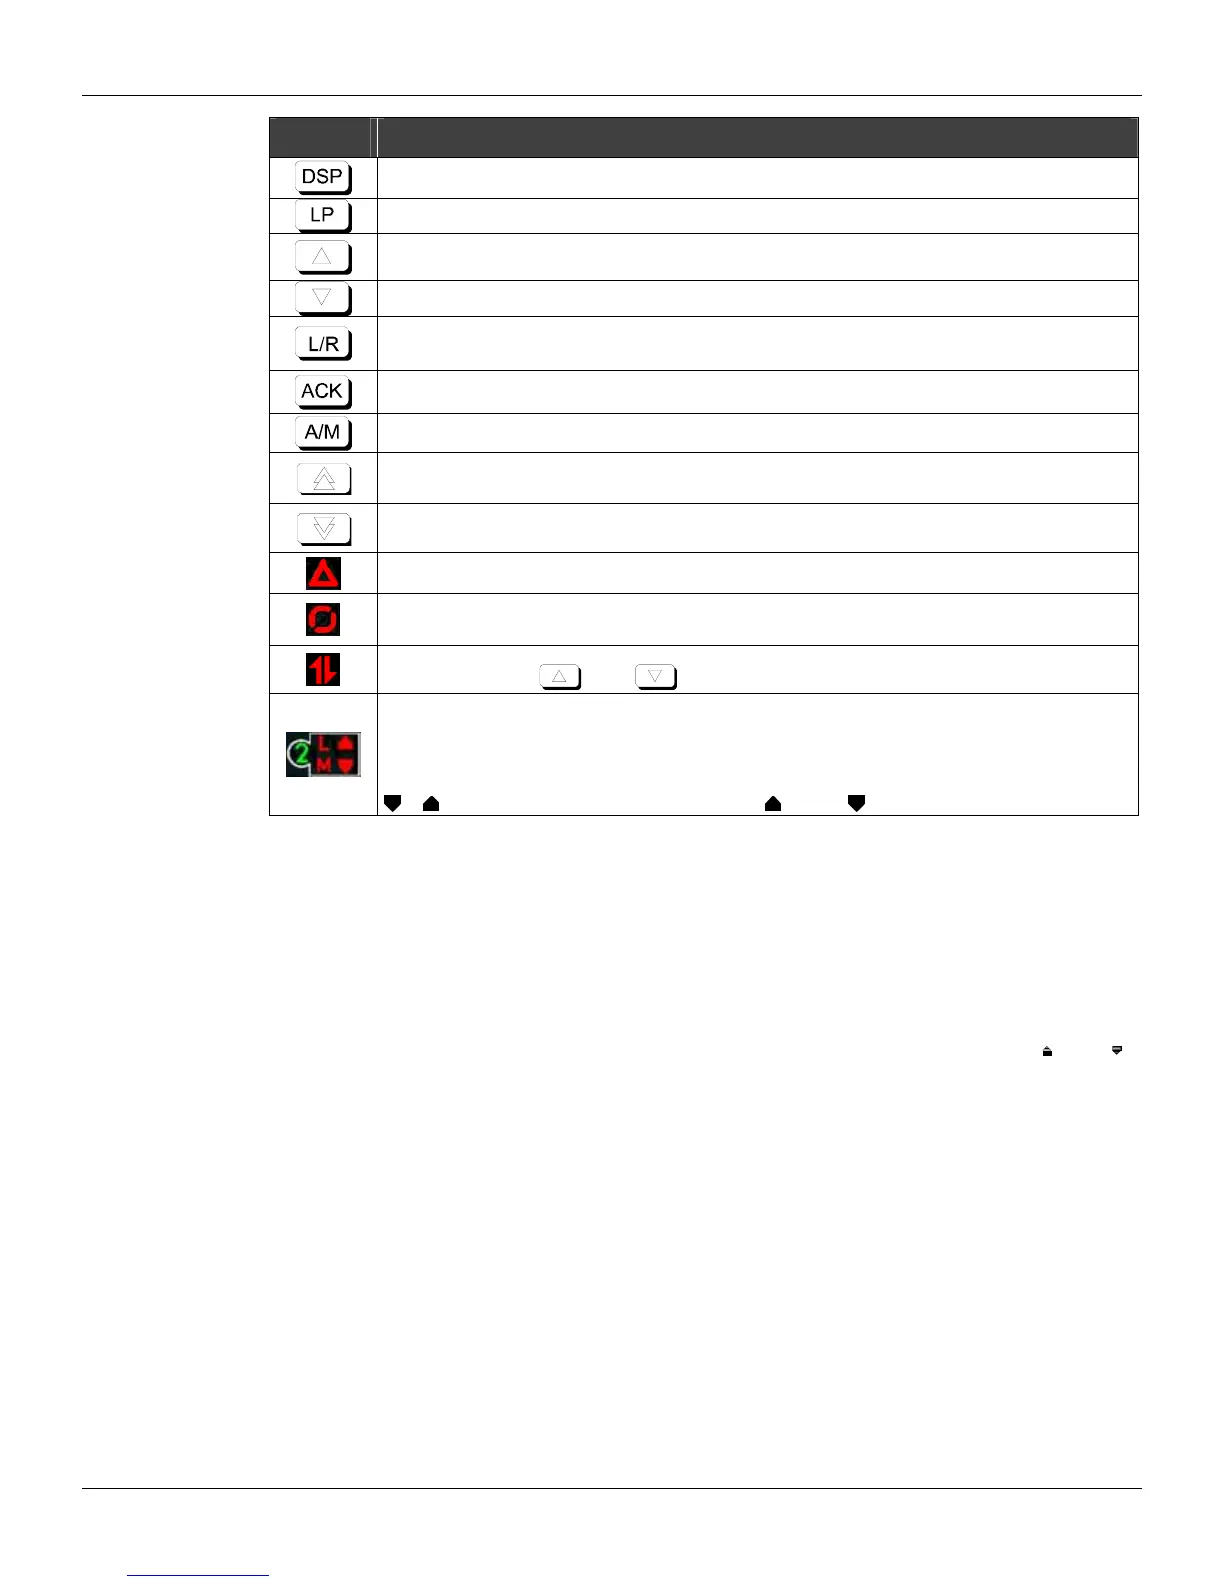
Keys Description
Selects the variable to be shown in the alphanumeric display.
Selects the loop to be monitored on the front panel.
Increases the value of the variable shown on the display.
Decreases the value of the variable shown on the display.
Selects the Local Setpoint or the Remote Setpoint of the monitored loop.
Alarm Acknowledgement
Selects the Automatic or Manual mode of the monitored loop.
Increases the MV value, when the control is in Manual. When touched shows the output value on the display.
Decreases the MV value, when the control is in Manual. When touched shows the output value on the
display.
Fail: When lit, indicates that the controller is in fault condition.
Cycle: Blinks every 10 cycles, during cycle time adjustment (refer to section 8 communication).
Adjust: When lit, indicates that the variable, which is being shown on the display, can have its value
changed by the keys <
> and < >.
1, 2, 3 or 4 – When lit, indicates that the variables, shown on the front panel refer, to the respective loop.
L – - When lit, indicates that the respective loop is working with Local Setpoint. Unlit L means Remote
Setpoint.
M – When lit, indicates that the respective loop is working in the Manual mode. Unlit M means Automatic
Operation.
or - When lit, indicates an alarm situation – High ( ) or Low ( ).
Loop Selection
A short touch on the <LP> key lets the display shows the Tag (see below) of the loop being monitored. A
longer touch transfers the monitoring to the next Loop. Initially, the new Loop's Tag is shown and, after a
few seconds, the monitored information.
Alarm Acknowledgment
Regardless of the selected Loop and of the variable shown on the display, if any alarm, which has been
programmed to be indicated on the front panel occurs, the display goes on to show the information of
the variable and the "*ALARM" information alternately. Furthermore, one of the LED's <
> or < >
from the respective loop, blinks.
As soon as the operator presses the <ACK> key for the first time, the Tag that identifies the
configuration, appears on the display, followed by the mnemonic message of the alarm. The message
will blink until the operator presses the <ACK> key again, acknowledging the alarm. After the
acknowledgement, the message stops blinking and remains displayed if the alarm condition persists.
Otherwise, the next alarm will be displayed on the stack, or the "NO ALARM" message, if no alarm
exists.
The alarm acknowledgement can also be made automatically. It means that when an alarm condition
disappears, the message also disappears, without the acknowledgment by the <ACK> key.
While the alarm is present, the alarm message remains stored in memory stack with capacity for up to
36 alarm messages.
With the keys <Δ> and <∇>, the operator can scroll the stack, checking if there is any other alarms.
Among the alarm messages, which can be visualized on the display, the user can write 8, and the
remainders are fixed messages. The blocks that can provide these alarms, and its characteristics, are
listed in table 1.1.