CD600 Plus - User’s Manual
6.2
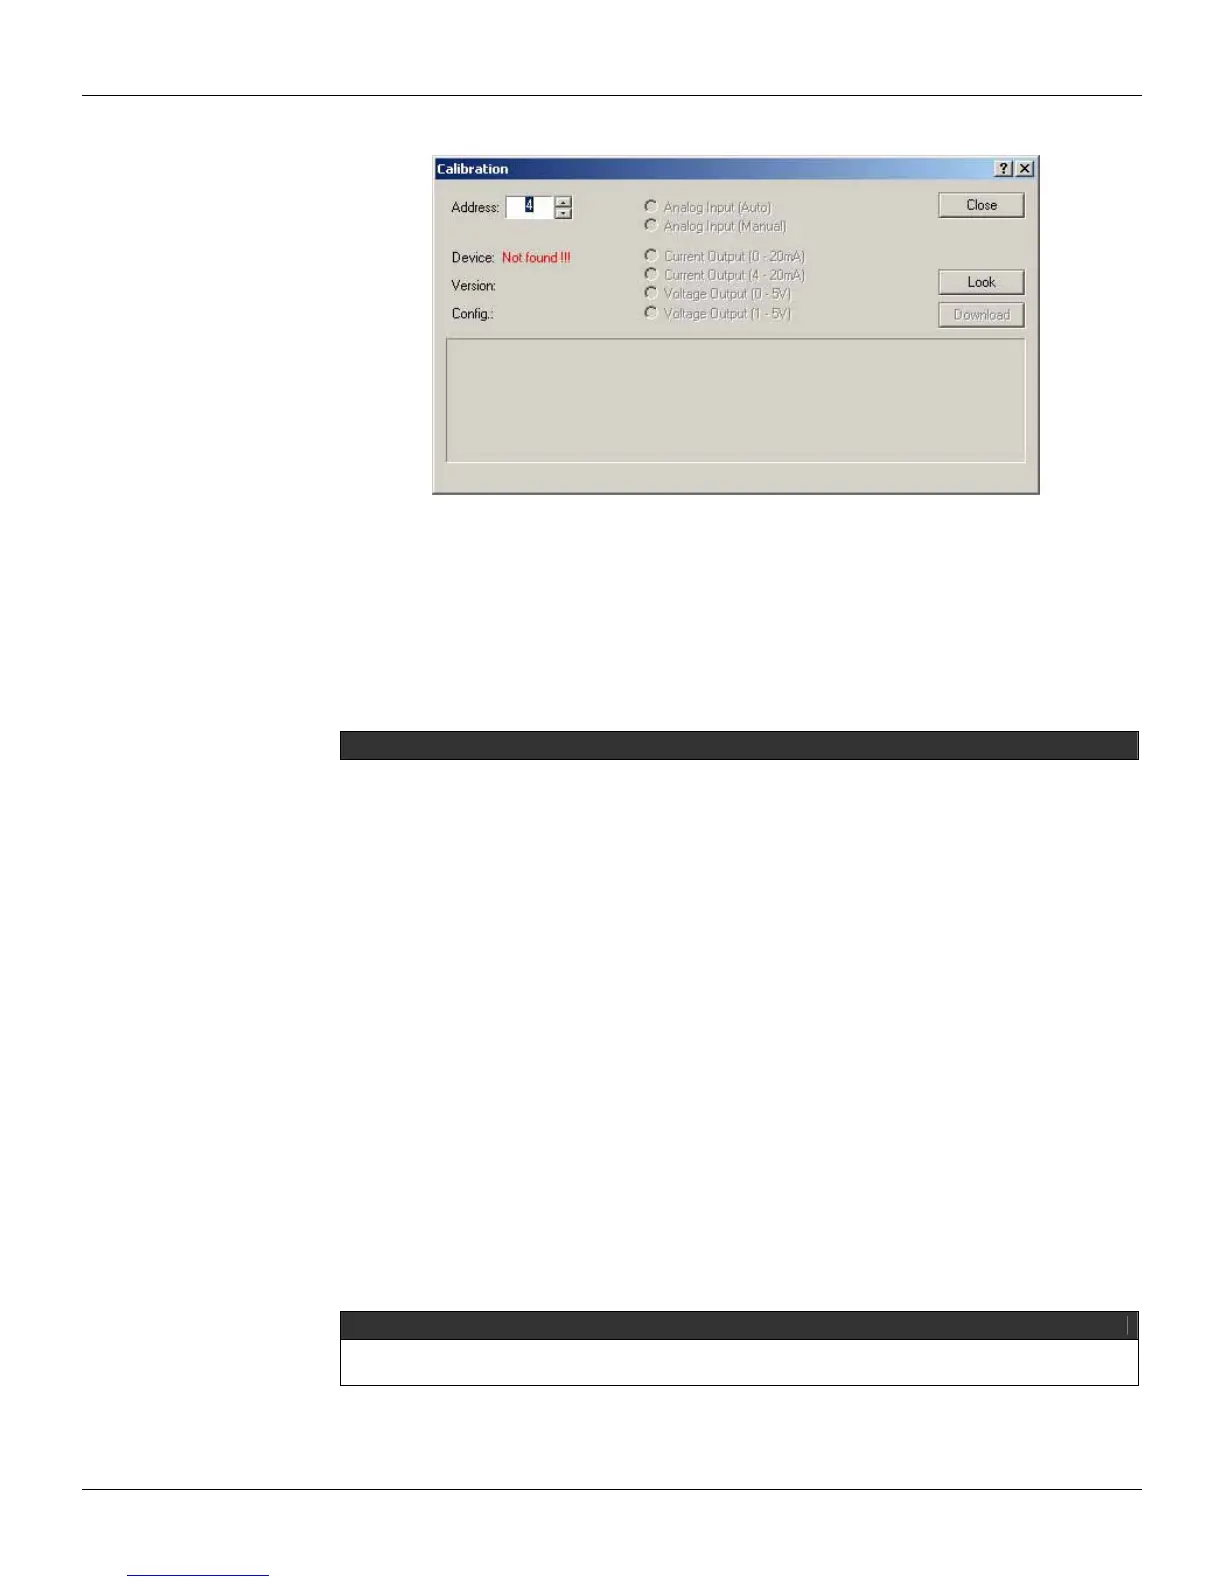
The selected equipment will be shown:
Figure 6.2 Selected Device
The controller has two options: Automatic and Manual. The Automatic mode is much faster, while
the Manual mode allows the user to read the parameters during calibration.
Analog Input Calibration–Automatic Mode
a) Select the Analog Input (Auto) option in the Calibration dialog box.
b) Select the input to be calibrated, from AI1 to AI8. The background color will be changed to red.
The user can select all inputs to be calibrated at once.
c) Apply 0V or 0mA with the voltage/current generator and select the cell with the “0V” heading on
the table.
d) Apply 1V or 4mA with the voltage/current generator and select the cell with the “1V” heading on
the table.
e) Apply 3V or 12mA with the voltage/current generator and select the cell with the “3V” heading on
the table.
f) Apply 5V or 20mA with the voltage/current generator and select the cell with the “5V” heading on
the table.
Repeat these steps from c to f for the inputs to be calibrated, if the user has not selected all inputs
to be calibrated at once.
Calibration of Analog Inputs - Manual Mode
This option enables the user to eventually read and write the calibration parameters. This mode is
not as fast and direct as the Automatic mode, but it is safer.
a) Select the Analog Input (Manual) option in the Calibration dialog box.
b) A dialog box will open asking if the user wants the default configuration to be opened. Click Ok
to open this configuration or Cancel to start a new calibration.
c) Double click on the field to be edited and the field is enabled for edition. On the 0V cell, type the
new value 0 and press Enter on the keyboard.
d) Repeat step 3 for the cells 1V, 3V, and 5V.
NOTE
Once the parameter values are changed, the Download button will be enabled. This means that the default
values were not downloaded for the CD600 Plus.
e) After these values are edited, click on the download button on the Calibration dialog box, in order
to download the new values for the equipment. The following message will appear to indicate
that the calibration to the device was successful: