GETTING STARTED 1 - 9
1. See Removing and Replacing the Back Cover on page 1-5 to connect all interface and power cables to the
scanner. Ensure the back cover is replaced and the cables are routed appropriately.
2. Determine the location for installing the scanner.
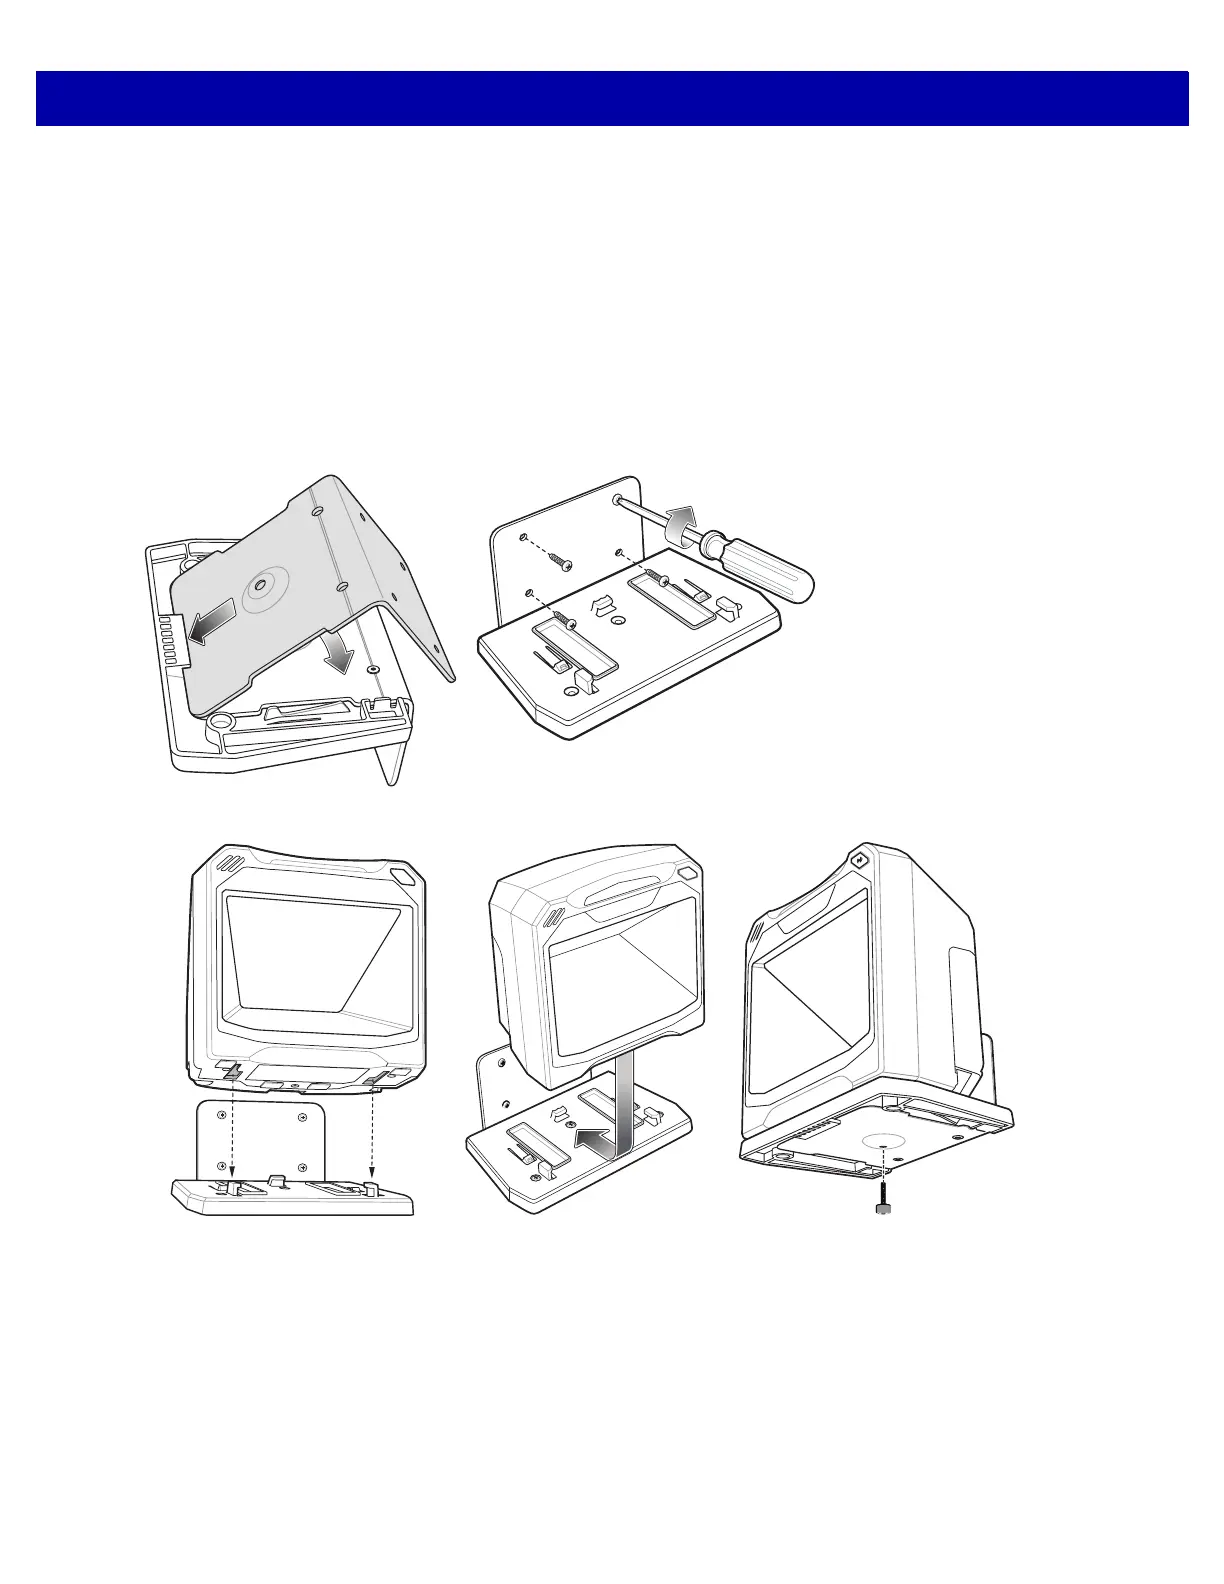
3. Figure 1-10 - 1: Mount the table bracket with three screws (not included).
4. Figure 1-10 - 2: Invert the scanner slightly and align the mounting slots over the plastic tabs on the bracket.
5. Figure 1-10 - 3: Insert the plastic tabs into the mounting slots on the scanner, and slide the scanner back
until it clicks into place.
Mounting the Scanner to a Wall
Figure 1-11
Wall Mounting Diagram - Mounting the Bracket
Figure 1-12
Wall Mounting Diagram - Mounting the Scanner on Bracket
1. Follow the steps in Removing and Replacing the Back Cover on page 1-5 to connect all interface and
power cables to the scanner. Ensure the back cover is replaced and the cables are routed appropriately.
2. Determine the location for installing the scanner.
3. Use the Wall Mount Template on page 1-12 as a guide to mark the four mounting holes.
4. Figure 1-11 - 1: Insert the back metal bracket under the plastic hook in the base plate and set in place so
that the thumb screw holes align.