Installing the AIEB1 I/O Expansion Board
317
Appendix
Appendix
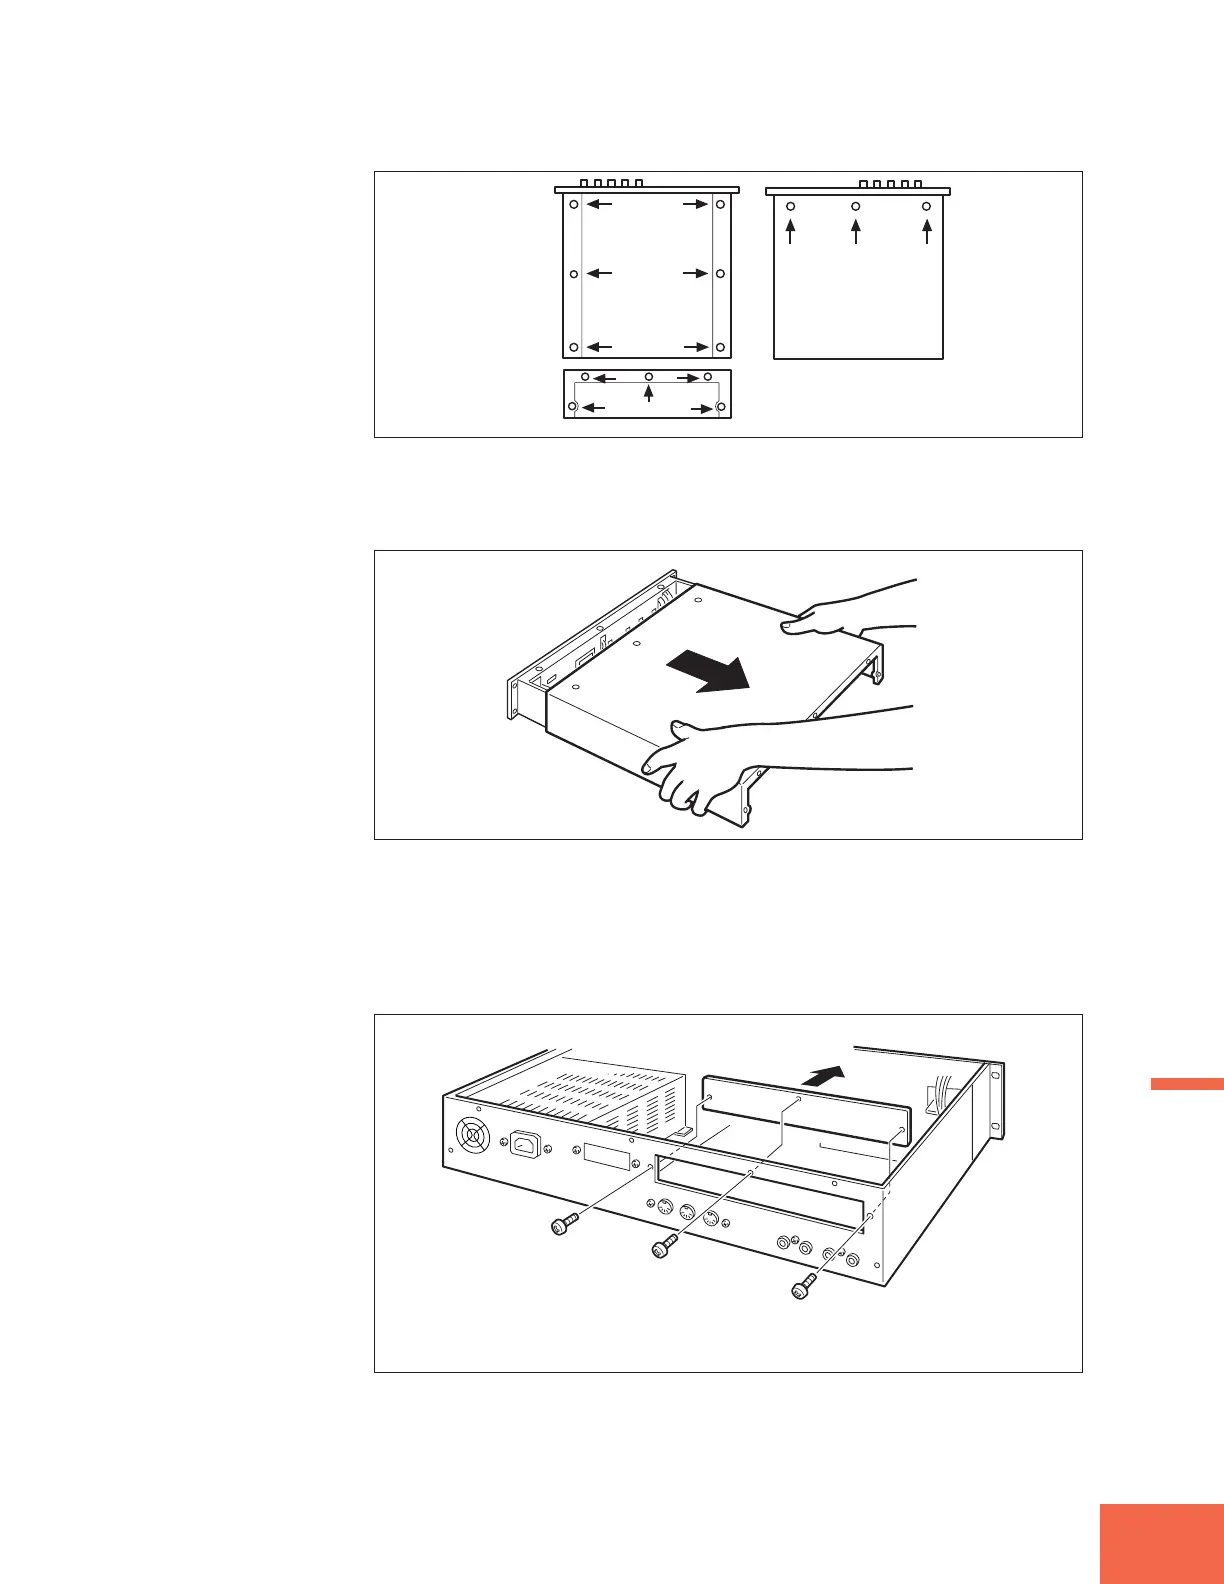
4.
Hold the two sides of the cover and slide the cover straight back (over the rear
panel) and off.
5.
Now go to the rear panel and remove the 3 screws holding the expansion-
board coverplate in place. Take the coverplate out.
Keep the 3 silver-colored screws at hand, since you will need them to fasten the expan-
sion board. (Note that these screws are not the same type as those removed at Step 3.)
You will not need the coverplate again unless you decide to remove the expansion board.
NOTE: Although the above illustration does not show the SCSI board mounted in the A3000, please note
that t
here is no need
to remove the SCSI board when installing SIMMs.
Bottom Top
Rear panel

 Loading...