Setting the SCSI Board Terminator Switch
321
Appendix
Appendix
Procedure
1.
Be sure that you have the following at hand before starting the installation.
• A3000 main unit
• Phillips screwdriver
Magnetic-tipped screwdriver is recommended.
• Workbench
Please carry out all work on a stable workbench or table. Spreading a cloth over the
work surface will help prevent scratching.
• Gloves: Be sure to wear gloves so that your hands are not scratched by the metal
cover or other metal parts.
2.
Switch off the A3000 power, and unplug the power cord from the wall outlet.
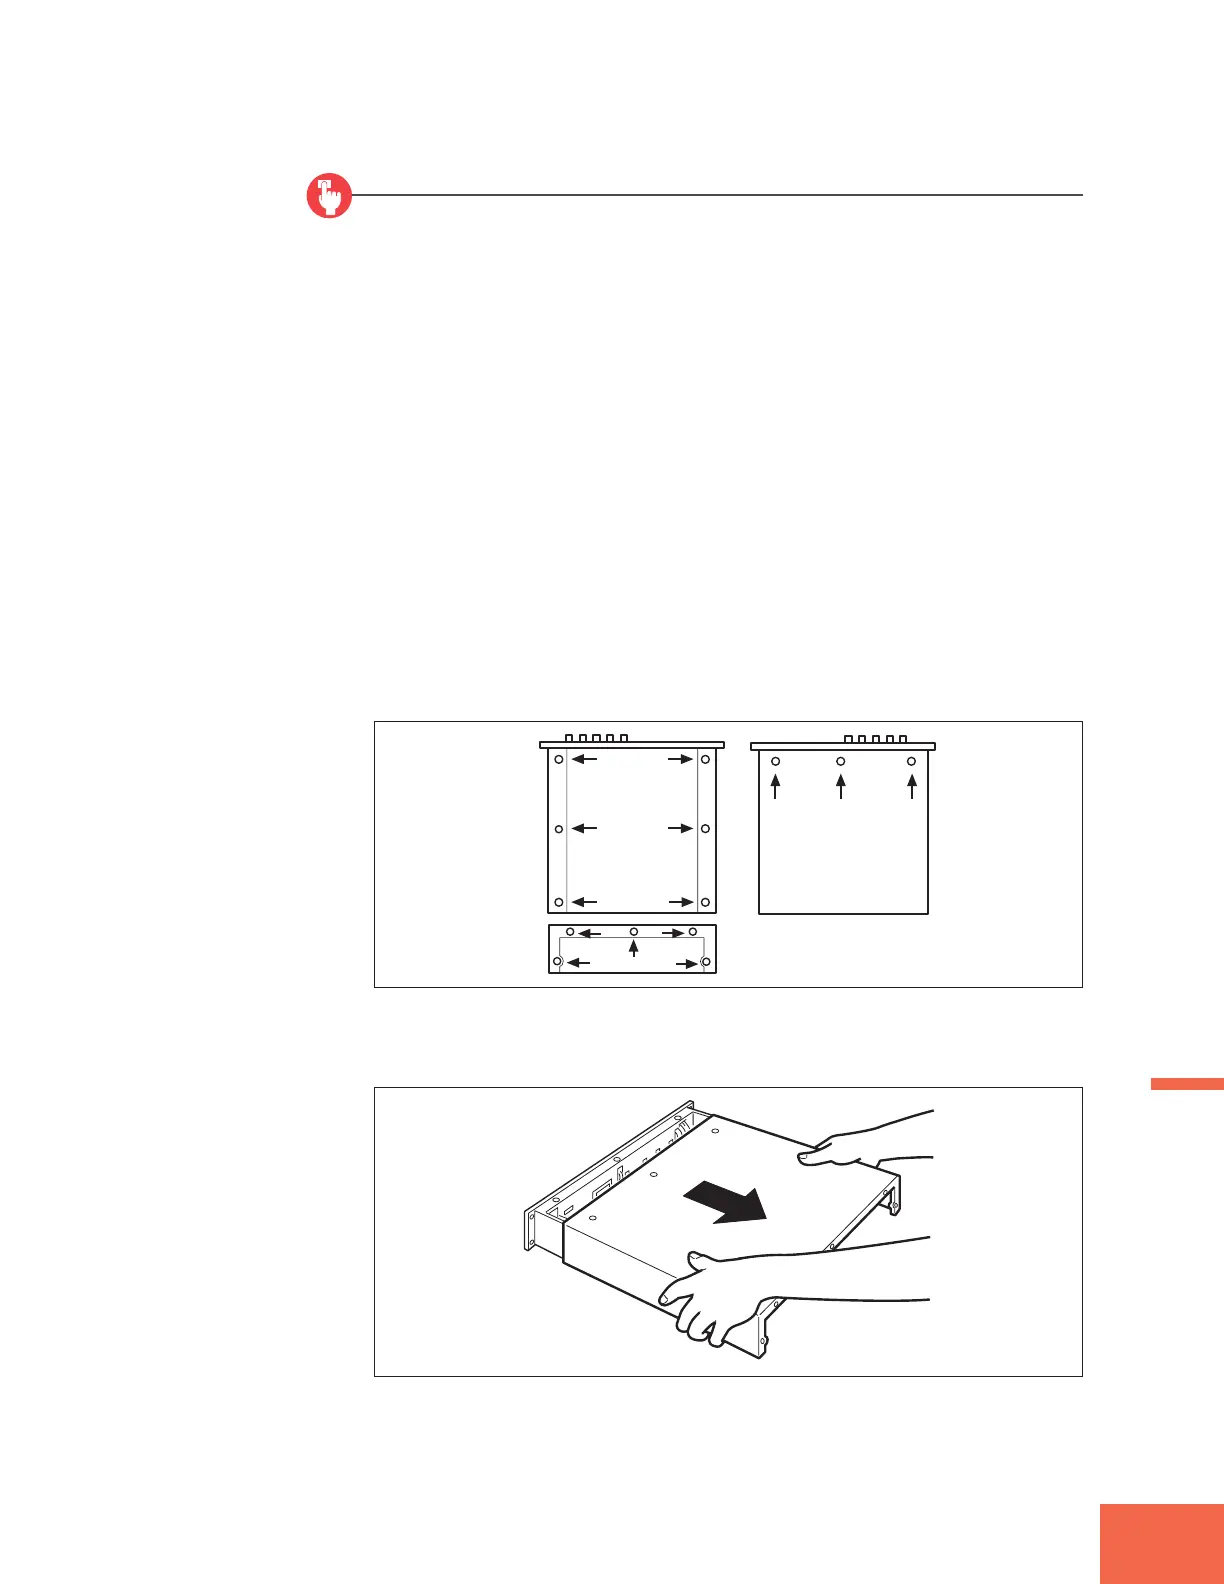
3.
Remove the screws holding the A3000 top cover in place.
Set the A3000 upside down on the workbench and unscrew the 6 screws along the sides
of the bottom (see drawing). Then turn the A3000 right side up again and unscrew the 3
screws along the top. Then unscrew the 5 screws holding the cover to the rear panel.
4.
Hold the two sides of the cover and slide the cover straight back (over the rear
panel) and off.
Bottom Top
Rear panel