4 - 22
FRONT AND REAR BRAKES
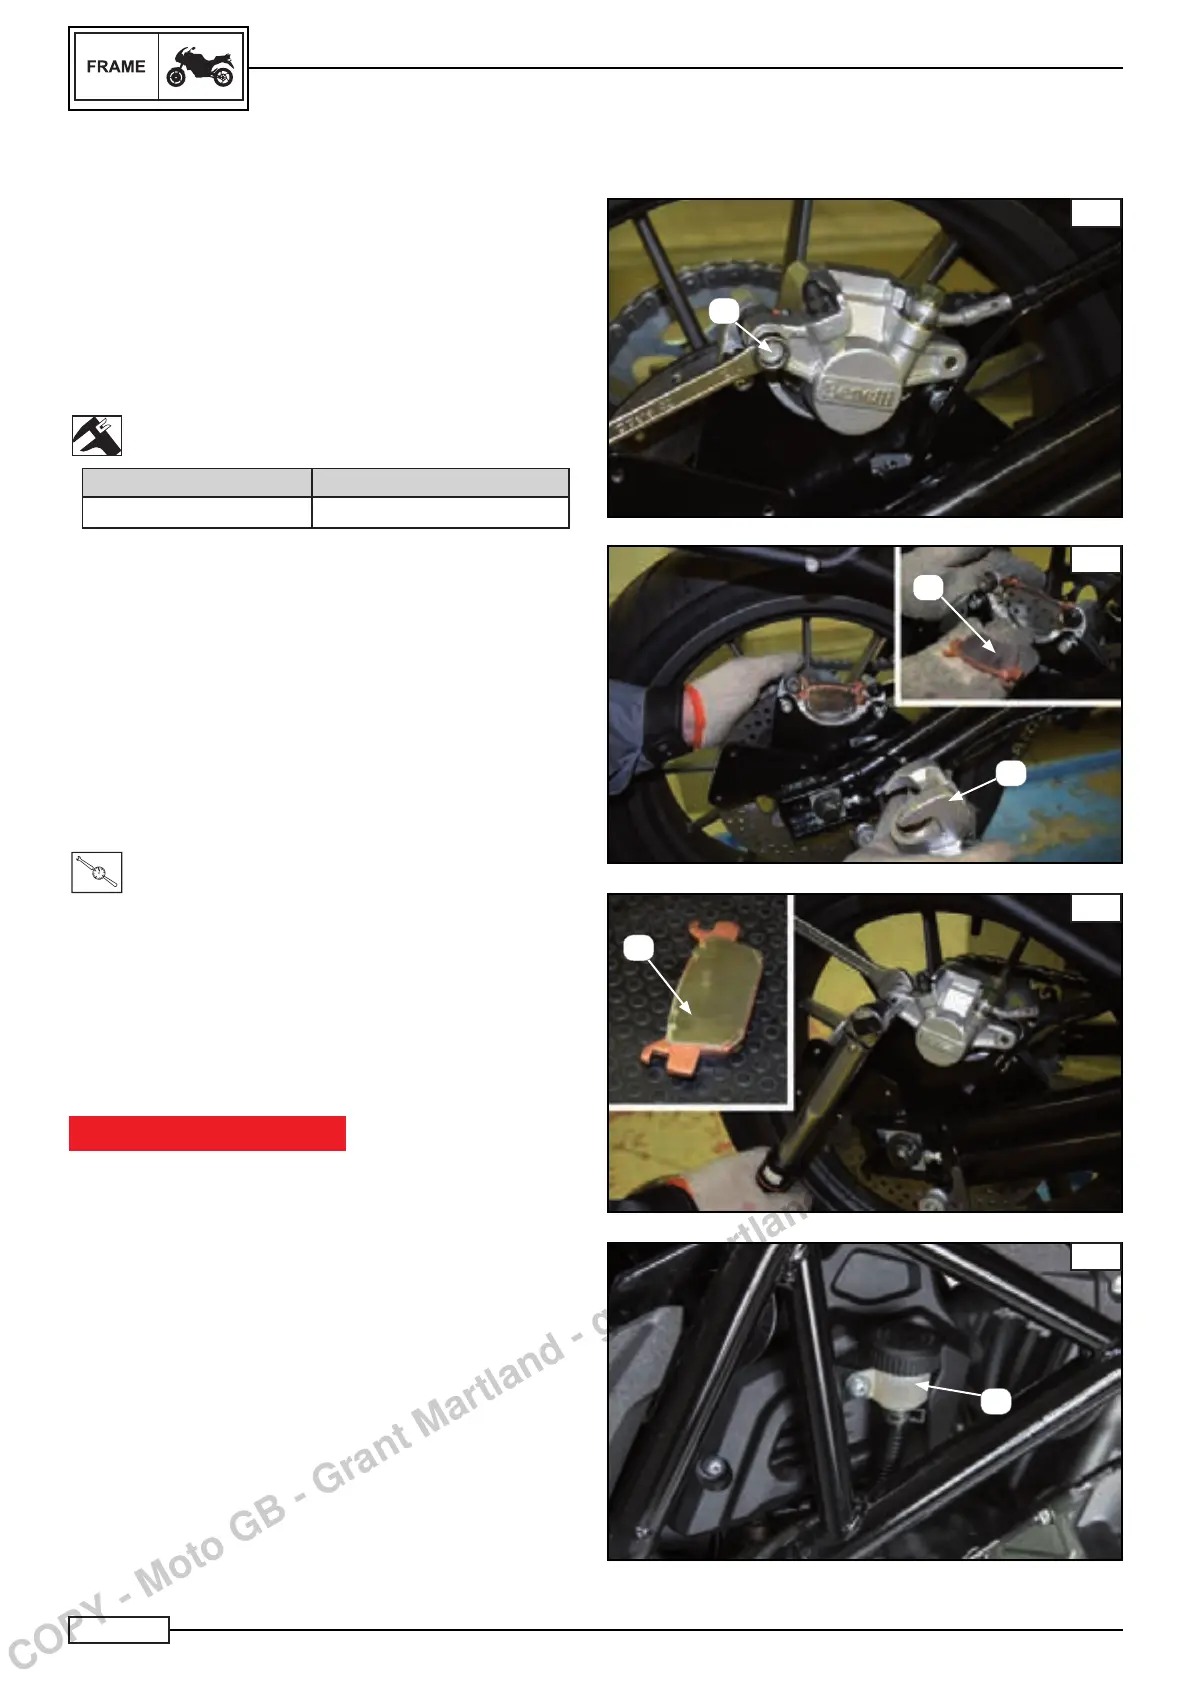
REMOVAL AND INSTALLATION OF REAR BRAKE PADS
Remove:
• the screw “A” Fig. A.
• the calliper body “B” Fig. B.
Take out:
• The brake pads “C” Fig. B.
Measure:
• The wear limit for the brake pads.
If outside specifi cations, replace the brake pads as a block.
Pads Wear limits
Rear
1 mm
Clean:
• inside the calliper
• the pistons, then dry everything.
Press:
• the pistons of the calliper inside to permit the installation of
the new brake pads.
Install:
• the brake pads in reverse order of disassembly.
• screws
• the brake calliper.
• tighten to the following torque:
T
.
R
.
Torque 22 N*m
Check:
• The brake fl uid level “E” Fig. D.
Top up with brake fl uid if the level is less that the minimum level
mark.
• Brake pedal operation.
IMPORTANT NOTICE
Do not utilise the motorcycle if full effi ciency of the brake
pedal cannot be obtained. Full effi ciency is activated by op-
erating the brake pedal several times so as to bring the pads
into contact with the disc. If this operation is not carried out,
the brakes will not operate the fi rst time when the pedal is
activated.
A
A
B
D
E
B
C
C
D
COPY - Moto GB - Grant Martland - grantmartland@motogb.co.uk
 Loading...