1 2
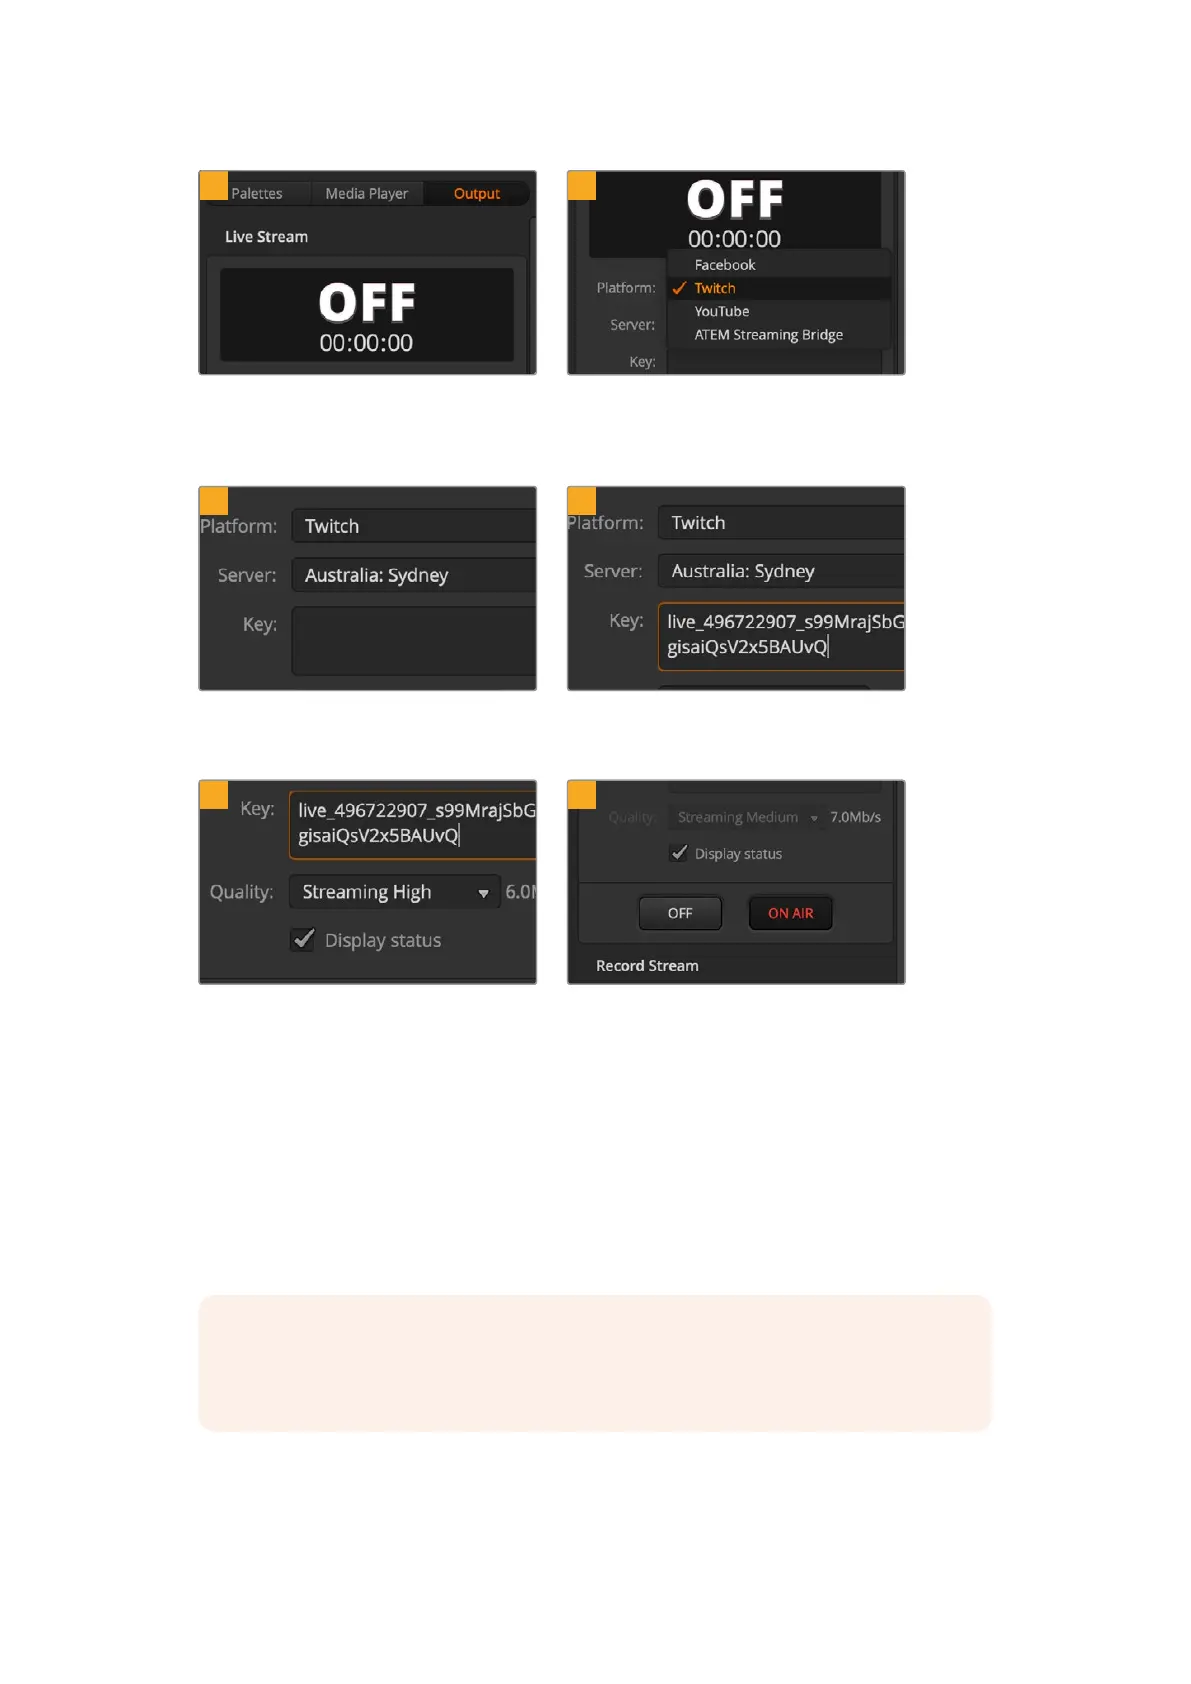
In ATEM Software Control’s processing
palettes, click on the ‘output’ tab. Open the
‘live stream’ palette.
Set the platform to Twitch by clicking in the menu
and selecting Twitch from the menu list.
3 4
Click on the ‘server’ setting menu list and select
the server nearest to your location.
In the ‘key’ setting, paste the stream key you
copied from Twitch.
5 6
Set the streaming quality to low, medium,
or high. This will also set the quality for the
recording output via USB-C.
With all the streaming details now set, it’s worth
performing a quick test broadcast to make sure
everything is working. Press the ‘on air’ button
on ATEM Mini Pro or Extreme switcher, or click
on the on air button in the live stream palette.
You are now on air! To check your broadcast, click on your account avatar and select ‘back to
Twitch’. Once in the main Twitch window, click your avatar icon again and select ‘channel’. You
will now see your broadcast on your channel and the live indicator will appear at the top of
the window.
NOTE If you are using additional ATEM control panels with your ATEM Mini, then you
might need a dedicated IP address. For more information, refer to the ‘connecting to a
network’ section.
25Additional Features on ATEM Mini Pro and ATEM Mini Extreme
 Loading...