7.6.4 BA ROLLANT 240 - 250 - 254 - 255 - 000 299 119 5
Prior to operation
Insert bracket (P) on the right side into the unwinding
bow.
Assembled the contact washer, screw the nut M 10 on
and tighten it by hand.
(Fig. 13)
Slide washer (S) and bush (B) over the hex bolt
M8x30.
Insert the hexagon screw into the draw bar.
(Fig. 14)
Insert the hexagon bolt into the bracket so that the
draw bar (Z) contacts the bracket on the inside.
Assemble the contact washer, screw the nut on and
tighten it.
Tighten the nut on the bracket.
(Fig. 15)
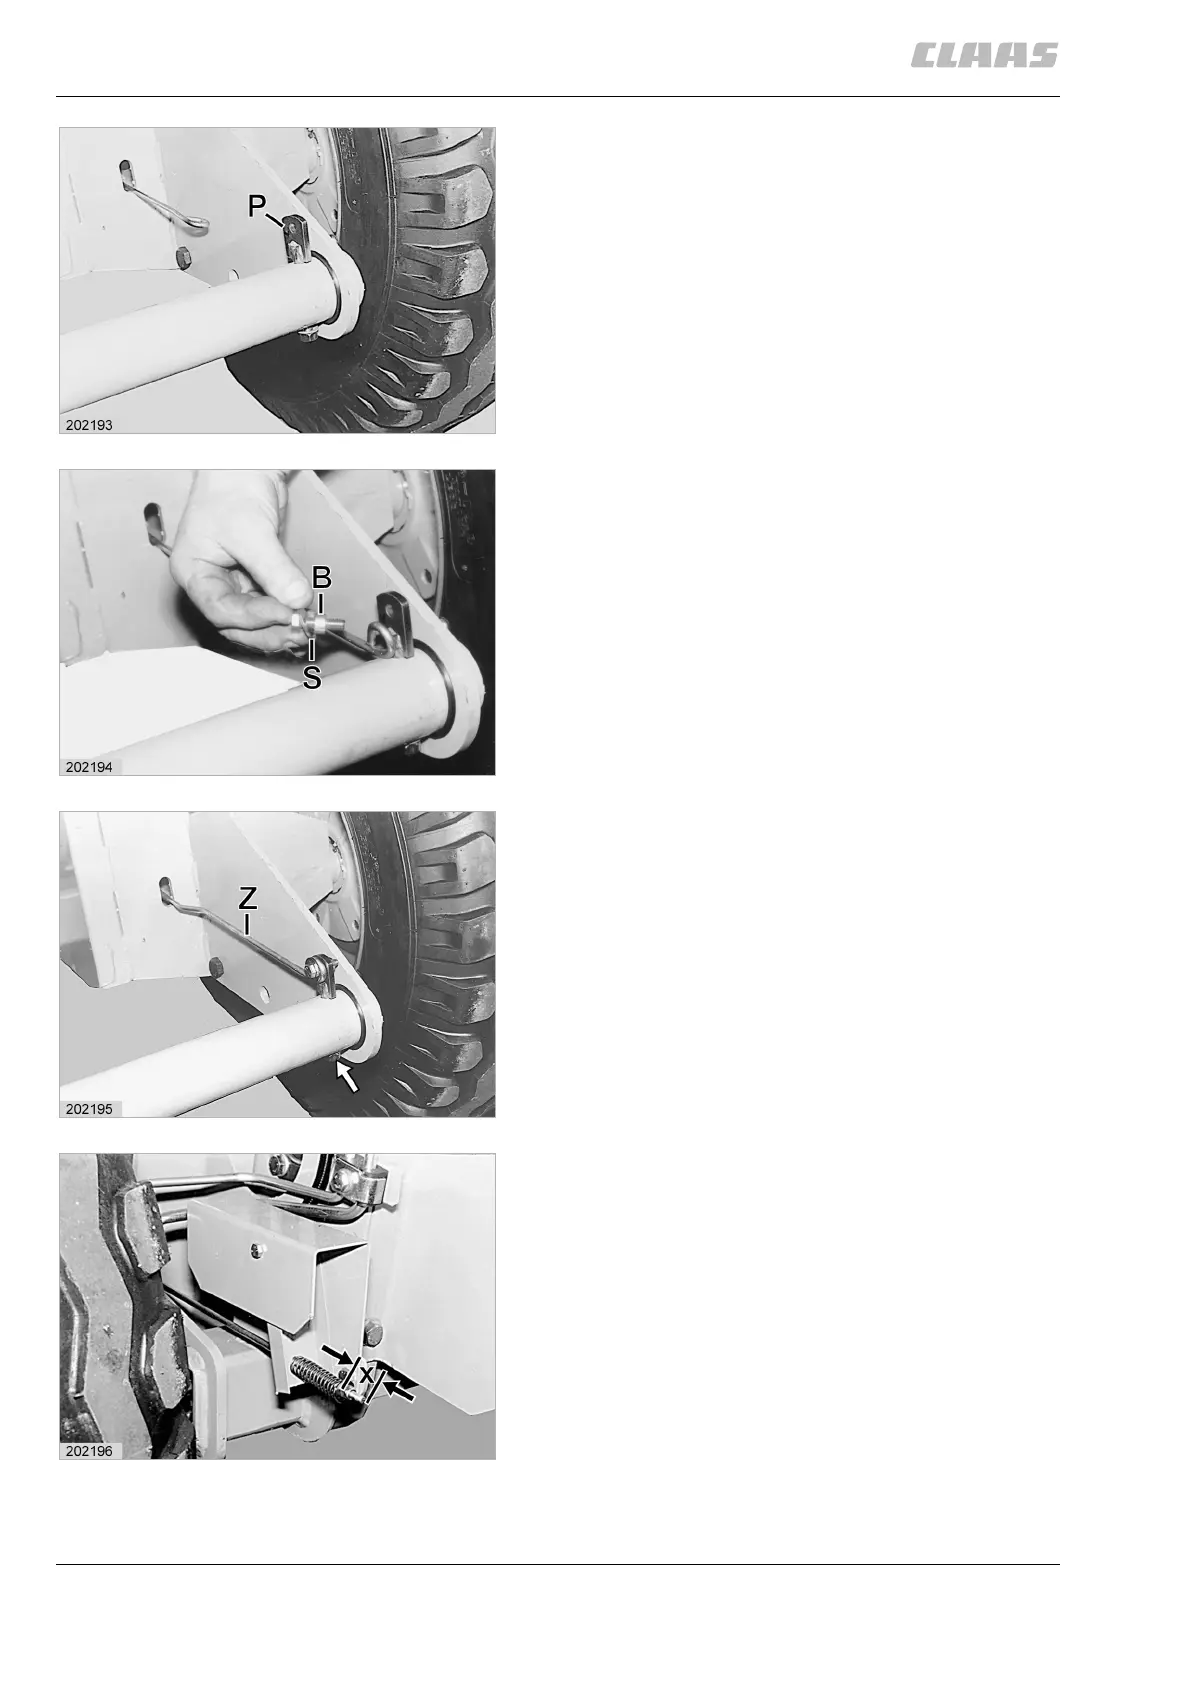
Turn the locking nut on the draw bar until the
measurement (X) of 20 mm (0.79 inch) is reached.
Close the tailgate.
(Fig. 16)
13
14
15
16

 Loading...