HelixNet | User Guide
6. Go to Station Settings->Keyset Assign and assign Channels to any keyset, or use the CCM
to create Roles.
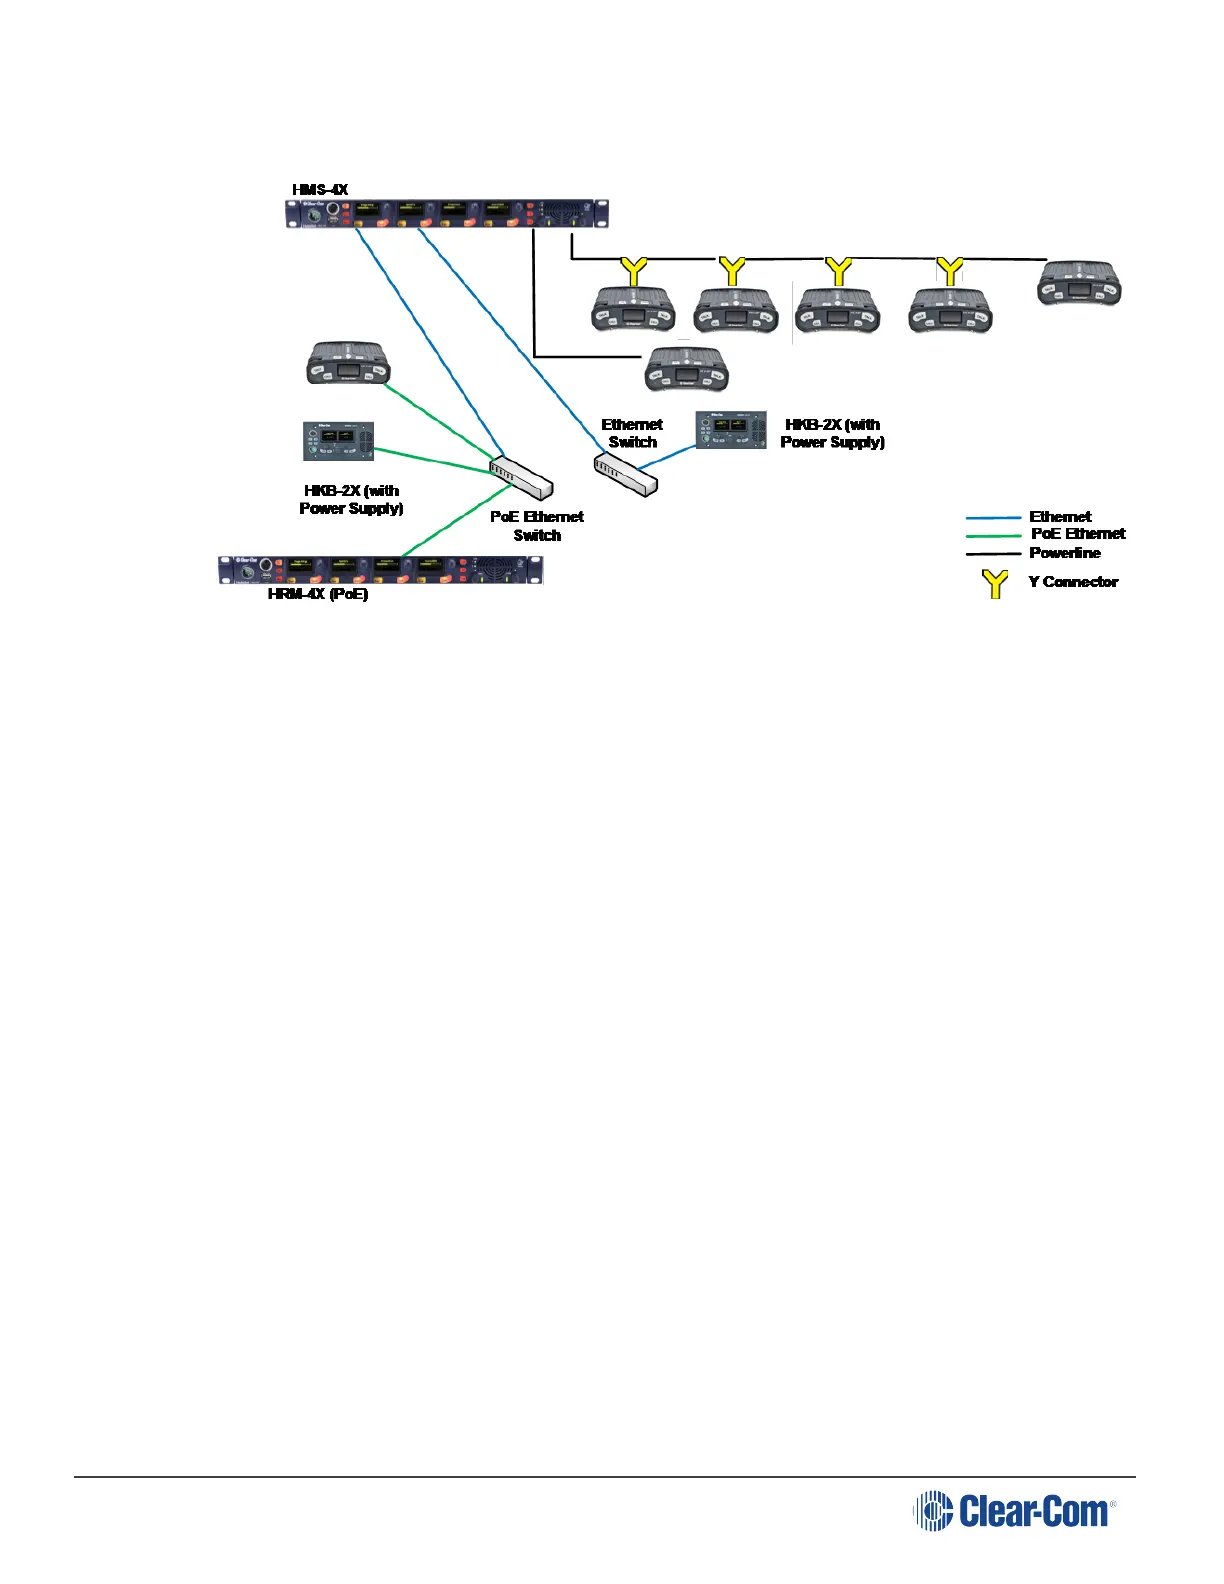
18.1.4 Remote IP Network
Remote and Speaker Stations can connect to a Main Station that is not within the same network
Broadcast Domain.
1. Insert an HLI-ET2 Ethernet interface module in the Main Station. Use any of the three slots
available.
Note: Ensure that the Main Station is powered down before inserting modules.
2. Connect a regular Ethernet cable (for example, CAT5, CAT5e, CAT6, CAT6e) from one HLI-
ET2 port to a Router/Gateway. Make sure you know the Gateway IP address for that first
subnet.
3. Connect Remote or Speaker Stations to a Router/Gateway. Make sure you know the
Gateway IP address for that second subnet.
4. Connect an external AC/DC power adapter to the Remote or Speaker Station or connect
them on a Power over Ethernet (PoE) port on the Ethernet Switch.
5. Power up all Stations. Verify that the green LED on the HLI-ET2 port and on the Remote or
Speaker Station is on.
6. On the Main Station, go to Networking->Preferences->IP Address and note the IP address
of the Main Station. Make sure that Networking->Preferences->Gateway and Networking-
>Preferences->Subnet match that of your local subnet, including the Gateway setting.
7. On each Remote and Speaker Station make sure that all Networking > Preferences match
Page 202
 Loading...