Horizon Imager User’s Manual 2-13
Setting Up the Imager
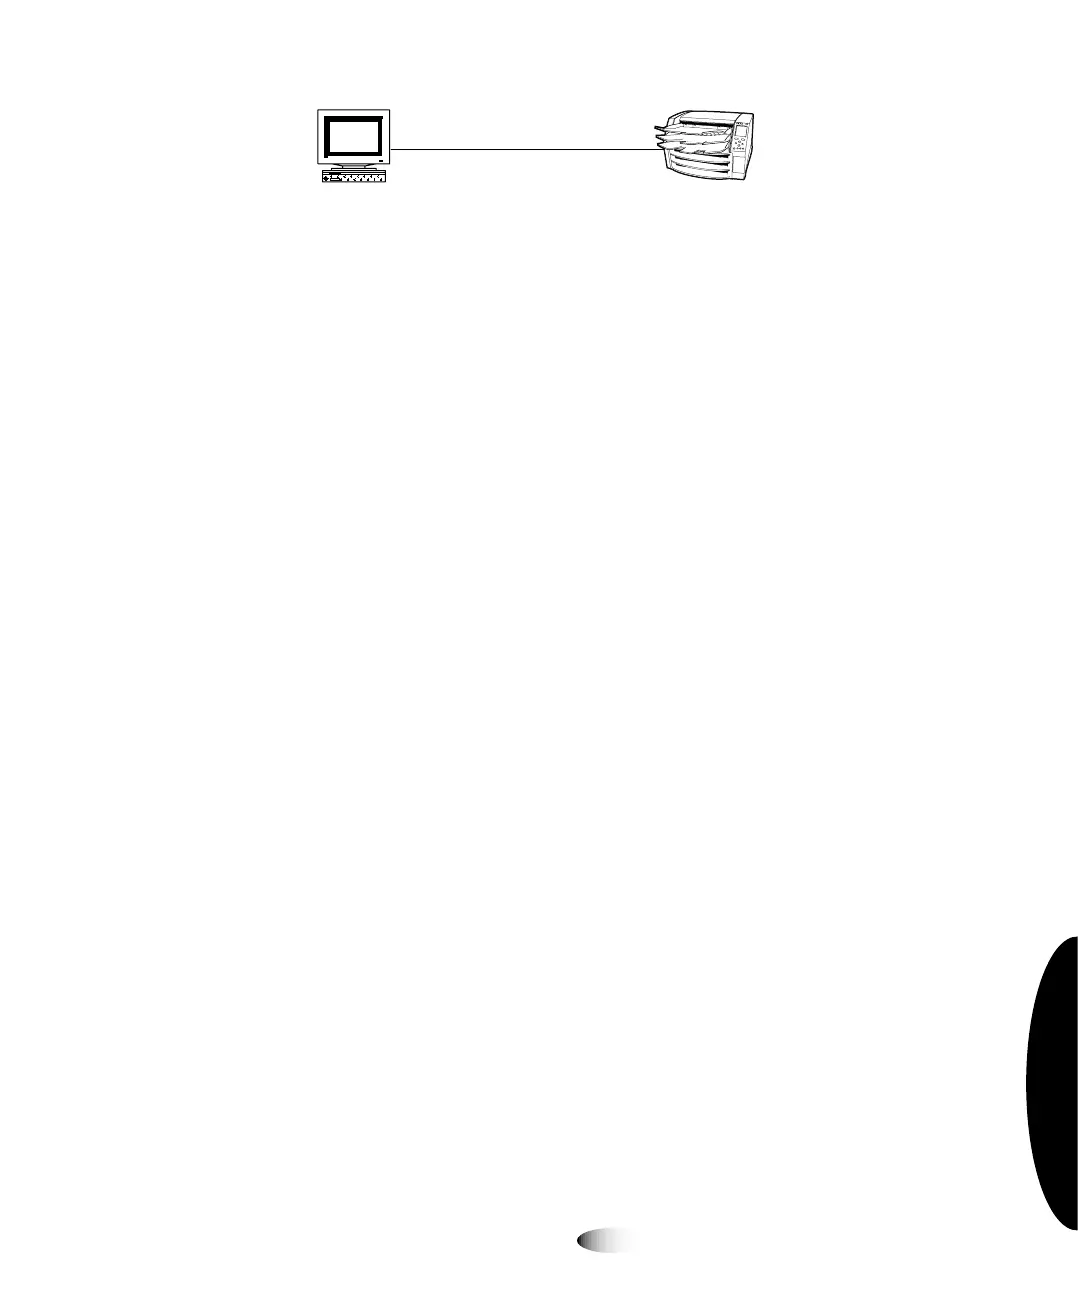
Simple Network with Ethernet Crossover Cable
In addition to physically connecting an Ether net cable to the imager,
you have to define an IP (Internet Protocol) address for the imager.
This address uniquely identifies the imager on the network.
péÉÅáÑóáåÖ=íÜÉ=fã~ÖÉêÛë=fm=^ÇÇêÉëë
You must specify an IP address for the imager. This address
uniquely identifies the imager on the network.
Determining an IP Address
Remember that the network connection discussion in this manual
covers only simple networks—we are assuming that the imager and
other devices on this simple network do not have to communicate
with devices on other networks. If this is true of your network, then
you only have to make sure that device IP addresses within this
network are unique.
NOTE:
If devices on this network
do
have to communicate with devices on other networks,
it is part of a complex network. In addition to specifying the imager’s IP address, the imager’s
subnet mask and gateway IP address may have to be specified. For more information about
configuring the Horizon imager in a complex network, refer to the Horizon Imager Technical
Manual.
IP addresses have the format
x
.
x
.
x
.
x
, where
x
is a value from 0 to
255. Certain IP address series have been reserved for special use by
the Internet community. One series has been reserved for
independent networks, like the simple network described
previously in this chapter, that are self-contained and not connected
to other networks. In this series, IP addresses have the format
192.168.
x
.
x
, for which you get to define the last two parts in the
address.
View Workstation
Horizon Imager
Ethernet Crossover Cable
3