2-8 Setting Up the Imager
The Horizon imager supports the following network cables and
hubs:
•
Category 5, RJ-45 [also referred to as unshielded twisted pair
(UTP)] network patch cables and crossover cables
•
10/100/1000 Base-T Ethernet hubs
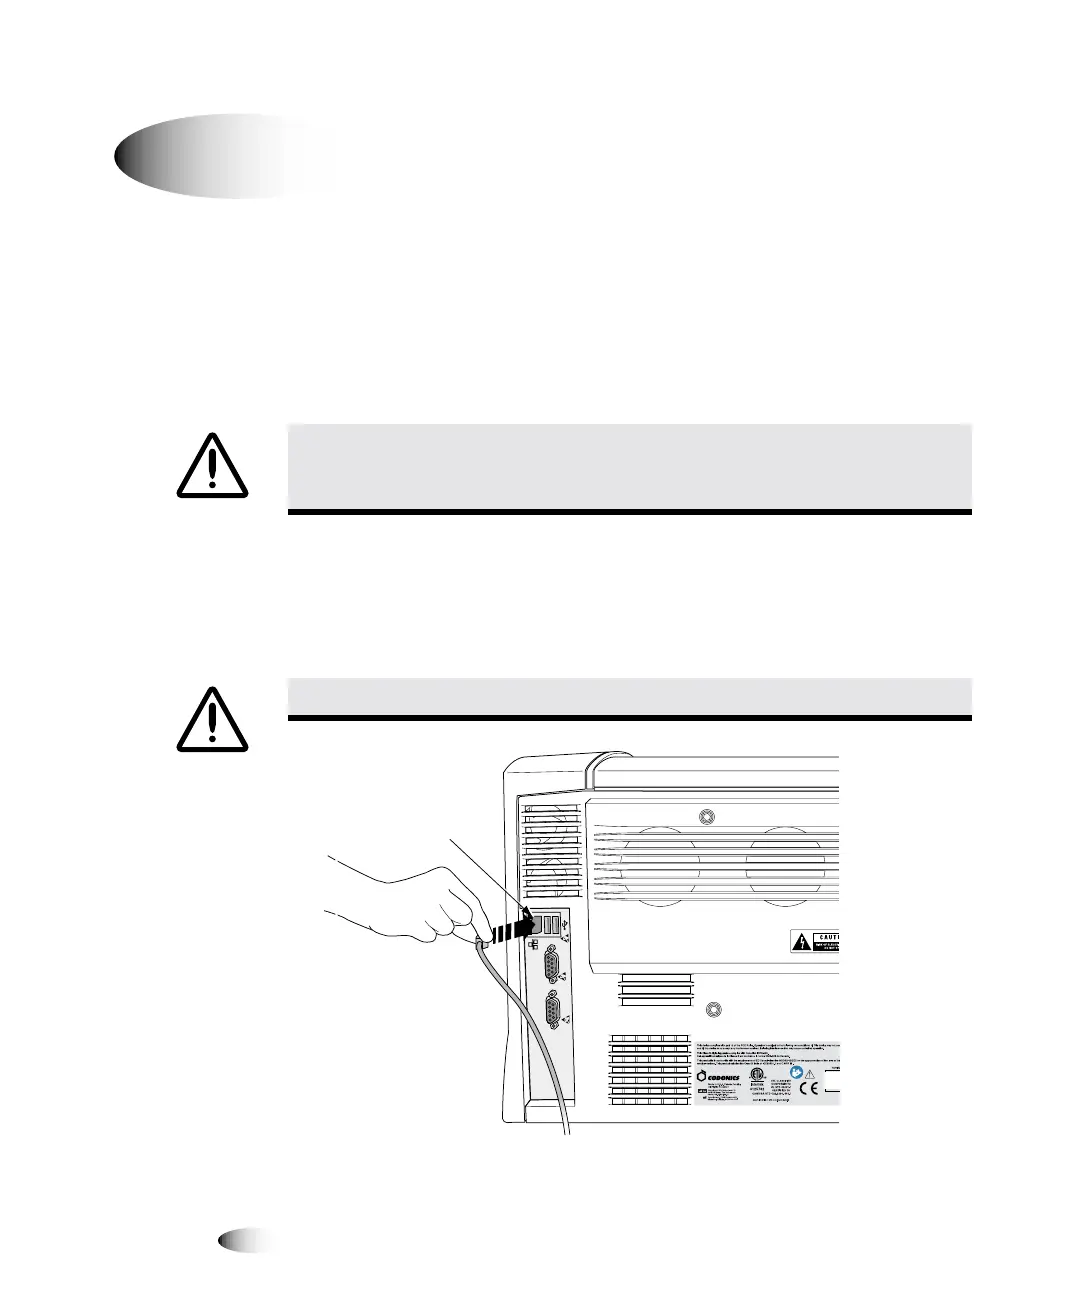
1. Locate the Ethernet cable jack at the back of the imager and
insert the Ethernet cable, as shown in the following illustrations.
Network connector
`çååÉÅíáåÖ=íÜÉ=bíÜÉêåÉí=`~ÄäÉ
CAUTION
Make sure that the imager is powered off before connecting the Ethernet
cable. For information about powering the imager on and off, refer to “Powering the
Imager On and Off” on page 3-3.
CAUTION
Do not touch any of the connector pins.
8
To connect the
Ethernet cable
to the image
C
O
N
S
O
L
E
U
P
S
Network
connector