Uneven height of the base surface, dirt or corrosion under the feet, or other
irregularities can all cause the machine to be supported unevenly: a condition
known as “soft foot”. Soft foot problems can place stress on the machine when the
anchor bolts are tightened. In addition to preventing proper machine alignment,
extreme soft foot conditions can actually cause damage to the machine (warped or
cracked feet, etc.).
Two major reasons for correcting soft foot are (1) to avoid continuous realignments
due to differing machine foot positions and (2) to remove the stress and enable the
machines to operate at their best. All machines should be checked for soft foot, not
just the machine being moved.
3.
Use proper foundation.
On new installations, allow foundation concrete to cure sufficiently before installing
your machines. Normally, you should not mount machines directly on the
foundation. Baseplates usually provide more stability. Also, to make future
alignments easier, place a set of high-quality (i.e. stainless steel) pre-cut shims
under each foot. They should be at least 1/8 inch (3 mm) thick.
4. Properly select and install coupling.
The alignment system is not affected by axial float, and the effects from torsional
play (backlash) in the coupling are minimal. However, ensure the coupling is
properly installed and not in such a poor condition that it adversely affects the
alignment process. Also, Emerson recommends (while alignment is being
performed) that you eliminate torsional play by rotating the driving machine in the
same direction that it normally operates. If necessary, put a drag on the driven end
to prevent gravity overswing.
5. Minimize pipe strain.
Excessive pipe strain can create serious problems and should be corrected before
attempting machine alignment. Ensure pipes are fitted correctly and, if necessary,
obtain flexibility. In some cases, stationary pipes fitted directly to the machine can
cause machine movement as they heat up (thermal growth).
6. Ensure the grouting is of suitable material with no voids or cracks.
7. Ensure the baseplate is clean, rigid, and properly designed.
8. Ensure the machinery element supports have no cracks and are tight.
7.1.3 Open or close the Advanced Laser Align application
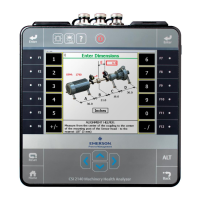
1. To open the program, press F10 Adv. Laser Align on the Home screen.
2. To close the program, press ALT > F7 Exit Laser Align.
Advanced Laser Alignment
164 MHM-97432 Rev 7
 Loading...
