Procedure
1.
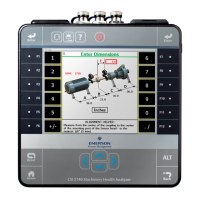
Connect the analyzer to the computer using the Ethernet cable.
2. On the computer, open Data Transfer.
3. Click the Enable Device menu and select your analyzer.
A device status box with an icon, name, and status appears in the workspace.
4. If more than one analyzer is enabled, click a device status box to select an analyzer.
5. Click the Options icon to expand the Options pane.
6. Set the connection type to Ethernet/Wireless on the analyzer and in Data Transfer.
7. On the analyzer, open a program and select Connect For Transfer using a path below.
Choose the program that corresponds to the file type you want to transfer.
Program Key sequence to Connect for Transfer option
Analyze Home > F7 Analyze > ALT > F9 Connect For Transfer
Balance Home > F9 Balance > F12 Job Manager > F7 Connect For Transfer
ODS/Modal Home > F12 ODS/Modal > F8 Job Manager > F7 Connect For Transfer
Program Manager Home > F6 Program Manager > F8 Connect For Transfer
Route Home > F8 Route > ALT > F9 Route Mgnt > F7 Connect For Transfer
Laser Alignment Home > F10 Adv. Laser Align > ALT > F9 Job Manager > F7 Connect For
Transfer
Transient Home > F11 Adv. Transient > F8 Job Manager > F7 Connect For Transfer
Note
If you experience issues when trying to connect, press the F9 IP/release/renew option to reset
the DHCP process.
Both the analyzer and AMS Machinery Manager display a message indicating the
connection was made. You can now transfer files between the opened program and
AMS Machinery Manager.
Connect to a remote AMS Machinery Manager database
using Ethernet
Prerequisites
• Ensure you set the connection type on the analyzer.
• Ensure the CSI Data Transfer Service is running on the AMS Machinery Manager
server.
• Contact technical support to configure the analyzer to connect to the CSI Data
Transfer Service.
Transfer files with CSI 2140
MHM-97432 Rev 7 51
 Loading...
