WARNING!
Do not use Ethernet in a Hazardous Location.
Procedure
1.
Connect the Ethernet cable to the analyzer and to an Ethernet switch or port.
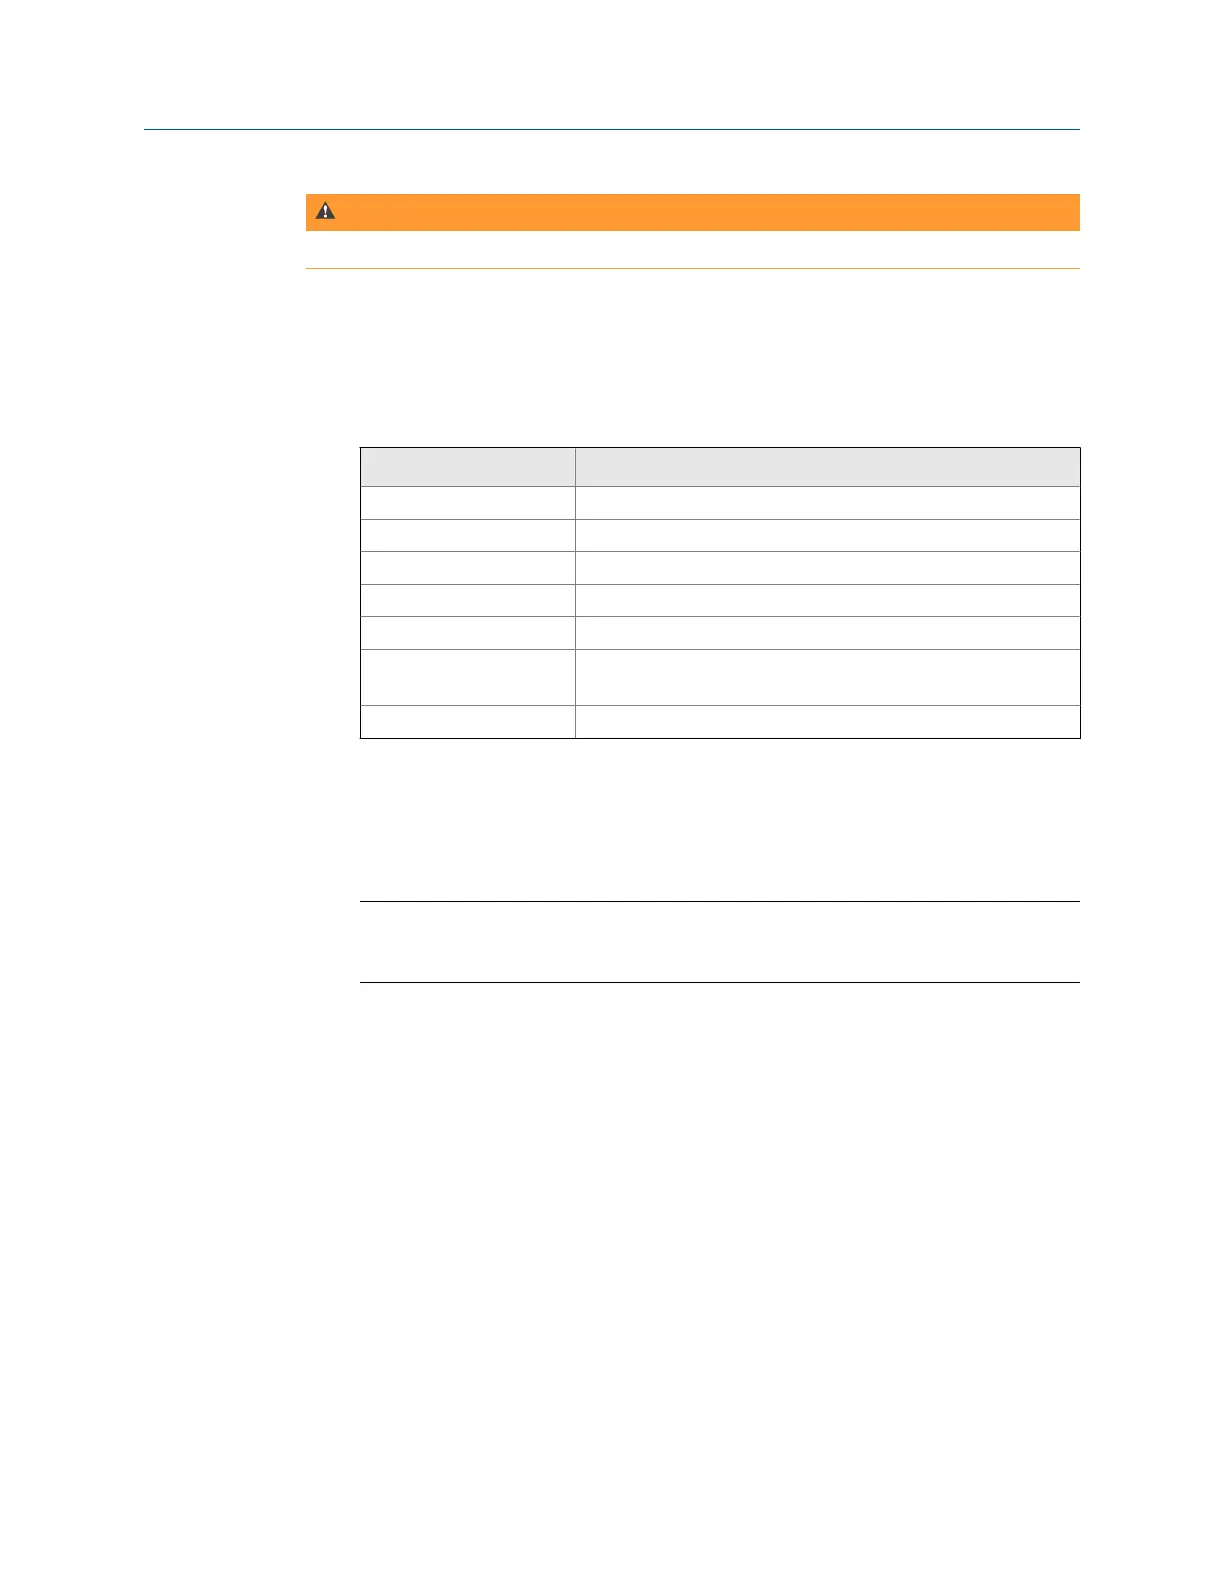
2. On the analyzer, open a program and select Connect For Transfer using a path below.
Choose the program that corresponds to the file type you want to transfer.
Program Key sequence to Connect for Transfer option
Analyze Home > F7 Analyze > ALT > F9 Connect For Transfer
Balance Home > F9 Balance > F12 Job Manager > F7 Connect For Transfer
ODS/Modal Home > F12 ODS/Modal > F8 Job Manager > F7 Connect For Transfer
Program Manager Home > F6 Program Manager > F8 Connect For Transfer
Route Home > F8 Route > ALT > F9 Route Mgnt > F7 Connect For Transfer
Laser Alignment Home > F10 Adv. Laser Align > ALT > F9 Job Manager > F7 Connect For
Transfer
Transient Home > F11 Adv. Transient > F8 Job Manager > F7 Connect For Transfer
3. Press Dump Data.
4.
Log in using your user name and your password.
The password is case-sensitive, so use the up and down arrows to change the case.
Tip
Store your login. The next time you connect, press Recall Login and enter your four-digit pin.
The analyzer displays your stored login information.
5. Enter your four-digit pin, and press Enter.
3.3.8 Wireless connection
If your analyzer supports wireless, you can use it to connect to AMS Machinery Manager
Data Transfer to transfer files. If your analyzer supports wireless, a wireless LED is on the
top of analyzer. See Section 2.3. To use the wireless functionality, you must enable the
wireless radio in your analyzer and connect to a wireless network. After you connect to a
wireless network, you can use wireless to connect the analyzer to an AMS Machinery
Manager computer. You may need to work with your network administrator or IT group to
set up a wireless connection.
Enable or disable the wireless radio in the analyzer
To connect to a wireless network, you must first enable the wireless radio in the analyzer.
Transfer files with CSI 2140
52 MHM-97432 Rev 7