334 Eos Family v2.9.0 Operations Manual
In the curve editor you can trace the desired shape of the curve using your finger or a mouse on
the touchscreen. As you progress through drawing the curve, intensity values will be added for
existing points on the curve. If you add points to the curve (from the keypad) those points will be
adjusted as well.
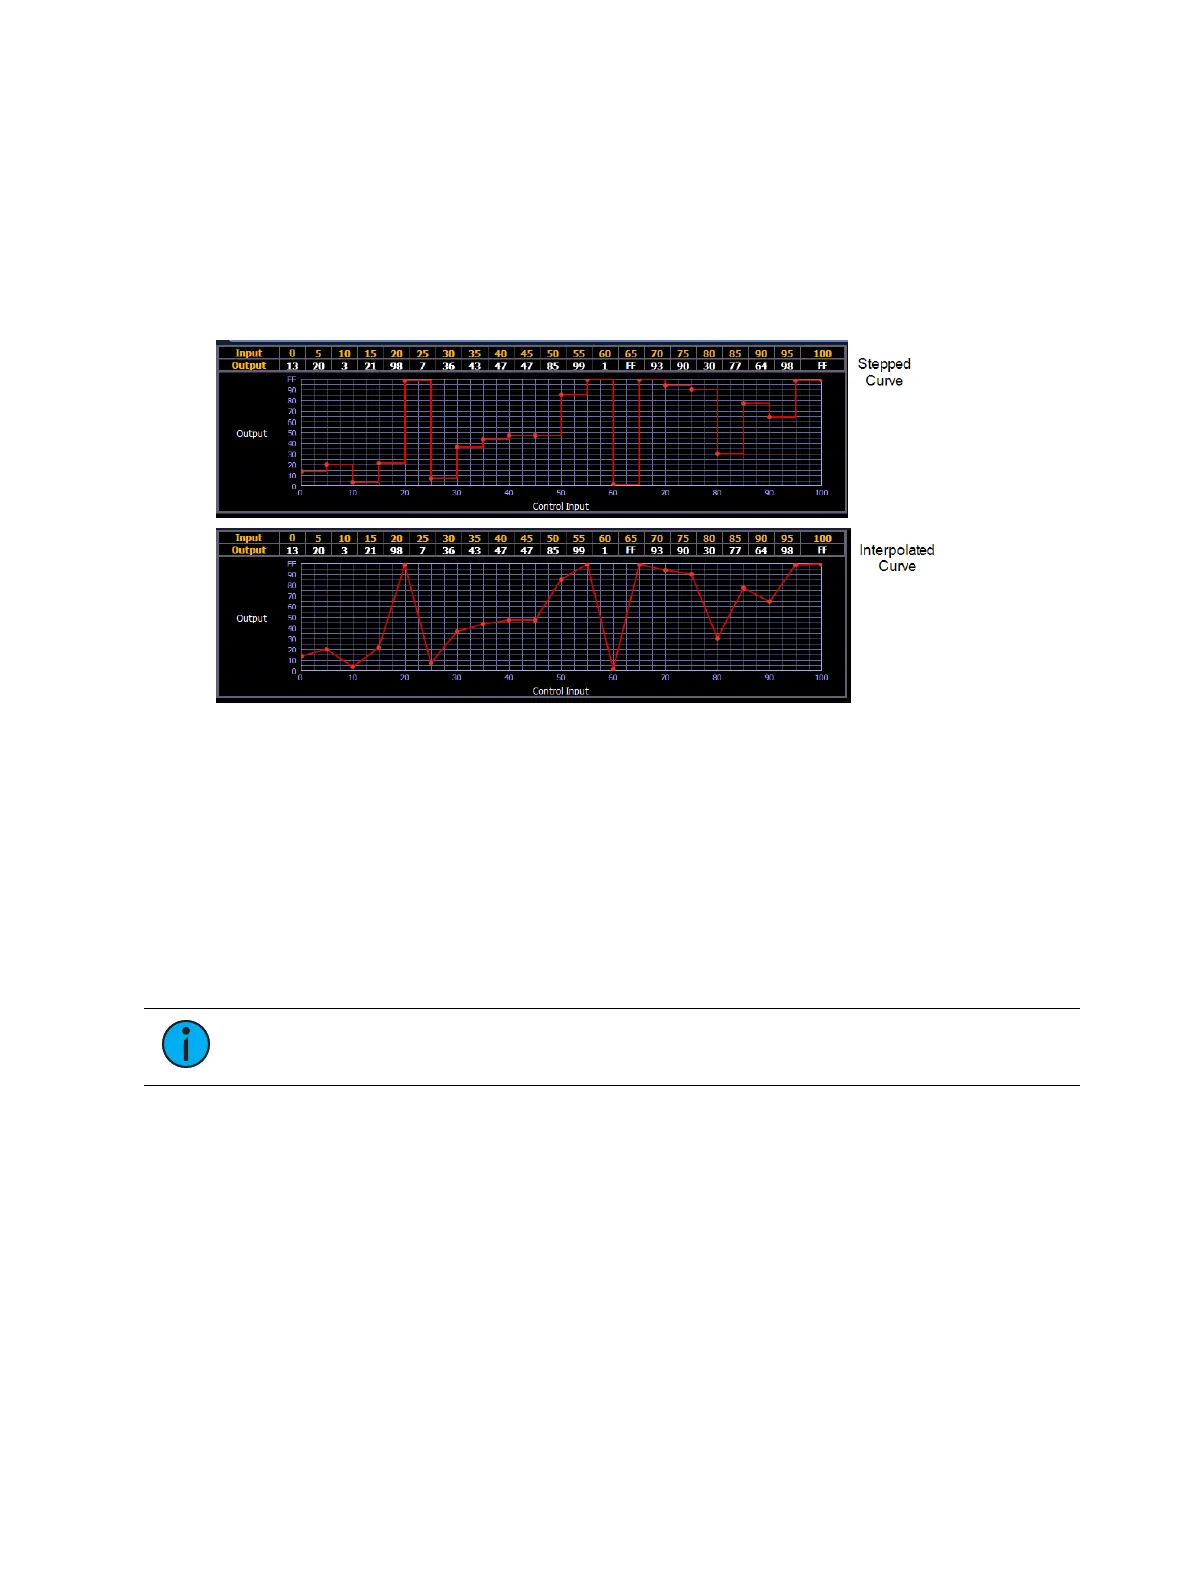
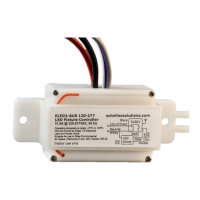
You can also toggle between an “interpolated” or “stepped” curve shape. Element defaults to
“interpolated”. To switch to “stepped”, press the {Stepped} softkey. Once pressed, this softkey
changes to {Interpolated}, which allows you to switch back.
Below are two examples of the same curve. The first is stepped and the second is interpolated.
Clearing the Curve
At any time, you can clear a curve from the curve editor display by pressing the {Clear Points}
softkey. This will return the curve to its original linear shape or to its default shape if it is a pre-
established curve.
Applying a Curve To Channels In Patch
Curves can be applied to any intensity parameter in patch. Once added, the curve number
appears in the channel’s “Curve” column of the patch display. Pressing {Curve} in
Patch>Attributes will display a list of available curves.
Note: On Element, you can also access the patch display by pressing the [Patch]
button.
[Patch] {Attributes} [1] {Curve} [9] [0] [1] [Enter] - applies curve 901 to channel 1 intensity.
[Patch] {Attributes} [2] [Thru] [8] {Curve} [2] [Enter] - applies curve 2 to intensity for
channels 2 thru 8.
[Patch] {Attributes} [1] {Curve} [At] [Enter] - removes the curve from channel 1.
Curves Applied to Cues
Curves can also be applied to cues or cue parts in Live/ Blind. This affects the percent
completion of the cue/ part by applying the curve’s output level as the percent completion for all
fade calculations. Once added to a cue, the curve number appears in the cue’s “Curve” column
of the cue list in the playback status display.