Virtual Media Server 377
40 pixel maps per show file
12 layers per pixel map
16,384 pixels per pixel map grid
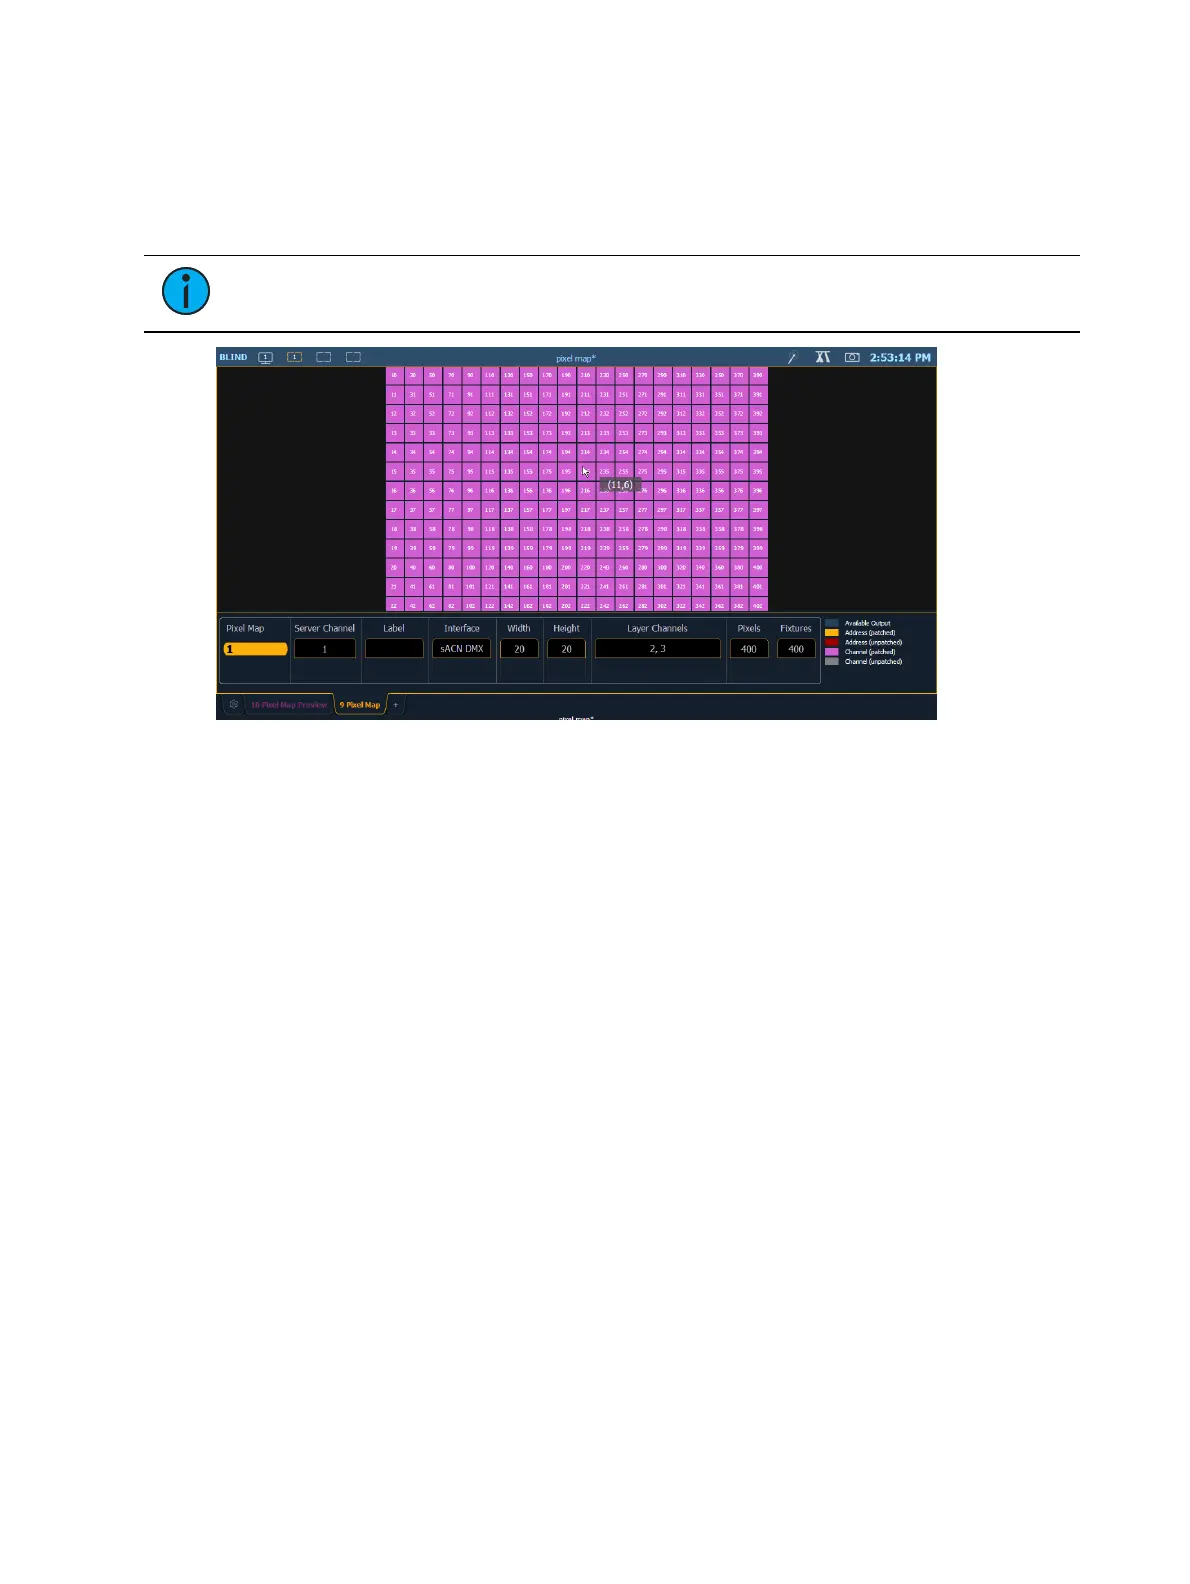
Open up the Pixel Map display,Displays>More SK>Pixel Maps. The display can also be opened
from the home screen, or by using [Tab] [9].
Note: Hovering your cursor above the pixel map will display the column and row
location for the pixel.
In the Pixel Map display, any numeric entry is assumed to be a Pixel Map. Each pixel map must
have a unique number.
To create a pixel map, type in the number you want to assign to it and hit [Enter].
The virtual media server and layer(s) need to be assigned to the pixel map. Using the softkeys,
select {Server Channel} and the channel you patched as the Virtual Media Server.
Then select {Layer Channels} and the channels you patched as Virtual Media Layers.
In this display you can also label the pixel map, assign the interfaces it will use, and adjust the
width and height.
Column and row guides can be created numerically in either the Pixel Map or in the Edit
displays. The guides can aid in viewing a pixel map.
When that basic information has been assigned to the pixel map, press the {Edit} softkey to
select the fixtures.
In the edit screen, you will be able to define the array and types of fixtures. To do this, you can
select pixels from the map by using a touchscreen or by holding down the left button on a mouse
and dragging across the pixels you wish to select.
Once the pixels have been selected, you need to select their fixture type and then assign the
starting address or starting channel.
When either {Starting Channel} or {Starting Address} is selected, both fields will be
cleared.
Address-based pixels can not overlap with channel-based pixels. This includes the entire
DMX fixture footprint.