80 Eos Family v2.9.0 Operations Manual
Navigate to the desired storage location and press [Select]. When using import, Element
displays only the available files. Navigate to the specific file and press [Select].
Note: Not all data is saved to a .csv file. It is recommended that you first export as a
.csv file, modify the file as needed, and then import. See Exporting a Show File (on the
facing page) for more information.
Choose the aspects of the file you wish to import (all are selected by default). If "Merge Data" is
not selected, the ASCII data will overwrite your current show data. If "Merge Data" is selected,
the ASCII data will be merged into your current show.
Lightwright Import
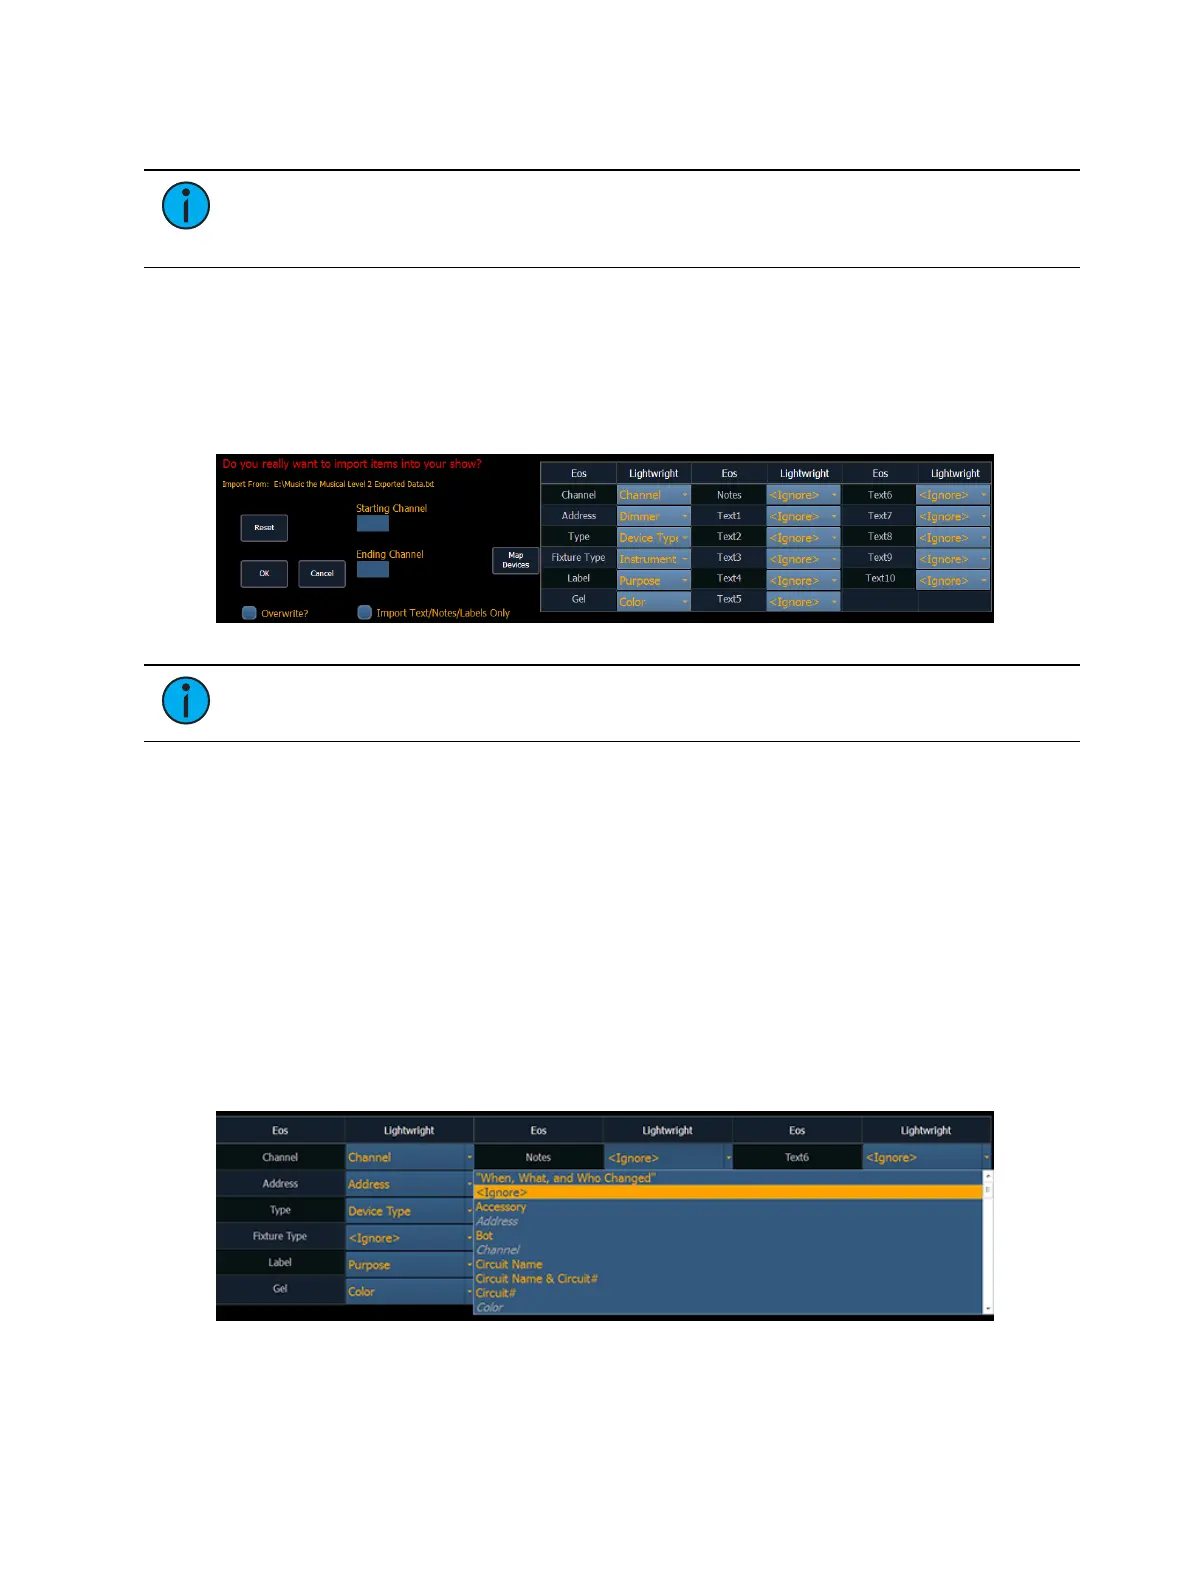
Once a file has been selected for import, you will now have options for importing.
Note: {Import Text/Notes/Labels/Gels Only} allows you to import just the patch
database text.
Merge and Overwrite
You can select to either merge the data with the current show file, or to overwrite the data in
the current file. To do this, check the {Overwrite} box. Leaving this box unchecked will merge
the data.
Starting and Ending Channel
You can select starting and ending channels for the import.
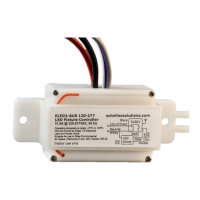
Mapping
You can map Element patch fields to fields in the Lightwright file. Channel and Address must be
mapped for the file import to work. Any other field can be set to ignore if desired. Once a
Lightwright field has been mapped, it will display in grey in the dropdown menu. However,
greyed out options can be selected again for placement in multiple fields.
The text fields in the Patch display and database will rename based off of the Lightwright
imported fields. See
Renaming Text Fields in Patch (on page109)
for more information.