13
NOTE
See section 15. "Multiviewer" for multi-display connection and setup.
See section
20-1. "GPI Control" and section 20-2-2. "Tally Output Settings (GPI
IN/TALLY OUT)" for setting up GPI input, GPI output and tally output.
See section
20-2-3. "Sending Tally Signals to Tally Units" and 20-2-5. "Connection
Settings with Tally Units (RS-422 port setting)", if you configure the tally units (Hanabi
series option).
See section
20-3. "Editor Control (Option)" for editor control.
The HVS-AUX8/16 units (Hanabi series option), which are used for selecting AUX
signal, can be deployed in the same Arcnet LAN as HVS-30OU. See section
20-4-1.
"ARCNET" for Arcnet connection. See the operation manual of Auxiliary Unit for how
to connect the AUX units to the switcher.
3-3. Power ON
Before powering on the system, verify that all system connections are properly in reference to
section
3. "Connection."
Control Pannel Power supply
Supply power to the control panel using the AC adapter provided and turn on the power
switch located at the rear panel of HVS-30OU.
MU (Main Unit) Power supply
Supply power to the MU using the power cable provided and turn on the power switch located
at the front panel. Turn on both power switches for the HVS-300RPS.
3-4. System Signal Format Selection at the Initial Use
When first switching on your unit, please select a signal format as shown below.
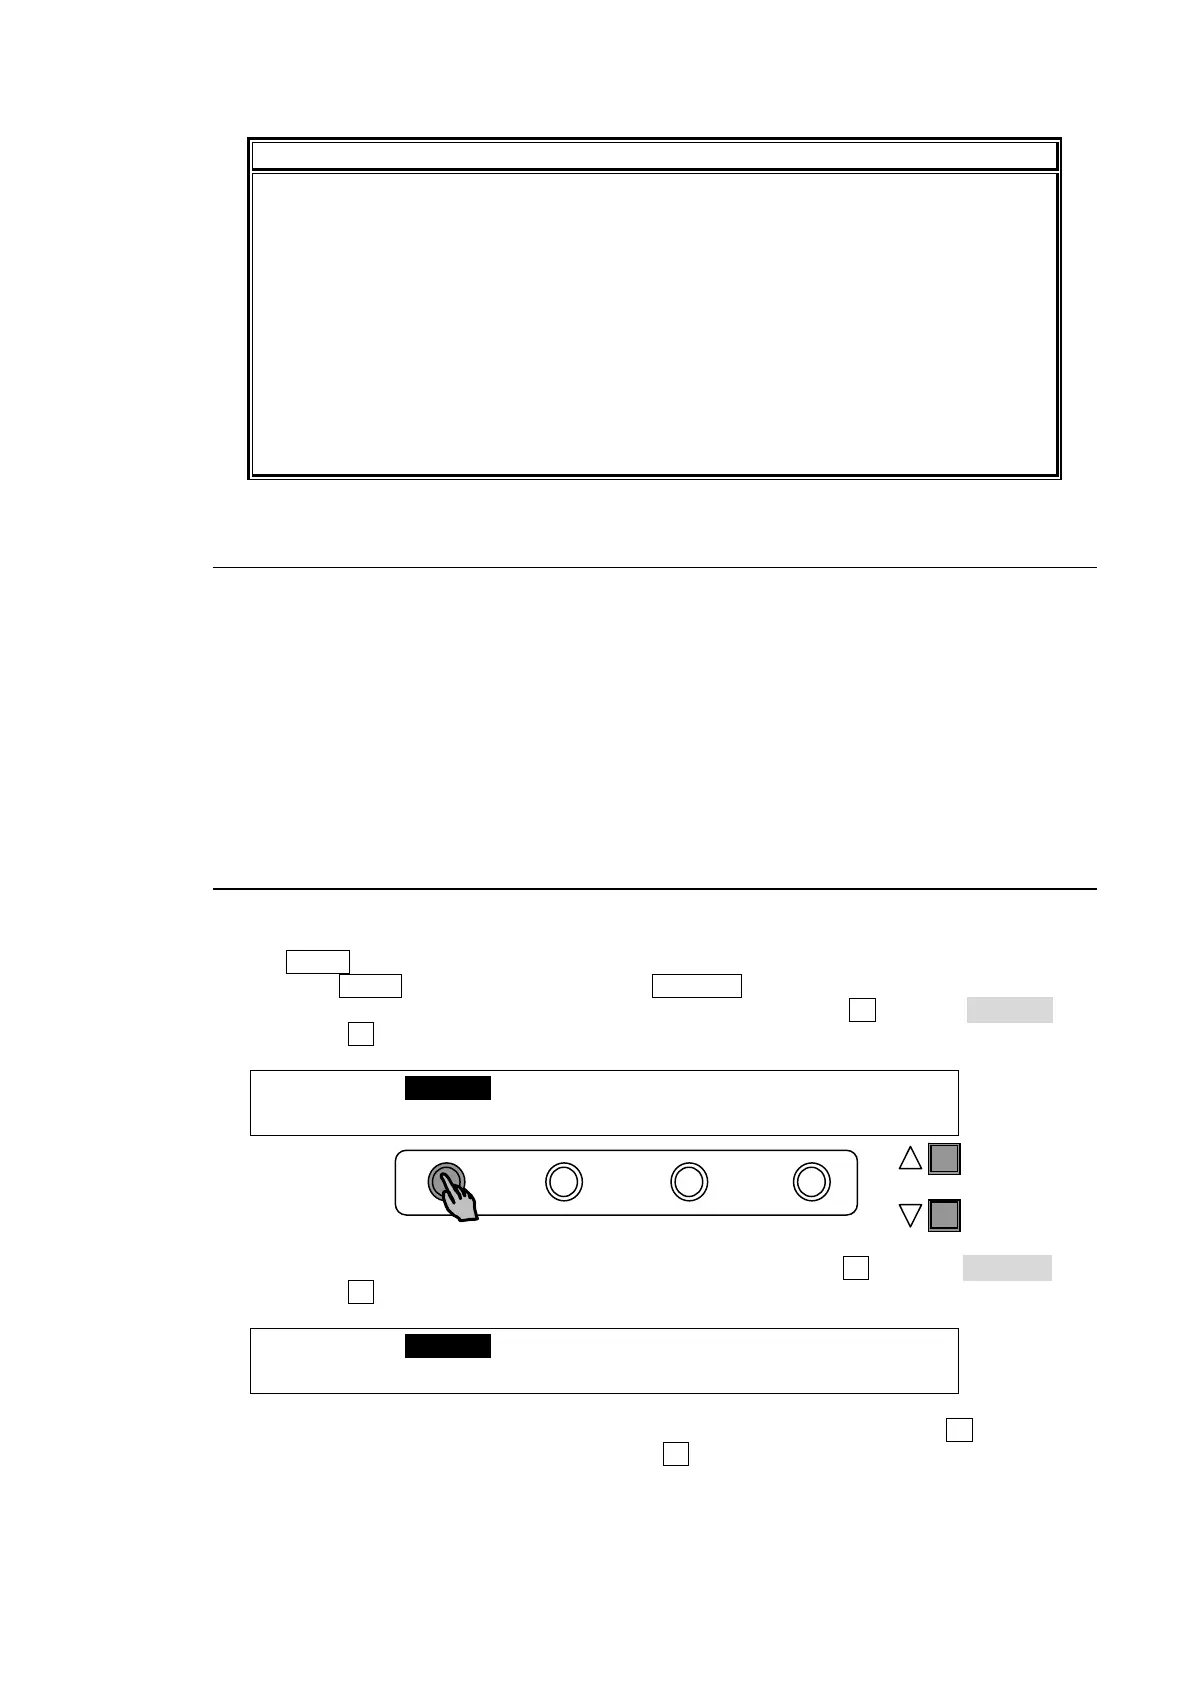
(1) The MENU button at the right of the menu display should be flashing at power ON.
(2) Press the MENU button and then press the 7/SETUP button.
(3) The SETUP menu's top page appears in the menu display. Turn F1 to select SYSTEM and
then press F1.
SETUP :>SYSTEM >INPUT >OUTPUT >PANEL
MENU :>EXT I/F >STATUS
(4) The [SETUP - SYSTEM] menu as shown below appears. Turn F1 to select FORMAT and
then press F1.
SETUP :>FORMAT >REF I/O >ARCNET >ETHERNET
SYSTEM :>TIME >INIT >REBOOT
(5) The [SETUP - SYSTEM - FORMAT] menu as shown below appears. Turn F1 to select the
signal format used in the switcher. Then turn F3 to select the aspect ratio.
PAGE


 To Next Page