Do you have a question about the FOR-A HVS-390HS and is the answer not in the manual?
Introduction to the HVS-390 series Hanabi Switcher and FOR-A products.
Overview of standard and optional features of the HVS-390HS video switcher.
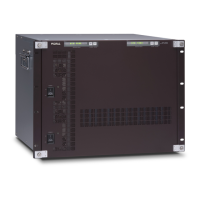
Description of the front panel components of the HVS-390HS unit.
Detailed description of the rear panel connectors and their functions on the HVS-390HS.
Identification and description of components on the HVS-391OU control panel.
Description of the rear panel connectors for the HVS-391OU operation unit.
Information on installing optional expansion cards into the HVS-390HS rear panel.
Details on various interface connectors like EDITOR and RS-422.
Explains the basic setup for connecting the HVS-390HS system components.
Illustrates an optional configuration for the HVS-390HS system setup.
Procedure for connecting the main unit (MU) and operation units (OU) via Arcnet.
Steps for correctly powering on the system components.
Guide to selecting the system signal format upon initial unit setup.
Instructions on navigating and accessing menus using control panel buttons.
Detailed procedures for setting parameter values using various controls.
Procedure for assigning custom names to video input signals for easier identification.
Guide to assigning video sources, stills, and macros to bus buttons.
Instructions on configuring how signal names are displayed on bus buttons.
Procedure for selecting an M/E bank to control when using the HVS-39EXTME.
Explanation of the resize function for inputting SD signals and upscaling them.
How to capture and freeze input video frames as still images.
Procedure for changing the side panel image of 4:3 video.
Feature to add a time delay to signals after pressing a bus button.
How to apply frame synchronization to input signals to synchronize asynchronous signals.
Assignment of matte signals to bus buttons and specification of matte colors.
Guide to installing and configuring up to four additional input cards.
Procedure for selecting video signals for SDI OUTPUT1 and 2.
Methods for selecting signals for auxiliary outputs via bus buttons or menus.
Configuration for preview bus monitoring and setting up preview images.
Procedure for routing and displaying clean video with optional key images.
Selecting video signals for the HDMI output port.
Assigning switcher processed key cut signals to AUX outputs.
Configuration for additional output cards installed in slots C and D.
Functionality for grouping auxiliary outputs for simultaneous switching.
Guide to selecting video sources for M/E and KEY/AUX buses.
How to change M/E bus mode between PGM/PST and A/B.
Procedure for assigning and using the SHIFT function for signal selection.
Overview of available transition types for M/E, KEY1/2, and KEY3/4.
Description of the transition block buttons and their functions.
A quick reference table for available transitions by bus and type.
How to perform black transitions using the BLACK TRANS button.
Procedures for performing CUT, MIX, and WIPE background transitions.
How to perform key transitions like CUT, MIX, and Pattern using M/E1 KEY1.
Procedure for performing background and key transitions simultaneously.
Explanation of how to perform pattern transitions for background and key.
Guide to selecting WIPE patterns using menus or the Direct Pattern function.
Categorization of WIPE preset patterns and their modification settings.
Information on how modified patterns are indicated in the menu display.
Step-by-step example of adding a border effect to background transitions.
Example of adding a border effect to KEY1 transitions using Pattern 117.
Procedures for resetting modified patterns and WIPE menu settings.
Details on WIPE pattern settings for various pattern number groups.
Overview of key features including types, effects, and output options.
Explanation of how Luminance Key (Self Key) works and is set up.
Description of the Full Key function which displays the key insert signal.
Explanation of Bus Key (External Key) using separate images for source and insert.
Function to automatically select Key Source when Key Insert is selected.
Using internally generated MATT as key fill and setting different colors.
Replacing key fill images using AUX bus while maintaining key shapes.
How to adjust key signal, its composition, and transparency using Clip and Gain.
Method for creating a key signal using a chroma component.
Fine adjustments for Chroma Key including edges, gain, clip, hue, and color.
Using mask and invert functions for all keys, including BOX Mask and Signal Mask.
Adding border type edges to KEY1 and KEY2 with adjustable width, transparency, and color.
How to change the destination of KEY3 and KEY4 to AUX outputs.
Procedure for changing the layer order of KEY1/KEY2 and KEY3/KEY4.
Steps to enable 2D DVE effects for keys by setting the 2D DVE item to ON.
How to change the position of key images using the menu or joystick.
Adjusting key image size and aspect ratio using the joystick or menu.
Adding a FADE effect to make backgrounds transparent.
Adding rotation effects to key images around X, Y, and Z axes.
Trimming the key image from all four directions.
Applying MONO COLOR, DEFOCUS, and PAINT COLOR effects.
Adjusting inside and outside borders independently, including width, softness, and color.
Procedure for capturing program images using STILL1.
How to display captured still images on PGM bus, AUX outputs, or key images.
Methods for saving still images to backup memory manually or automatically.
Using HVS-39MB to automatically save still and clip data.
Procedure for manually loading backup data from STILL1-4 or CLIP1-4.
How to delete backup data for STILL1-4, CLIP1-4, and ALL.
Setting up automatic loading of saved data at switcher startup.
Procedure for recording video to clips through STILL1.
How to record AUX1 video and AUX2 key signals simultaneously to clips.
Examples of playing clips on PGM bus and KEY1.
Procedure for clearing clip data from memory.
Diagram illustrating the CG WIPE sequence parameters.
Visual example of CG WIPE video playback.
Step-by-step guide for CG WIPE operation using STILL1 and KEY1.
Example of CG WIPE operation using VDCP1 and KEY1.
How to save CG WIPE settings using Direct Pattern and event memory.
Summary of CG WIPE menu settings for different playback sources.
Procedure to assign multiviewer video to an AUX output bus.
How to select the split-screen type (4, 10, or 16-way) for multiviewer.
Guide to selecting video sources for each split area in the multiviewer screen.
Configuration options for each split area, including titles and positioning.
Displaying audio level meters for embedded audio on multiviewer screens.
Setting safety area markers, aspect ratio, and center markers on outputs.
Applying a frame border to split-screen areas to emphasize channels.
Displaying tally indicators (frame and marker) for On-air and next output status.
Procedure for saving control panel setup statuses as events.
Methods for recalling saved events using DIRECT mode or the RECALL button.
Setting write protection for memory buttons to prevent accidental data changes.
Procedures for deleting data for a specific event, event page, or all event data.
Configuring default settings for the EVENT STORE menu.
Recalling desired panel setup automatically when the switcher starts.
List of functions and information accessible for sequence operations.
List of functions not available for sequence control.
Examples demonstrating how to create and manage sequences.
Procedures for recalling and playing back sequences.
Explanation of SEQUENCE mode and SEQ EDIT mode for keypad operations.
Examples demonstrating sequence memory operations like overwrite protection and deletion.
Procedure for saving sequence data to a USB memory stick.
Procedure for recording and storing macros.
How to execute recorded macros, including Direct mode operation.
Step-by-step example of recording and executing macros.
Second operation example demonstrating macro recording and execution.
Operations related to macro memory: overwrite protection and naming.
Procedures for deleting macro data for a single macro, a macro page, or all macro data.
Assigning macros to bus buttons and changing KEY/AUX bus buttons to macro buttons.
How to attach and remove macros from control panel buttons.
Information about using USB flash memory for storing and retrieving data.
List of supported file formats for images and system data.
Procedure for saving panel settings to a USB flash memory device.
How to load setting data and image files from USB flash memory.
Navigating through directories on the USB flash memory.
Procedure for deleting files from the USB flash memory.
How to input or rename files stored on USB flash memory.
Overview of color correction features and assignment of signals.
Detailed steps for adjusting color levels using Balance, Differential, and Sepia modes.
Adjusting signal level thresholds for color correction outputs in Y/C or RGB mode.
Procedure for selecting the TV format and aspect ratio for the switcher.
Setting the timing for when and where crosspoints are switched.
Configuration for reference input and output signals.
Adjusting video signal levels using Proc Amp and Video Level Clip functions.
Displaying markers for safety area, center, and aspect ratio on outputs.
Passing, substituting, or blanking ancillary data in Program, Preview, and AUX outputs.
Procedure for setting the system date and time, including SNTP synchronization.
Adjusting buzzer volume, display brightness, and screen saver settings.
How to use USER BUTTONS for menu shortcuts or specific functions.
Default assignments and how to assign functions or menu pages to user buttons.
Examples of triggering user buttons by state changes like tally or GPI.
Procedure for rebooting the HVS-390HS system.
How to initialize system settings to factory defaults.
Controlling external devices via GPI interface and assigning pin functions.
Details on GPI IN connector and assigning functions to pins.
Configuration of GPI OUT connector and assigning functions to pins.
GPI IN/OUT configuration for the HVS-391OU rear panel.
Overview of tally output functions and color settings.
Setting tally colors for PGM, PST, and AUX buses.
Pin assignments for GPI/TALLY OUT connectors and function assignment.
Configuration for tally output using HVS-30TALR cards.
How to set up TALLY1 and connection settings with tally units via RS-422.
Example of connecting and configuring a VTR or VDCP device.
Procedure for assigning VTR or VDCP channels to RS-422 ports.
How to select a VTR or VDCP channel for control.
Selecting the VDCP model type when connecting to a VDCP device.
Control commands for VTR/VDCP playback and recording operations.
How VTR/VDCP functions can be assigned to user buttons.
Operations related to VDCP devices including playlist management and clip handling.
Procedure for creating playlists by selecting CLIP IDs and setting IN/OUT points.
How to jump to IN/OUT points or specified time codes within playlists.
Procedures for changing CLIP IDs and deleting clips from the connected device.
Methods for clearing playlists and copying data between playlists.
Procedure for creating new clips by recording video and key signals using VDCP.
Procedure for assigning router channels to RS-422 ports and configuring settings.
Enabling title link display to show router video titles on the control panel.
Methods for controlling router crosspoint switches using the GUI or bus buttons.
How to view current destination/source settings (crosspoints) on the router.
Procedure for saving and loading router crosspoint settings.
Switching multiple crosspoints simultaneously using stored data.
Using TSL protocol to send tally information to TSL devices.
Procedure for assigning TSL to RS-422 ports for title and tally linking.
Configuring title links to display router video titles on the switcher.
Configuring TSL tally connection similarly to MFR series.
Procedure for connecting HVS-390HS to an Audio Mixer via RS-422.
How to assign an audio mixer channel to an RS-422 port.
Enabling Audio-Follow-Video to set audio playback to follow video images.
Settings for controlling the editor, including protocol selection and bus control.
Configuration of connection settings with an editor via the EDITOR port.
Connecting HVS-391OU to HVS-390HS via Arcnet and ARCNET menu settings.
Connecting to LAN via Ethernet for computer connection or data transfer.
Procedure for sending and receiving image data via Ethernet using FTP.
Displaying current status of cooling fan, power, and genlock.
How to check software and FPGA firmware versions installed in the switcher.
Checking the status of installed hardware and software options.
List of software and firmware upgrade files for HVS-390HS.
List of software and FPGA firmware upgrade files for HVS-391OU.
List of software upgrade files for HVS-30RU.
Step-by-step guide for upgrading the switcher's software and firmware.
Procedure for upgrading the HVS-390HS software.
How to reset switcher settings by loading the 'DATA.ALL' file from USB.
Procedure for creating and loading bitmap images for bus buttons.
Diagram showing system connection with control and remote panels.
Procedure for connecting HVS-30RU units to the HVS-390HS via RS-422.
Connecting up to three control panels (HVS-392OU, HVS-392ROU, HVS-391OU) via Arcnet.
Operating the switcher in 2.5 M/E mode with the HVS-39EXTME option.
Procedure for connecting and setting up a control panel for P/P control.
Assigning P/P program and preset images to AUX outputs.
Assigning video sources to P/P bus buttons on HVS-30OU.
How to freely assign and use KEY3 and KEY4 on the P/P.
Information on transitions and GPI functions available in P/P mode.
Assigning video sources to PGM/PST bus buttons on HVS-30RU.
Assigning functions or menu pages to USER buttons on HVS-30FP.
Detailed specifications of the HVS-390HS and HVS-391OU units.
Diagrams showing the external dimensions of the HVS-390HS unit.
List of supported file extensions and formats for data transfer.
Visual list of available WIPE transition patterns.
Visual list of available DVE transition patterns.
Guide to controlling the HVS-390HS switcher via a web browser.
Minimum system requirements for the computer used with the web control feature.
Instructions for setting the IP address of your computer to connect to the HVS-390HS.
Steps to launch the web browser and connect to the HVS-390HS unit.
Description of how clicking menu buttons in the HOME screen opens relevant pages.
Information displayed in the upper center of the HOME screen.
Indication of alarms for power, fan, or loss of external synchronization.
Procedure for executing macros through the web interface.
How to edit macros by deleting actions or adjusting duration.
Procedure for loading events from the event list.
Procedure for saving events to the event list.
Loading, saving, deleting sequence files, and playing sequences.
Playing and editing sequences, including step control and durations.
System setup options including Format, REF I/O, ARCNET, Ethernet, RS-422, Time, Init, Reboot.
Input settings including Signal, Resize, FS, Still Control, Proc Amp, Clip, and Rename.
Output settings including Marker, Clean/Preview, Ancillary Data, and Out XPT.
Panel settings, including TRS CTRL for button switching modes.
GPI/Tally settings including Tally Color, GPI IN, GPI OUT, and Tally Output.
Function settings including M/E Key, Virtual, AUX Link, and other functions.
Procedures for capturing, recording, and playing still images and clips.
Backing up and loading still images, and setting automatic still loading.
Using HVS-39MB for backing up and loading still and clip data.
Setting colors for MATT1 and MATT2 using HSL values or preset colors.
Procedure for specifying start/end colors and patterns for gradient matte.
Settings for editor control via the EDITOR tab.
Settings for TSL TALLY via the TSL TLY tab.
Control settings for VTR and VDCP devices.
Router settings and control options via the ROUTER tab.
Switching crosspoints on the GUI using DIRECT or PRESET modes.
Connecting to and setting up the Audio Mixer.
Settings for Insert Source, including Type, Source, and Invert.
Adjusting key edge properties like width, softness, and color.
Applying masks to keys, including BOX Mask, Signal Mask, and Preset Mask.
Chroma Key settings, including Chroma Key adjustments and color settings.
Adjusting key position, size, and aspect ratio.
Adding borders to key images, with adjustable width, softness, and color.
Applying sub-effects like Mono Color, Defocus, and Paint Color.
Resets each KEY menu to its default settings.
Assigning WIPE, DVE, and other patterns to buses.
Saving, deleting, and assigning patterns from the DIRECT pattern list.
Modifying assigned WIPE patterns for background and key buses.
Setting the transition rate in frames to complete transitions.
Limiting the fader range for transitions.
Setting the background layer for DVE images.
Performing black transitions using the BLACK button.
Setting up TIE transitions by successively clicking buses.
Displaying or hiding M/E banks, including P/P bank with HVS-39EXTME.
Selecting the number of displayed bus buttons (12, 20, or 28).
Overview of USER buttons and their assignment capabilities.
Selecting the type of assignment (MENU or Function) for user buttons.
Setting trigger conditions and functions for user buttons.
How to perform user button functions via the pop-up menu.
Copying or swapping keyer settings between keyers.
Checking the alarm status of cooling fan, power, and genlock.
Verifying software and FPGA firmware versions installed in the switcher.
Checking the status of installed hardware and software options.
Accessing menu pages via shortcuts in the pop-up menu.
Executing user button functions from the pop-up menu.
Resetting parameters to their default values via the pop-up menu.
Recommended operations for backing up panel settings.
| Multi-Viewer Outputs | 2 |
|---|---|
| Mix/Effects | 2 M/E |
| Frame Synchronizers | 16 |
| Keyers | 4 per M/E |
| Frame Rate | 59.94Hz, 50Hz, 29.97Hz, 25Hz, 23.98Hz |
| Audio Inputs | 16 x embedded audio |
| Control Interface | Ethernet, RS-422 |
| Control Panel | Dedicated control panel available |
| Power Supply | AC 100-240V, 50/60Hz |
| Audio Outputs | 16 x embedded audio |