37
4-2-4. Changing Settings or Values Using the Joystick
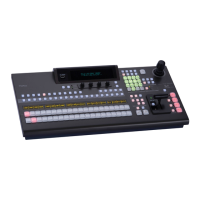
Users can also use the joystick to set position, size and color settings to specific parameters.
The menu pages controllable from the JOYSTICK block are shown in the table below.
MATT, KEY and MV menu
Menu Menu Page Menu Menu Page
MATT1 BUS MATT1 COLOR MATT2 BUS MATT2 COLOR1
BUS MATT2 COLOR2
KEY1
KEY2
BORDER COLOR
POSITION SIZE (*1)
LOCAL ROTATION (*2)
CENTER POSITION
INSERT MATT COLOR
KEY EDGE COLOR
KEY AUTO CK
KEY3
KEY4
BORDER COLOR
POSITION SIZE (*1)
LOCAL ROTATION (*2)
CENTER POSITION
INSERT MATT COLOR
INPUT SIDE MATT COLOR
(*1) To open the related menu, quickly press KEY1-4 twice in the BUS SELECT section, then quickly
press POS twice in the Joystick section.
(*2) To open the related menu, quickly press KEY1-4 twice in the BUS SELECT section, then quickly
press ROT twice in the Joystick section.
WIPE MODIFY menu
Pattern No. Menu page
All BORDER COLOR
0 to 99 POSITION ANGLE (*1)
140 to 162 WARP LIGHT COLOR
(*1) Pressing WIPE POS in the Joystick section opens the related menu.
How to Use the Joystick
Users can simultaneously perform up to three item settings using the joystick as below.
(1) Open a menu page you want to set. The position, rotation and color setting pages can be
directly open using the buttons on the Joystick section.
ME1 WPBG: BORDER COLOR :RECALL : 2/2
BDR COL :S=66.3 L=5.4 H=3.5 : >BLUE :
(2) Press MENU in the joystick block.
(3) Move the joystick to the desired direction to change three items simultaneously.
X-axis Moves the joystick left and right (for S item above).
Y-axis Moves the joystick up and down (for L item above).
Z-axis Twist the joystick clockwise or counterclockwise
(for H item above).
MENU Button
Pressing the MENU button in the Joystick block allows the user to control menu items with
the joystick if controllable items are included in the displayed menu.

 Loading...