27
WEB CONTROL
9-3-2. VDCP Control
>> Manual Sec. 25-6. "VDCP Control"
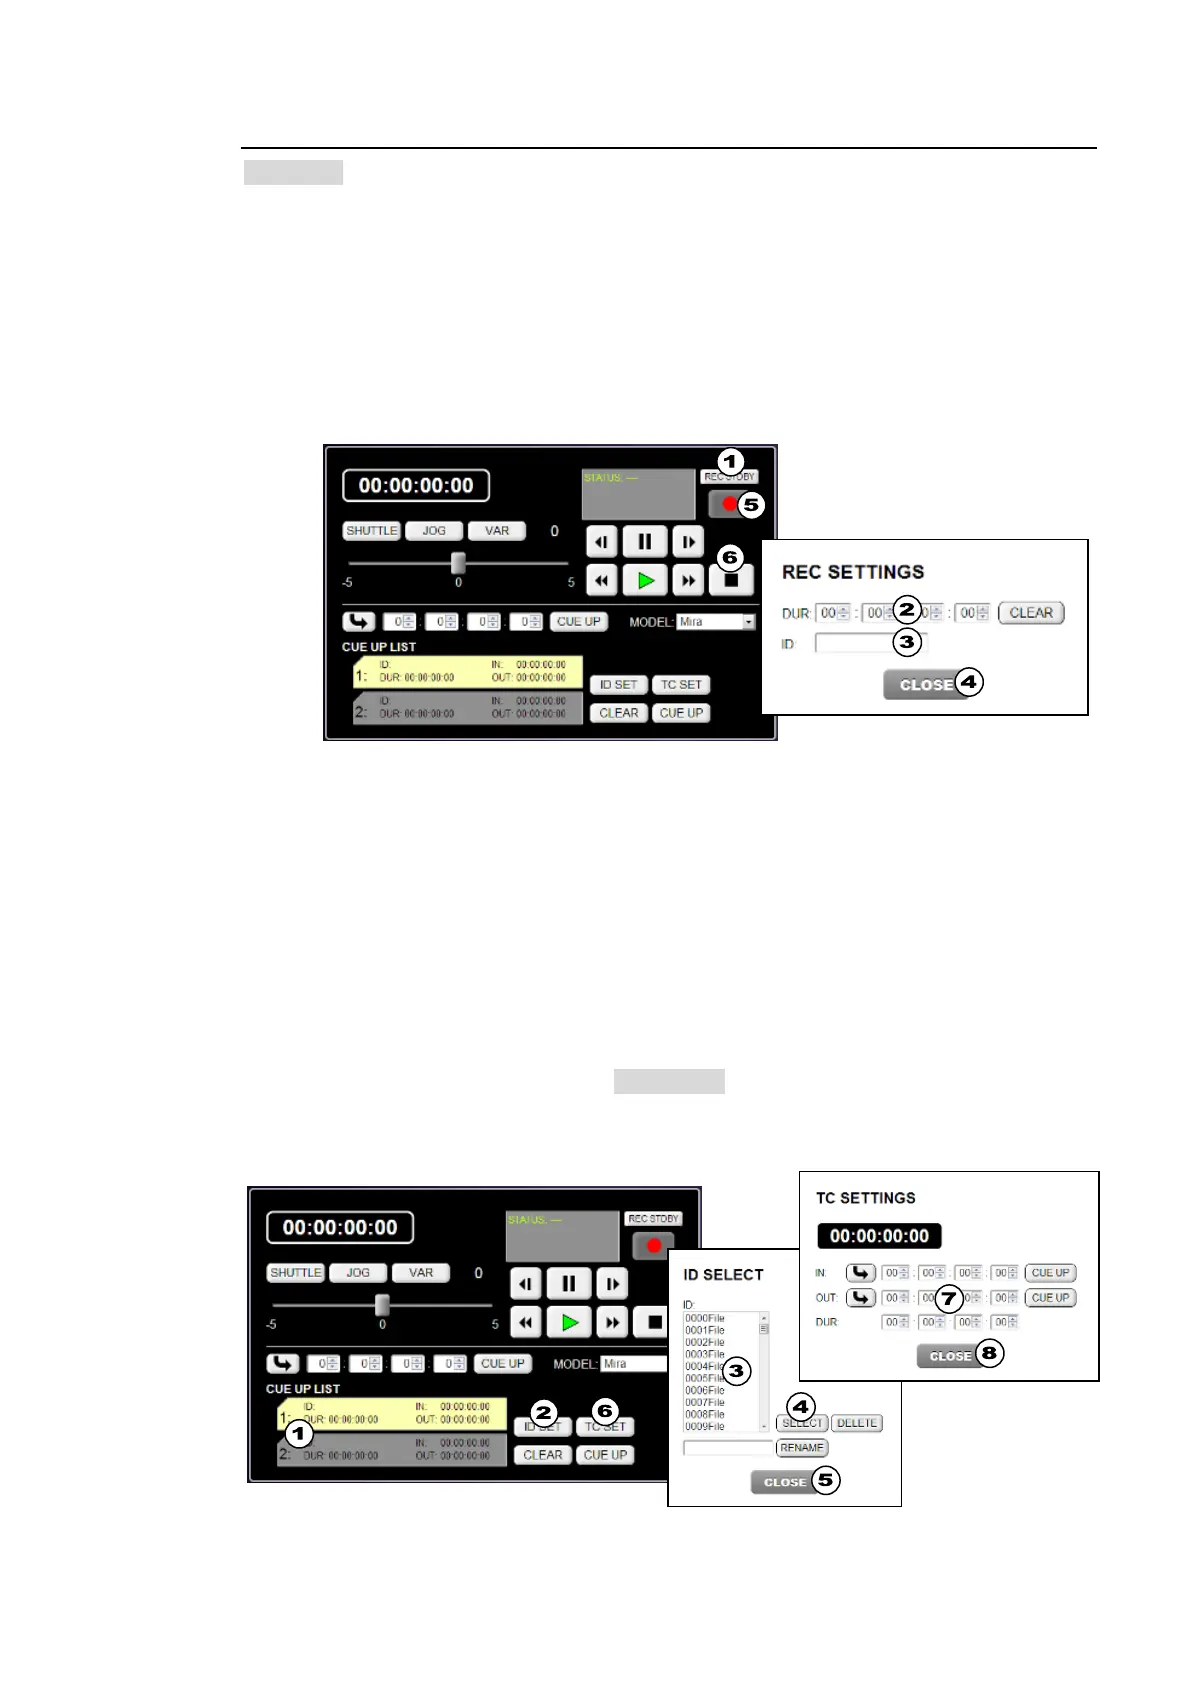
Recording Video
(1) Click REC STDBY. A dialog box will pop-up.
(2) Set the recording time in the dialog box. If set to 00:00:00:00, recording continues until
STOP is clicked.
(3) Enter the CLIP ID (clip name) to which the clip is saved.
(4) Click CLOSE to close the pop-up dialog.
(5) Click REC to start recording.
(6) To stop recording, click STOP. (Recording will automatically stop if the duration value is
set.)
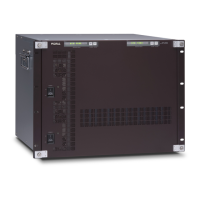
Setting Up Playlists
Two playlist, List 1 and 2, can be saved to the switcher. To copy the playlist contents, drag
and drop from one list to the other.
(1) Click to select List 1 or 2 under CUE UP LIST. (The selected list will turn to yellow.)
(2) Click ID SET to pop-up the ID SELECT dialog box.
(3) Select a clip to be played in the dialog box.
(4) Click SELECT. The selected clip will be cued up (and displayed in the List 1 or List 2
label.")
(5) Click CLOSE to close the dialog box.
(6) Click TC SET to pop-up the TC SETTINGS dialog box.
(7) In this dialog, set IN and OUT points (or Duration). (Once the values are set, they will be
displayed on the List 1 or 2 label.) If 00:00:00:00 is set for both IN and OUT points, clips
will be played back from Start to End. Clicking a CUE UP on the dialog moves the
play-head to the IN or OUT timecode.
(8) Click CLOSE to close the dialog box.