11 Job Status
292
Job Status
11
2
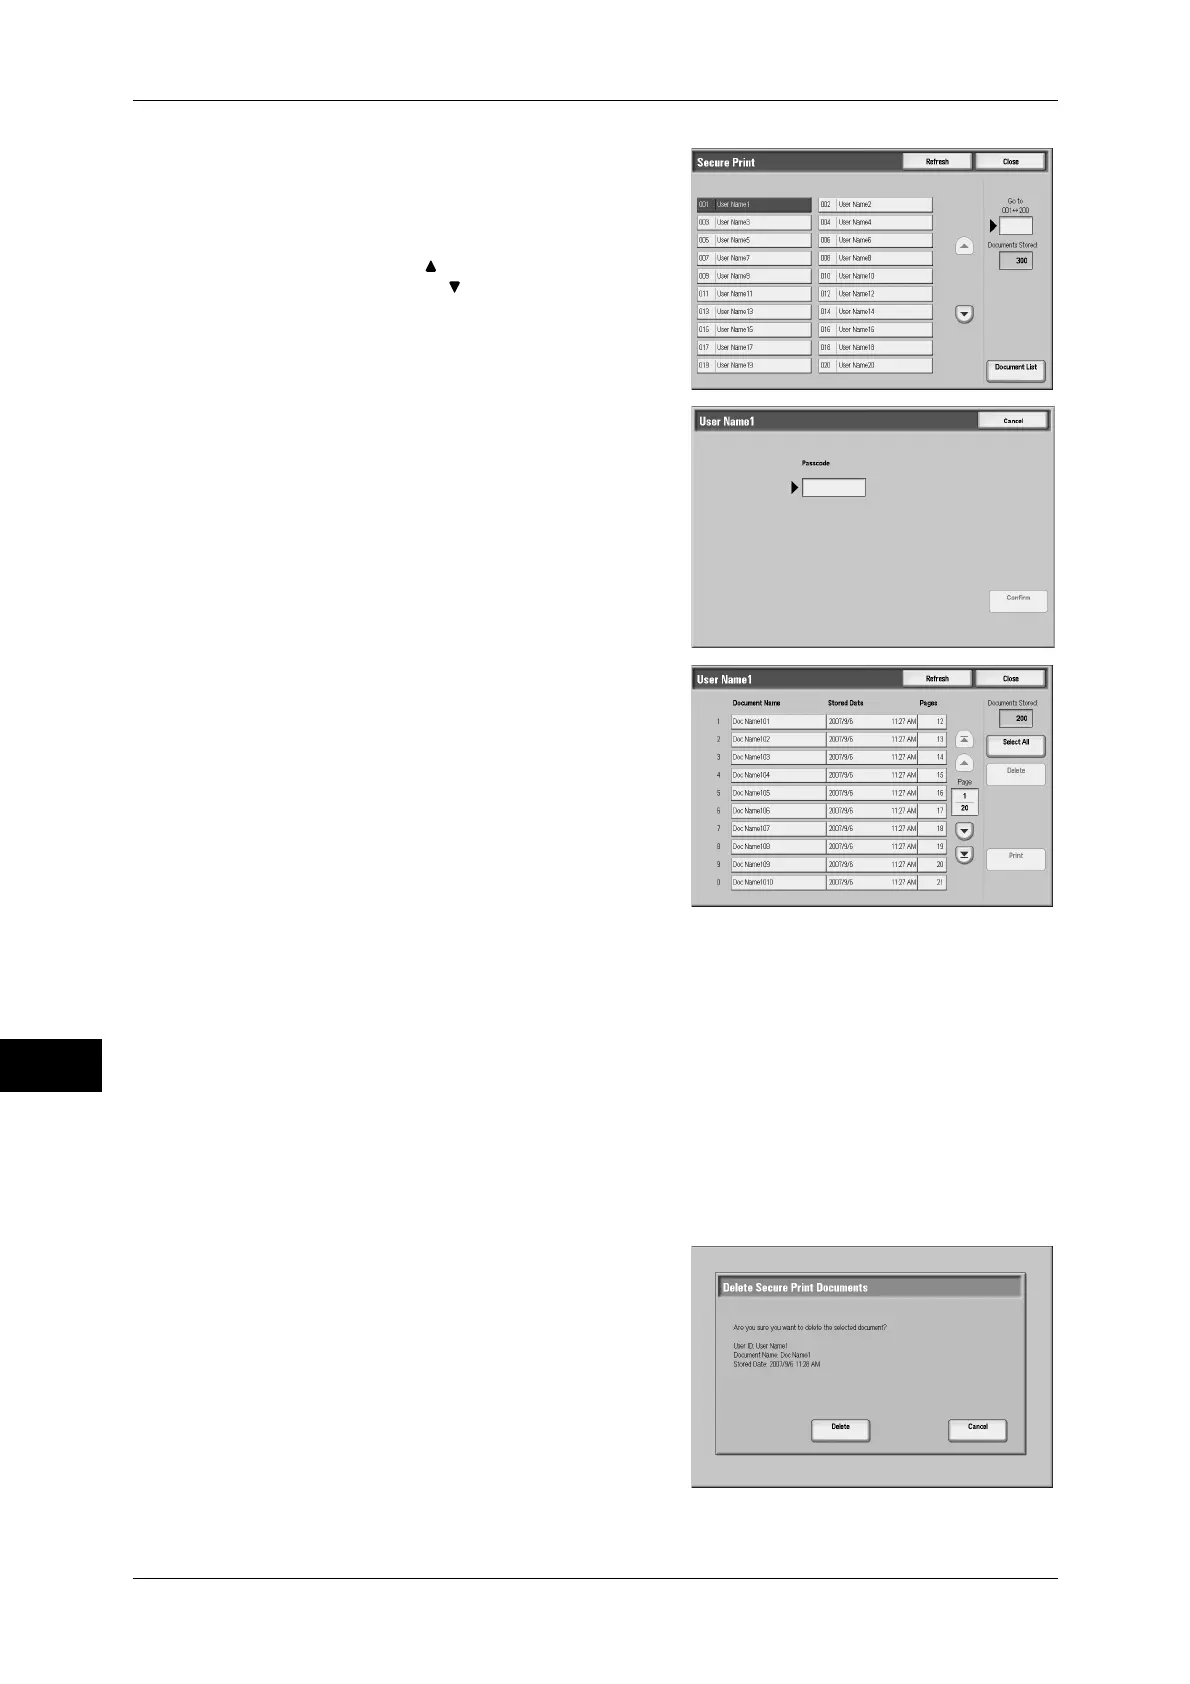
Select the user to be checked, and select
[Document List].
Note • Select [Refresh] to display the updated
information
• Select [ ] to return to the previous
screen or [ ] to move to the next screen.
• Entering a 3-digit billing ID with the
numeric keypad specifies the user
directly.
3
Enter the passcode, and select [Confirm].
Note • If no passcode is assigned, the passcode
entry screen will not appear.
4
Select the document to be printed or
deleted.
5
When printing, specify the number of print
using the numeric keypad.
6
Select any item.
Select All
Selects all documents. To deselect all the
documents, select this button again.
Delete
Deletes the selected document.
Note • If documents with the same Billing ID are all deleted, the Billing ID will be deleted.
Refer to "When [Delete] is Selected" (P.292).
Print
Prints the selected document.
Refer to "When [Print] is Selected" (P.293).
When [Delete] is Selected
1
Select [Delete].
Delete
Deletes the document.
Important • Once the document is deleted, it cannot
be restored.
Cancel
Cancels deleting the document.

 Loading...
