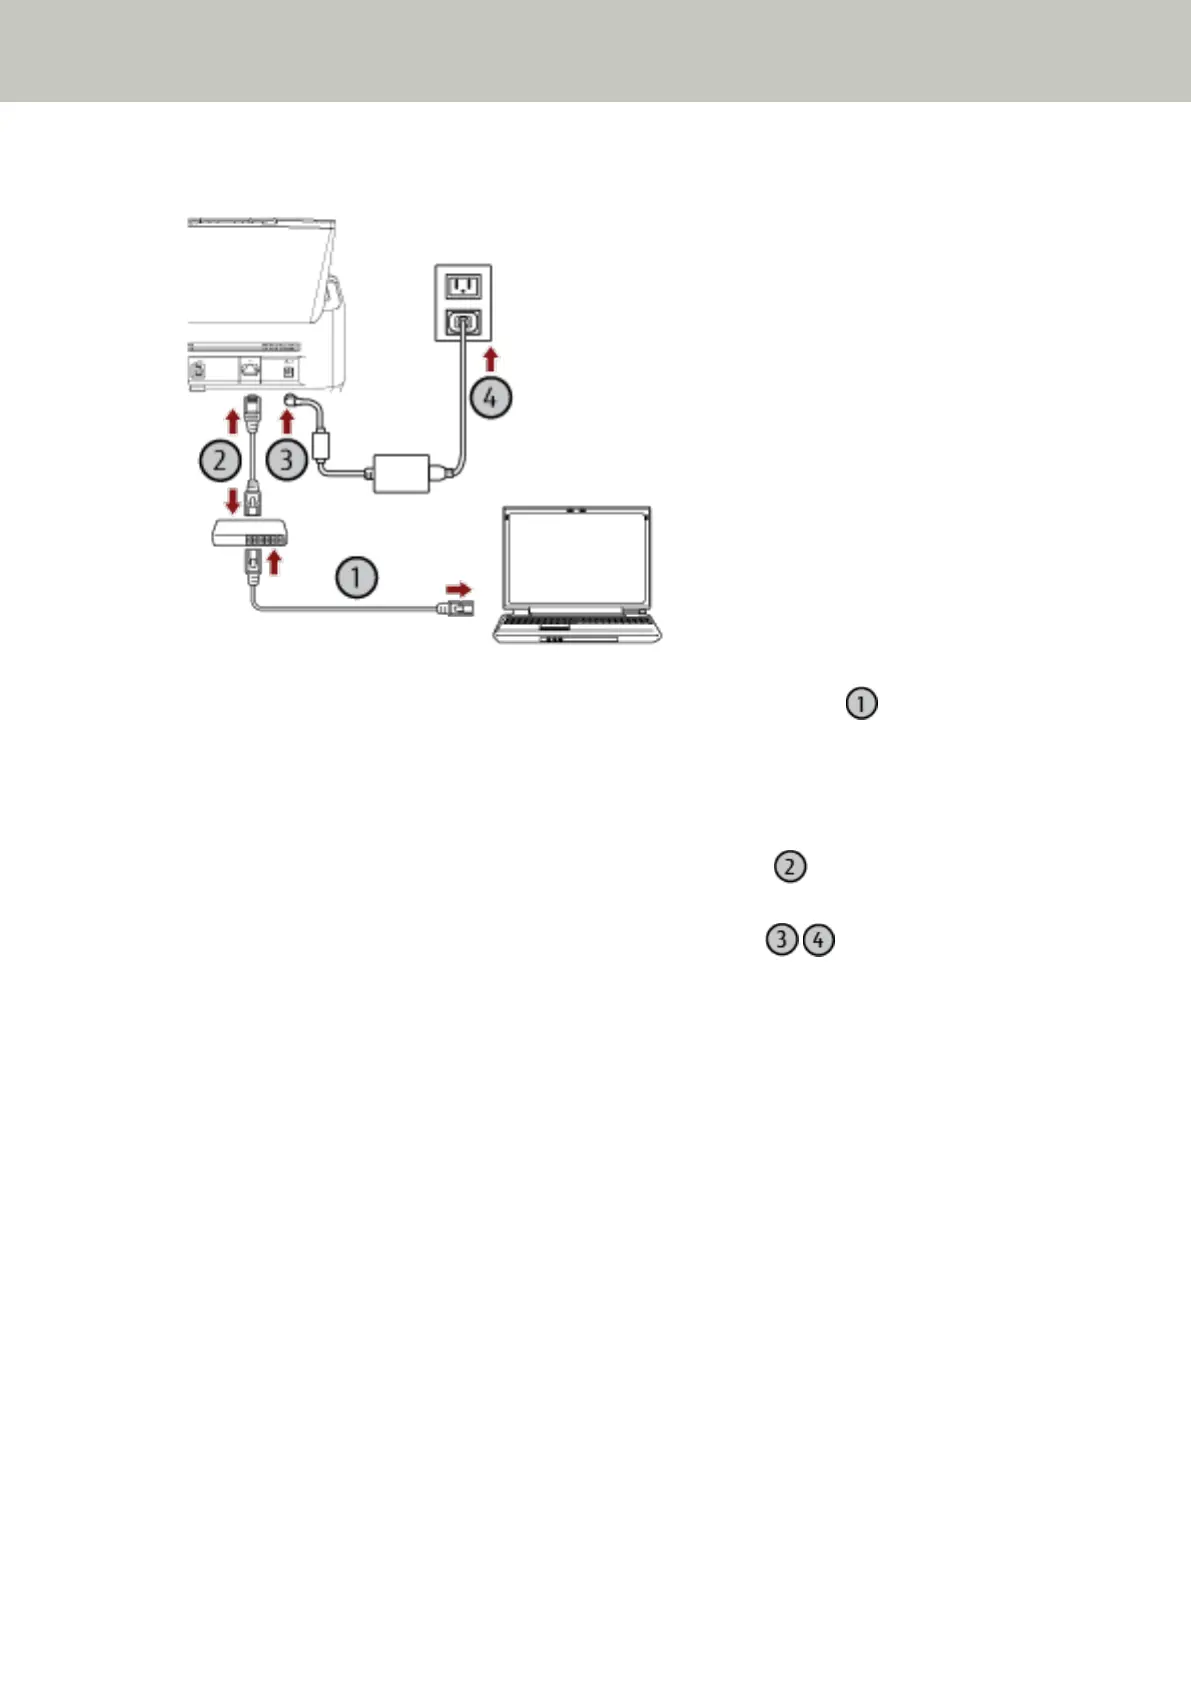
6 Connect the scanner to the computer as follows.
a Connect the computer to a network device via a wired LAN or Wi-Fi ( ).
The procedure below shows an example of connecting the computer to a network device via a wired
LAN.
For details about how to connect the computer to the network, refer to your computer manual.
b Connect the scanner to the network device via a wired LAN ( ).
c Connect the power cable to the scanner and the AC outlet ( , ).
d Turn on the scanner.
For details, refer to How to Turn the Power ON (page 72).
7 Click the [Select a Scanner] button in the [How to Connect the Scanner] window.
The [Scanner Selection Tool] window appears.
8 In the scanner list, select the check box for the scanner that you want to use.
The default scanner name is "(Model Name) - (Serial No.)".
The serial number is printed on the label on the back of the scanner, so remove the ADF paper chute (feeder)
to check the number. For details, refer to Checking the Product Label (page 332).
For details about Scanner Selection Tool, refer to the Network Setup Tool for fi Series Help.
9 Click the [OK] button to close the [Scanner Selection Tool] window.
10 Click the [Exit] button in the [fi Series Setup] window.
11 Start an image scanning application, and select the scanner to be used for scanning.
The scanner name depends on the scanner driver type and the scanner connection method.
Select the scanner name that is used for a wired LAN connection. For details, refer to the help for the scanner
driver.
Scanner Setup
50