Figure 67: Installing the SAS expander board (B)
▶
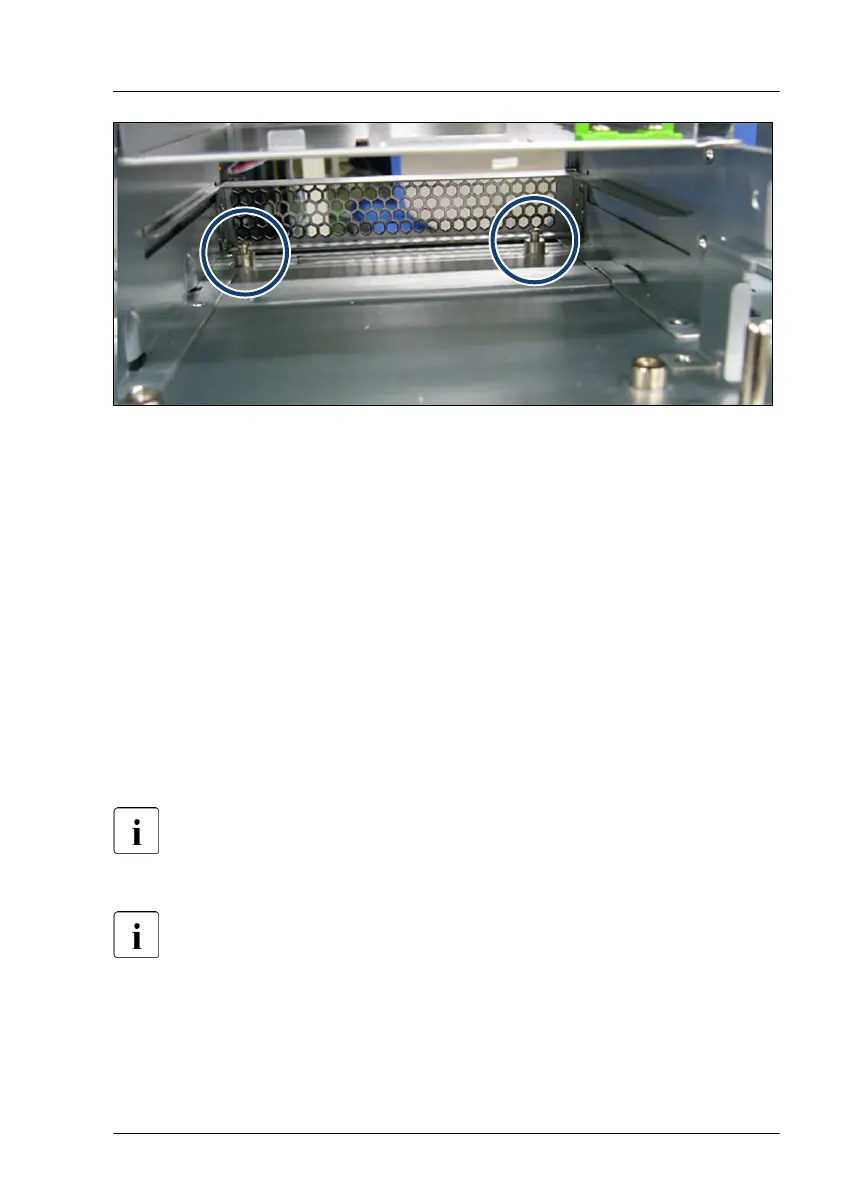
Install the new SAS expander board in a slight angle and push it in direction
of the arrow
. The SAS expander board must stand on two the stand-offs
(see circles) on the rear side of the bay.
▶
Fasten the SAS expander board with the two screws.
▶
Connect the mini-SAS cables in the following order:
–
yellow marked mini-SAS cable to connector "PACC EP_1 J1"
–
red marked mini-SAS cable to connector "SAS 1-2 J6"
–
blue marked mini-SAS cable to connector "SAS 3-4 J5"
–
power cable to connector "PWR 1"
–
I2C cable to connector "EXP I2C"
Run the mini-SAS cables around the fan connectors to bring the cables
in the correct position.
▶
Secure the SAS cables with the cable clamp.
Install the left mini-SAS cable in the cable clamp first then the middle
and the right cable.
▶
Install the FBU carrier into the bay (see "Installing the FBU carrier" on
page 231).
Hard disk drive (HDD) / solid state disk (SSD)
RX4770 M5 Upgrade and Maintenance Manual 161
 Loading...


