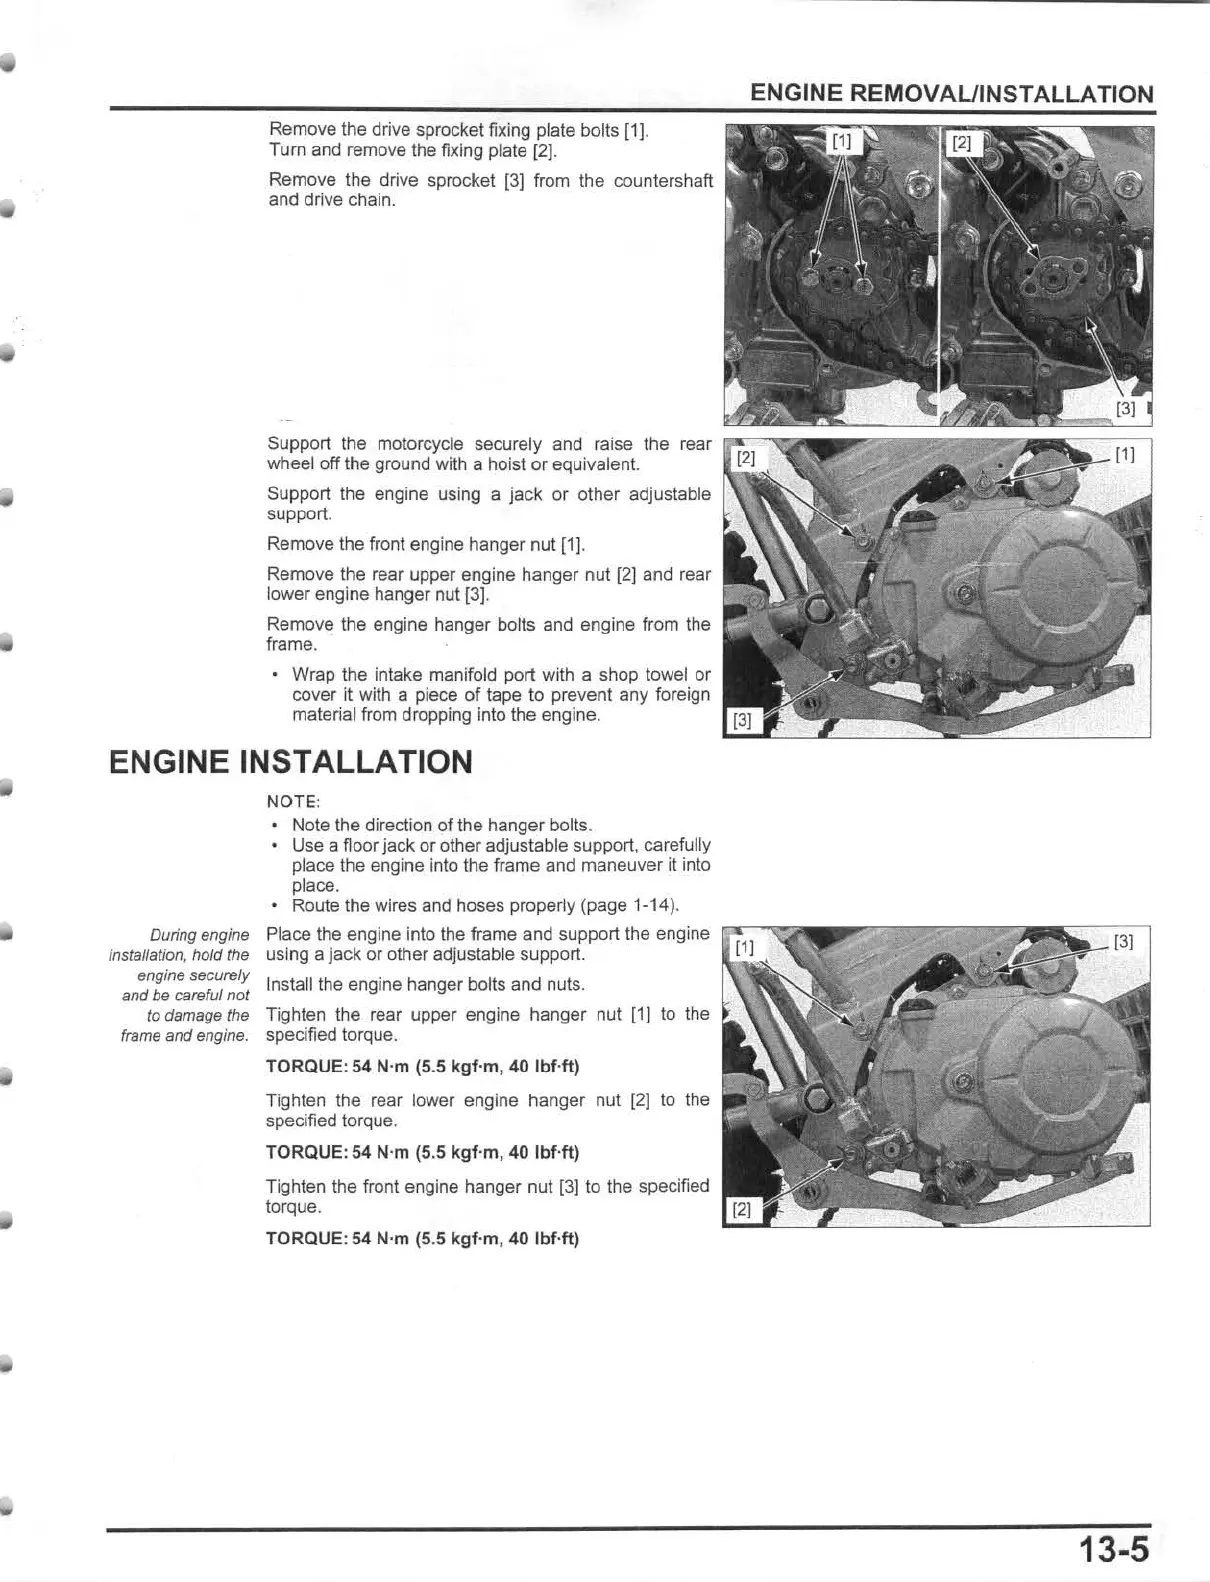
Remove the drive sprocket fixing plale bolts [1].
Tum
and remove the fixing plale [2j.
Remove the drive sprocket
(3)
from the counlershaft
and drive chain.
ENGINE
REMOVAUINSTALLA
TION
Support the motorcycle securely and raise the rear
..
-..."
wheel
off
the ground with a hoist
or
equivalent.
Support the engine using a jack or other adjustable
support.
Remove the front engine hanger
nul
[1J.
Remove the rear upper engine hanger nut
[2J
and rear
lower engine hanger n
ut
[3].
Remove the engine hanger bolls and engine from Ihe
frame.
Wrap the
in
take manifold port with a shop towel or
cover
it
with a piece
of
tape to prevent any foreign
malerial from dropping into
the
engine.
ENGINE INSTALLATION
During
engine
installation,
hold
the
engine
securely
and be careful
not
to
damage the
frame
and
engine.
NOTE:
Note the direction of the hanger bolts.
Use a floor
jack
or
other
adjustable support, carefully
place the engine Into the frame
and
maneuver
it into
place.
Route
the
wires and hoses properly (page 1-14).
Place the engine into the frame and support the engine
using a
jack
or other adjustable support.
Install the engine hanger bolts and nuts.
Tighten the rear upper engine hanger nut [1) to the
specified torque.
TORQUE: 54 N'm (5.5
kgf
'm, 40
IbHt)
Tighten the rear lower engine hanger nut
[2]
to the
specified torque.
TORQUE: 54 N'm (5.5 kgf-m, 40
IbHt)
Tighten the front engine hanger nut [3) to
the
specified
torque.
TORQUE
: 54 N'm (5.5
kgf'm
, 40
IbHt
)
13-5







 To Next Page