CHARGING SYSTEM INSPECTION
CURRENT LEAKAGE INSPECTION
Remove
the left side
cover
(page 2-4),
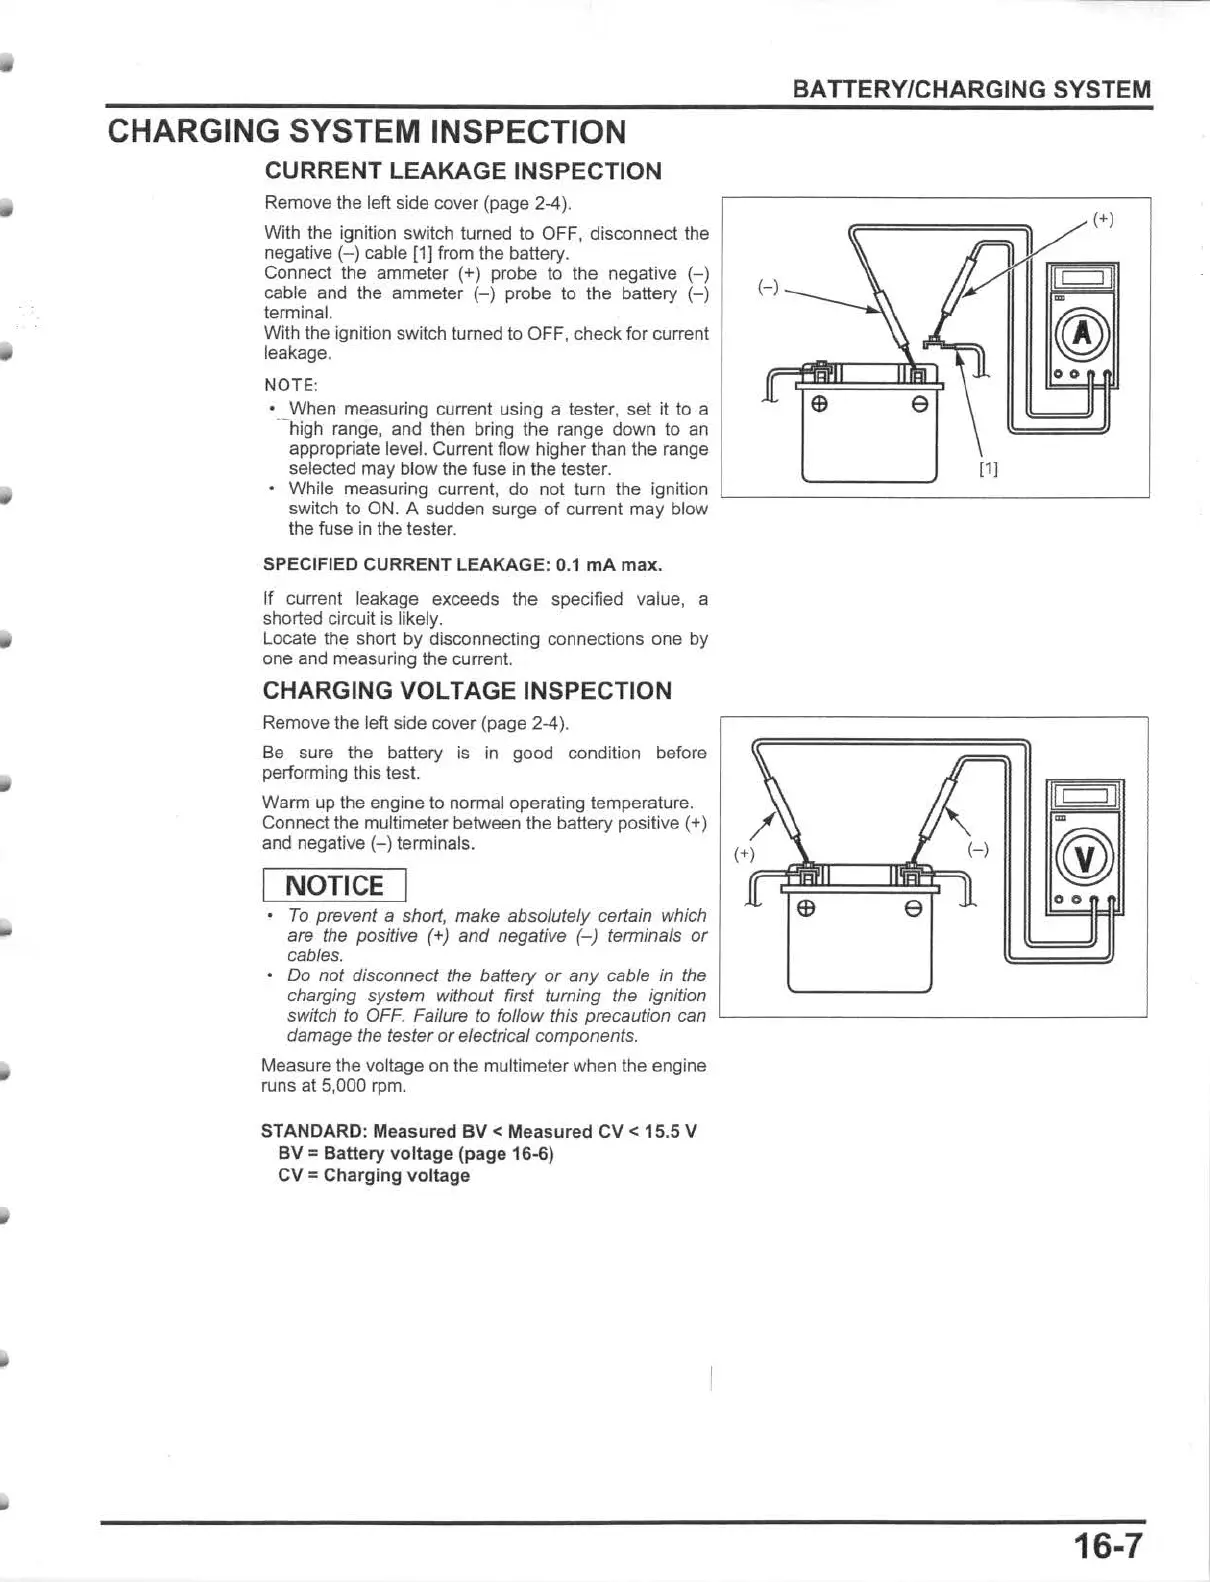
With the ignition switch turned to OFF, disconnect t
he
negative (- ) cable
[1J
from
the
battery
.
Connect the ammeter (+) probe to the negative (- )
cable
and
the ammeter
(-)
probe
to
the banery
(-)
terminal.
With
the ignition switch turned
to
OFF
,
check
for
current
leakage.
NOTE
:
• When
measuring
current using a
tesler
,
set
it
to
a
--
high range, and then bring the range down to
an
appropriate level.
Current
flow
higher
than
the
range
selected
may
bl
ow
the
fuse
in
th
e tester.
While measuring current, do not turn the ignition
switch to
ON.
A sudden surge
of
current may blow
the
fuse
in
the
les
t
er
.
SPECIFIED
CURRENT
LEAKAGE
: 0.1
rnA
max.
If current leakage exceeds the specified value, a
shorted circuil
is
likely.
Locate the short
by
disconnecting
connections
one
by
one
and
measuring
the current.
CHARGING VOLTAGE INSPECTION
Remove
the left
side
cover
(page
2-4)
.
Be sure the
battery
is
in
good
condition before
performing this test.
Warm
up t
he
engine
to
normal operating temperature.
Connect the multimeter
between
the
battery
positive (+)
and
negative
(-)
terminals.
I
NOTICE
I
To
provent a short,
make
absolutely certain which
are
the
positive (+) and negative
(-
) terminals or
cables.
Do not disconnect
the
battery
or
any cable
in
the
charging system without first turning the ignition
switch to
OFF.
Failure to follow this precaution can
damage
the
tester or electrical components.
Measure
the voltage on t
he
multimeter
when
the
engine
runs
at
5,000 rpm.
STANDARD:
Measured
BV
<
Measured
CV
<
15
.5 V
BV
=
Battery
voltage
(page
16-6)
CV
=
Charging
vo
lt
age
BATTERY/CHARGING SYSTEM
(+)
=
-
00
[1
[
16-7