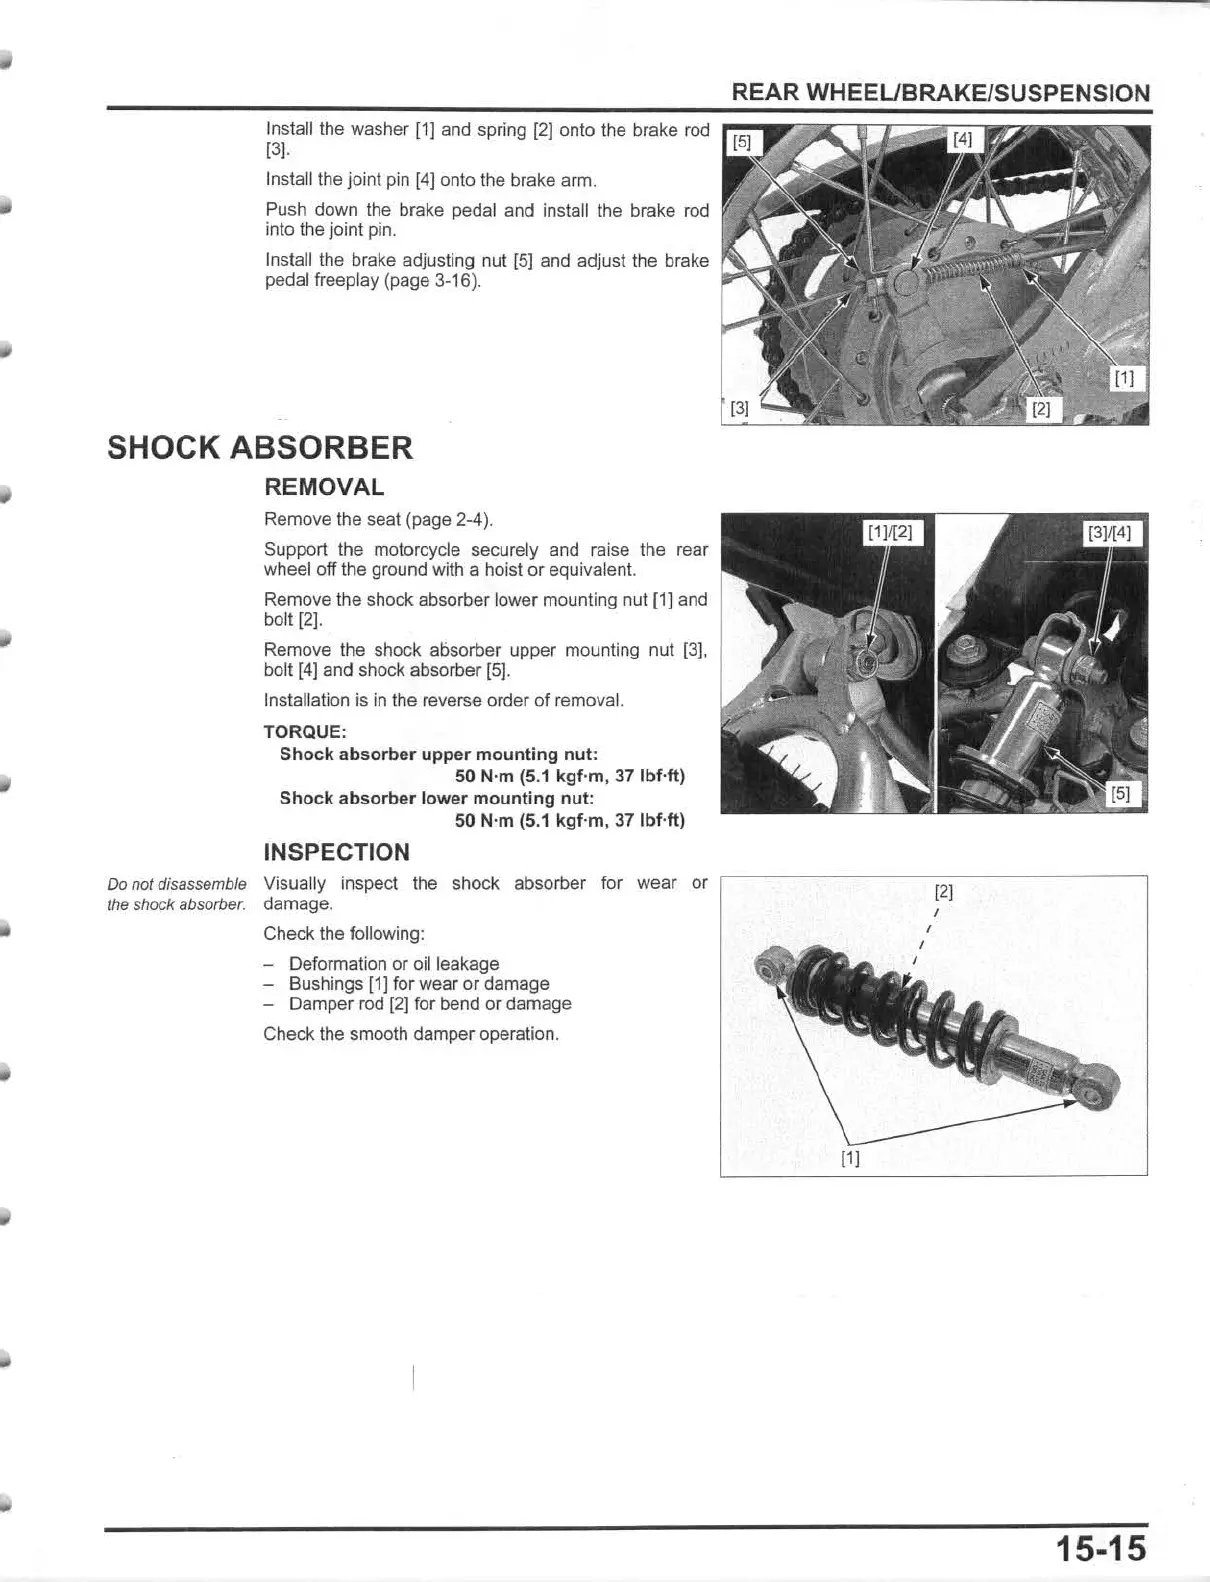
Install the washer
(1]
and
spring
(2)
onto
the
brake
rod
131·
Install the joint pin [4] onto t
he
brake arm.
Push down the brake pedal and install the brake
rod
into
the
j
Oint
pin.
Install the brake adjusting nul [5] and adjust the brake
pedal freeplay (page 3-16).
SHOCK ABSORBER
REMOVAL
Remove the seat (page 2-4).
Support the motorcycle securely and raise the rear
wheel off the ground with a hoist or equivalent.
Remove the shock absorber lower mounting nut
(1
) and
bolt
121
.
Remove the shock absorber upper mounting nut
(3),
bolt
(4)
and shock absorber
(5)
.
Installation is
in
the reverse order of removal.
TORQUE:
Sh
oc
k
absorber
upper
mounting
nu
t:
50
N'm (5.1
kgf
'm, 3
7Ibf-ft
)
Shock abs
orb
er
lo
w
er
mounting
nut
:
50 N'm (5.1
kgf
'm,
37
1bHtl
INSPECTION
REAR WHEEUBRAKE/SUSPENSION
Do not disassemble Visually inspect the shock absorber for wear or
,--------~
1
~
21
;-----
-
--,
the shock absorber. damage.
Check the following:
- Deformation or oil leakage
- Bushings
[1]
for wear or damage
- Damper
rod
(2)
for bend or damage
Check the smooth damper operation.
15·15