ADJUSTMENT
loosen
the rear
axle
nut
(1)
and chain adjuster lock
nuls [2].
Tum
both chain adjusting nuls [3) equally until the chain
slack is correc
t.
Make sure
the
both adjusters
[4)
end surface are
aligned with the index marks
[5J
on the swingarm.
TlQhten the rear axle nut
to
the specified torque.
TORQUE: 64 N'm (6.5
kgf
'm, 47
IbUt)
Tighten both chain adjuster lock nuts.
Recheck the drive chain slack and free wheel rotation.
MAINTENANCE
151
131
Check the rear brake pedal freeptay (page 3-16). adjust
l
~12~1'...::
~~~:~:::::~~::::::~:7-~
::.!~
--.J
if necessary.
Lubricate the drive chain with Pro Honda chain lube or
equivalent.
Wipe off
any
excess drive chain lubricant.
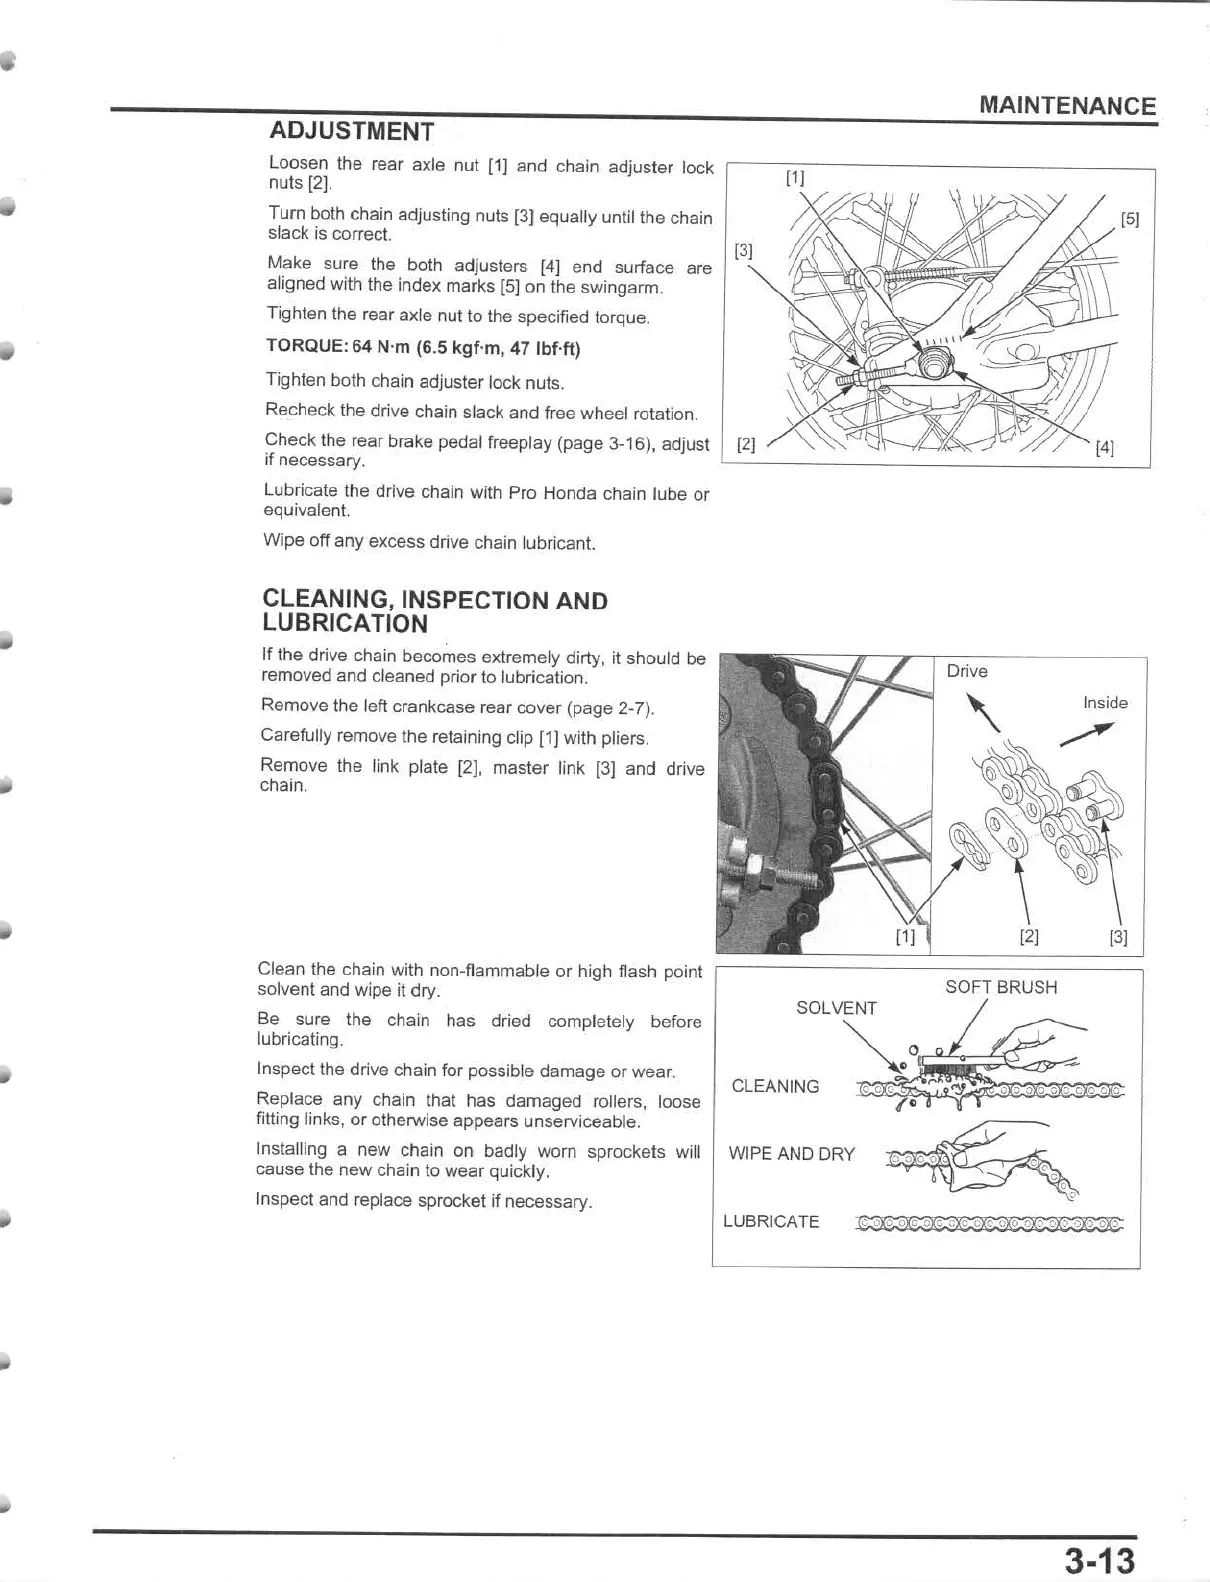
CLEANING, INSPECTION AND
LUBRICATION
If
the drive chain becomes extremely diny, it should be
removed
and
cleaned prior to lubrication.
Remove the left crankcase rear cover (page 2-7).
Carefully remove the retaining clip (1) with pliers.
Remove the link plate [2), master link (3] and drive
chain.
Clean the chain with non-flammable or high flash point
solvent and wipe it
dry
.
Be sure the chain has dried completely before
lubricating.
Inspeclthe
drive chain for possible
damage
or wear.
Replace
any
chain that has damaged rollers, loose
filling links,
or
otherwise appears unserviceable.
Installing a new chain on badly
wom
sprockels will
cause the
new
chain to
wear
quickly.
Inspect and replace sprocket if necessary.
Drive
Inside
131
SOFT BRUSH
SOLVENT
CLEANING
~
O~~~
_
;
'
;
O
~
O
~
O
~
O
;
O
~
O
!ll
O
ll
'
:!!:
'
WIPE AND DRY
~
LUBRICATE
~:~
3-13