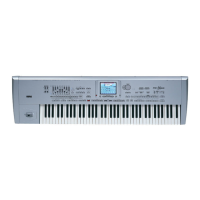
175
Sequencer operating mode
Record mode: Backing Sequence (Quick Record) page
Reference
Track names
Under the sliders, a label for each track is shown. Use the TRK.
SEL button to switch between the various track views.
MIC/IN Audio inputs.
UPPER1…3 Upper tracks.
LOWER Lower track.
Backing Sequence (Quick Record) recording
procedure
Here is the general procedure to follow for the Backing Sequence
(Quick) Recording.
1. Press SEQUENCER to enter the Song mode.
2. Press the REC button, and select the “Backing Sequence
(Quick Record)” option to enter the Backing Sequence
(Quick Record) mode. Now you can prepare your record-
ing parameters. (For more details, see “Record mode: Back-
ing Sequence (Quick Record) page” on page 173).
3. The last selected Style is currently selected. Should it not be
the right one, select a different Style to start recording with.
(See “Style Select window” on page 75).
4. The last selected Performance or STS is currently selected.
If you prefer, select a different Performance or STS. (See
“Performance Select window” on page 74, and “STS Select”
on page 75).
5. Select the status of the Backing Sequence grouped tracks,
using the Kbd/Pad and Ch/Acc parameters. (Kbd/Pad stays
for Keyboard and Pads; Ch/Acc stays for Chord and
Accompaniment, i.e. the Style tracks). To record all you
play on the keyboard, plus the automatic accompaniment,
leave their status to REC (see “Track status icons” on
page 170).
Warning: Tracks set to REC are automatically overwritten
when starting recording. Set a track to the PLAY or MUTE
status, when you don’t want to delete it. For example, if you
are recording a keyboard part on an existing Style track, set
the Ch/Acc parameter to PLAY, and the Kbd/Pad track to
REC.
6. Start recording by pressing the left (PLAY/STOP) but-
ton or the START/STOP button.
• By pressing the left (PLAY/STOP) button (or the
START/STOP button), you can record a keyboard intro
with no Style playing. After a count-in (see “Metro (Metro-
nome)” on page 174), you can start recording.
Play a solo intro, then start the auto-accompaniment by
pressing the START/STOP button.
• By pressing the START/STOP button you can start the
Style right at the beginning of the Song.
Since you can use any Style control, you could start with
the usual combinations (INTRO, ENDING, FILL… see
“Selecting and playing a Style” on page 40 for more infor-
mation).
Note: While in Backing Sequence mode, you can’t record the
SYNCHRO, TAP TEMPO/RESET, MANUAL BASS,
ACCOMPANIMENT VOLUME controls.
7. Play your music. You can even stop the Style by pressing
START/STOP. If you stop the Style while recording, start it
again with the START/STOP button.
8. When finished recording your performance, press the
(PLAY/STOP) button in the SEQUENCER 1 section. The
REC LED will turn off, and you will go back to the
Sequencer Play Main page (see “Sequencer Play - Main
page” on page 166).
At this point, you may press the (PLAY/STOP) button
in the SEQUENCER 1 section to listen to the new Song.
You may also edit the Song by pressing the MENU button
(see “Edit menu” on page 178).
9. Save the song to disk (see “Save Song window” on
page 188).
Warning: The recorded Song is in RAM (Random Access
Memory), and will be deleted when turning the instrument
off, switching to the Style Play or Song Play mode, or entering
Record again. If you wish to preserve it, save the Song to disk.