217
Sampling operating mode
Sampling: Edit
Reference
Level
Use these meters to see the level of the entering signal. When the
CLIP indicator turns red, the signal is too hot. Lower it by reduc-
ing the source output level, or by using the GAIN knob on the
rear panel of the Pa1X.
In case of mono sampling, only one of the indicators will work.
REC Setup
Record Mode
Use this parameter to select the audio input on the back of the
instrument.
Channel 1 (L) Only the Input 1 is selected. A mono sample will
be produced.
Channel 2 (R) Only the Input 2 is selected. A mono sample will
be produced.
Channel 1&2 (Stereo)
Both inputs will be selected. A stereo sample will
be produced.
Note: Whether you record or load a stereo or mono sample, the
sample in memory will be treated as if it was stereo (the editor is
always a stereo editor). Mono samples will be saved as mono files.
Stereo samples will be saved as two separate mono files, and will be
treated as mono files when reloaded.
Left to Sample
Non editable. Remaining memory (in samples/seconds) for sam-
pling. The maximum space available for samples is 524,288
(mono or stereo) samples, or 10.9 seconds.
Sampled
Non editable. Used memory (in samples/seconds) for sampling.
Sampling Buffer
Non editable. Available memory (in samples/seconds) for sample
editing.
Record button
Press this button to start recording. Press it again to stop record-
ing. Recording will automatically stop when the maximum avail-
able space will end.
Note: Pa1X always samples at the maximum quality (16 bit,
48,000Hz). Samples of a different quality may be loaded (8 or 16
bit, 11,025Hz to 48,000Hz).
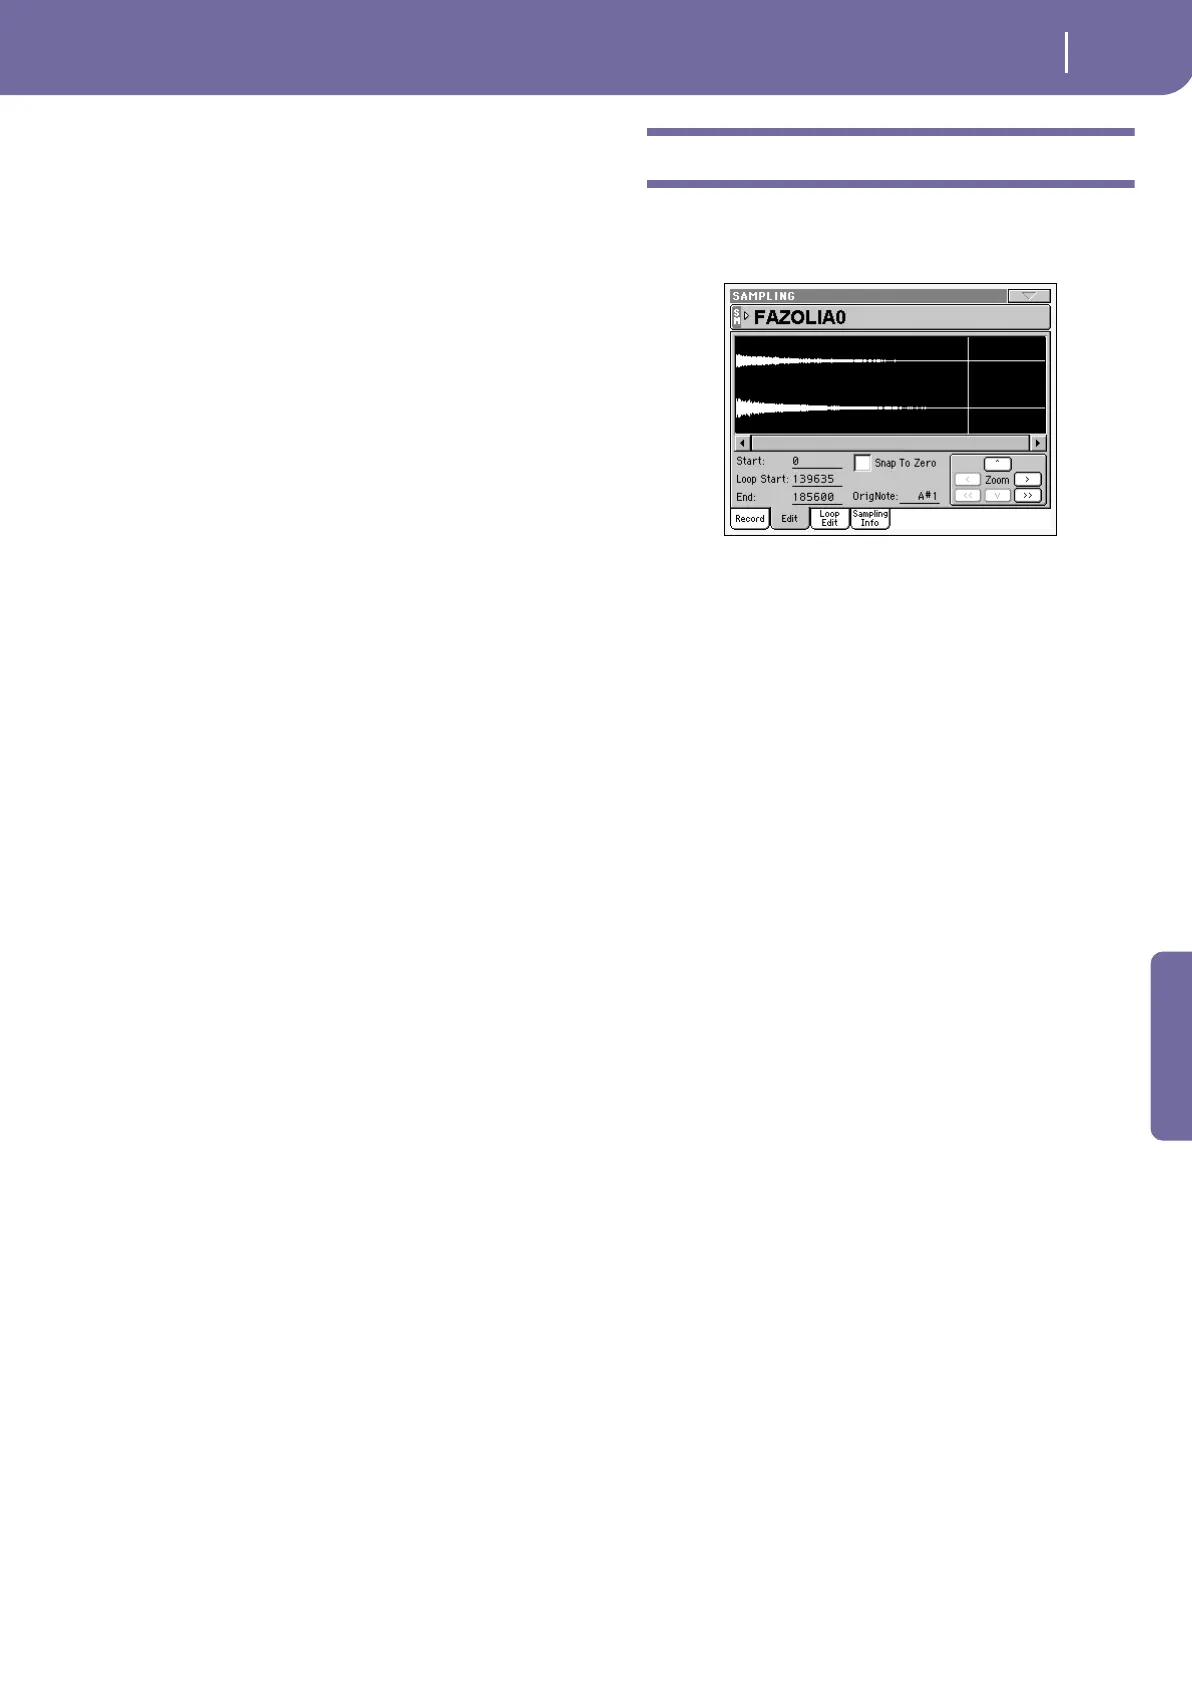
Sampling: Edit
This page allows you to cut, trim or normalize a sample, as well
as edit the loop points. The sample can played on the full key-
board.
SM (Sample)
Selected sample. See “SM (Sample)” above.
Sample diagram
This is the graphical display of the selected sample waveform.
The area included between the Start and End points is high-
lighted (dark background).
Parameters
Start (Sample Start)
This is the sample start point (in samples). You may edit this
point, as well as the End point, to shorten the sample. Changing
the Sample Start cuts out the attack portion of the sound.
Note: When moving the “Start” point forward, the “Loop Start”
point is also moved forward.
Warning: When saving the edited sample (Write Sample opera-
tion), the segments exceeding the Start and End points are perma-
nently removed.
Loop Start
Note: Use the “Loop On” parameter on the “Sampling: Loop Edit”
page to turn the loop on (see page 219).
Use this parameter to adjust the Loop Start point. When you
adjust this parameter, an audible click may appear, due to a pitch
and/or level mismatch between the starting and ending points of
the loop. Move the Loop Start and Loop/Sample End point, so
that the click can no longer be heard.