66
Singing with a connected microphone
Applying harmony to your voice
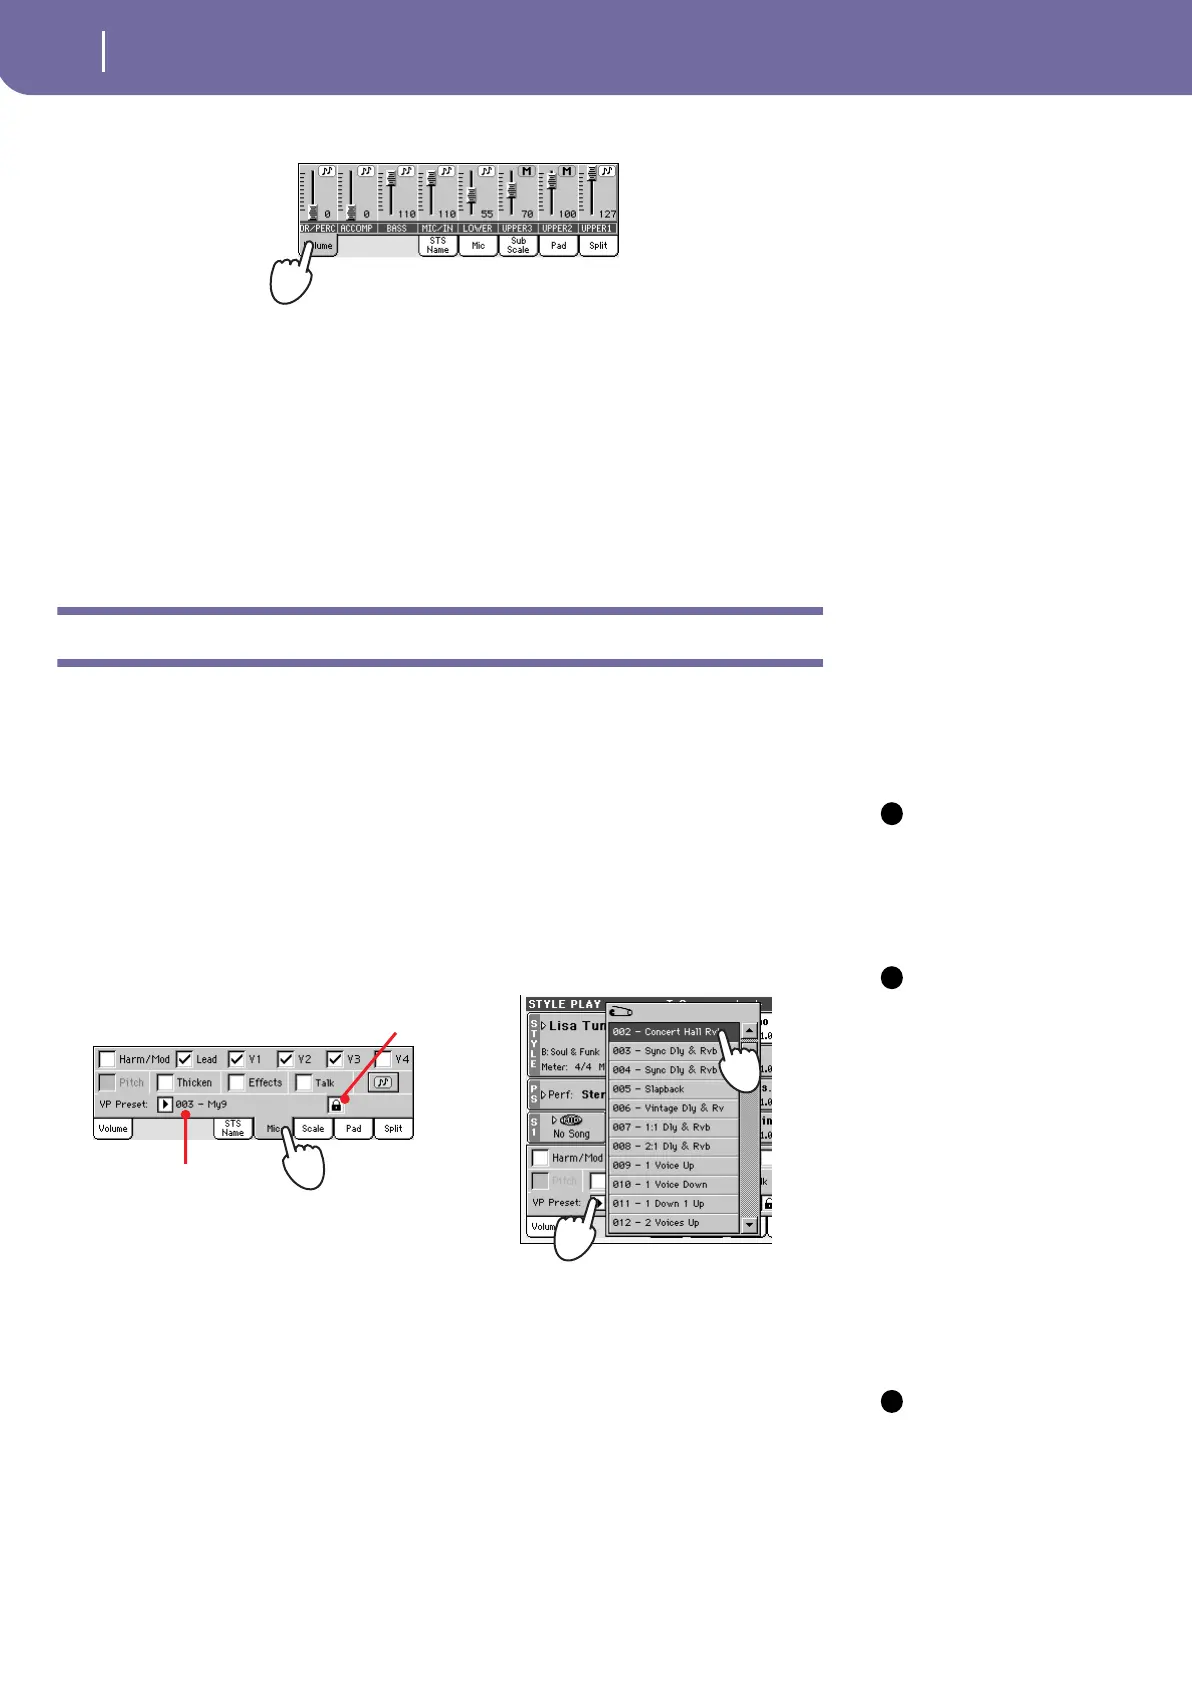
7 Press the Volume tab to select the Volume panel.
8 If you like, start a Style or Song. Adjust the microphone final volume
using the AUDIO IN Assignable Slider.
9 Adjust the other settings, balancing the Style/Song and microphone with
the ACC/SEQ VOLUME slider and the AUDIO IN Assignable Slider.
The settings for the ACC/SEQ VOLUME and AUDIO IN sliders are not saved in memory, so
they stay consistent when selecting different Styles, Performances, Songs or Voice Processor set-
tings.
Applying harmony to your voice
1 Be sure you are in Style Play mode, and select a Style you especially like.
2 Press the Mic tab to show the Microphone panel, and select one of the
available Voice Processor Presets.
Note: Pitch Correc-
tion and Voice Model-
ing are available as
options.
Voice Processor Presets are settings for the various Voice Processor modules (Effects, Harmony,
Voice Modeling, Pitch Correction, Thickening). By selecting a Preset, all processing parameters
may change.
A Voice Processor Preset is assigned to each Performance or STS. When selecting a different Per-
formance or STS, the Voice Processor Preset may change (depending on the Mic panel lock sta-
tus), changing the type of processing applied to your voice.
Note: By default, the
first Performance and
STS does not include any
harmony effect, to avoid
any unwanted process-
ing from being applied
to the microphone.
When you select a Preset
you like, you can save it
to a Performance or STS
(see “Saving your set-
tings to a Performance”
on page 37)
3 If you like, start the Style.
4 Check the Harm/Model checkbox, to turn Harmony on.
Note: By default, you
can turn the Harmony
section on/off by press-
ing the ASSIGNABLE
SWITCH 2, whichever the
shown page is.
5 Play the keyboard, to send chords to the Voice Processor.
6 Sing along with the chords and melody you play on the keyboard.
7 If it is playing, stop the Style.
i
i
Use this pop-up menu
to select a Voice Pro-
cessor Preset.
Mic panel lock
i