Sequencer
P0
P1 P2 P3 P4 P5 P6 P7 P8 P9
69
(Tempo) [040...240]
Specify the playback tempo of the pattern. ☞“ (Tempo)” (0–
1c).
Metronome Sound [Only REC, REC & Play, Off]
Specify whether the metronome will sound during record-
ing or playback. This setting is linked with “Sound” (0–7b).
Other metronome-related parameters such as Bus Select,
Level, and Pre-count are set in “Metronome Setup” (0–7b).
(
☞“Metronome Setup” 0–7b)
Reso (Realtime Quantize Resolution) [Hi, 3 … ]
Specify how the timing of the data being recorded into the
pattern will be corrected.
☞“Reso (Realtime Quantize Reso-
lution)” (0–1f).
Remove Data
Checked: This allows you to remove unwanted musical
data while you record. During recording, hold down the
key(s) (note number) corresponding to the musical data that
you wish to remove, and only the data for those note num-
bers will be removed as long as you continue holding down
the key. Controller data can also be removed in this way. For
example while you move the joystick in the X (horizontal)
direction, pitch bend data will be removed. While you apply
pressure to the keyboard, after touch data will be removed.
Alternatively, you can hold down the [REC/WRITE] key to
delete all musical data for as long as you continue holding
down the key.
6–1c: USED IN SONG TRACK, USED IN RPPR
USED IN SONG TRACK
This area indicates the song tracks in which the selected pat-
tern is used.
USED IN RPPR
This area indicates the RPPR in which the selected pattern is
used. The assigned key and the specified track are shown.
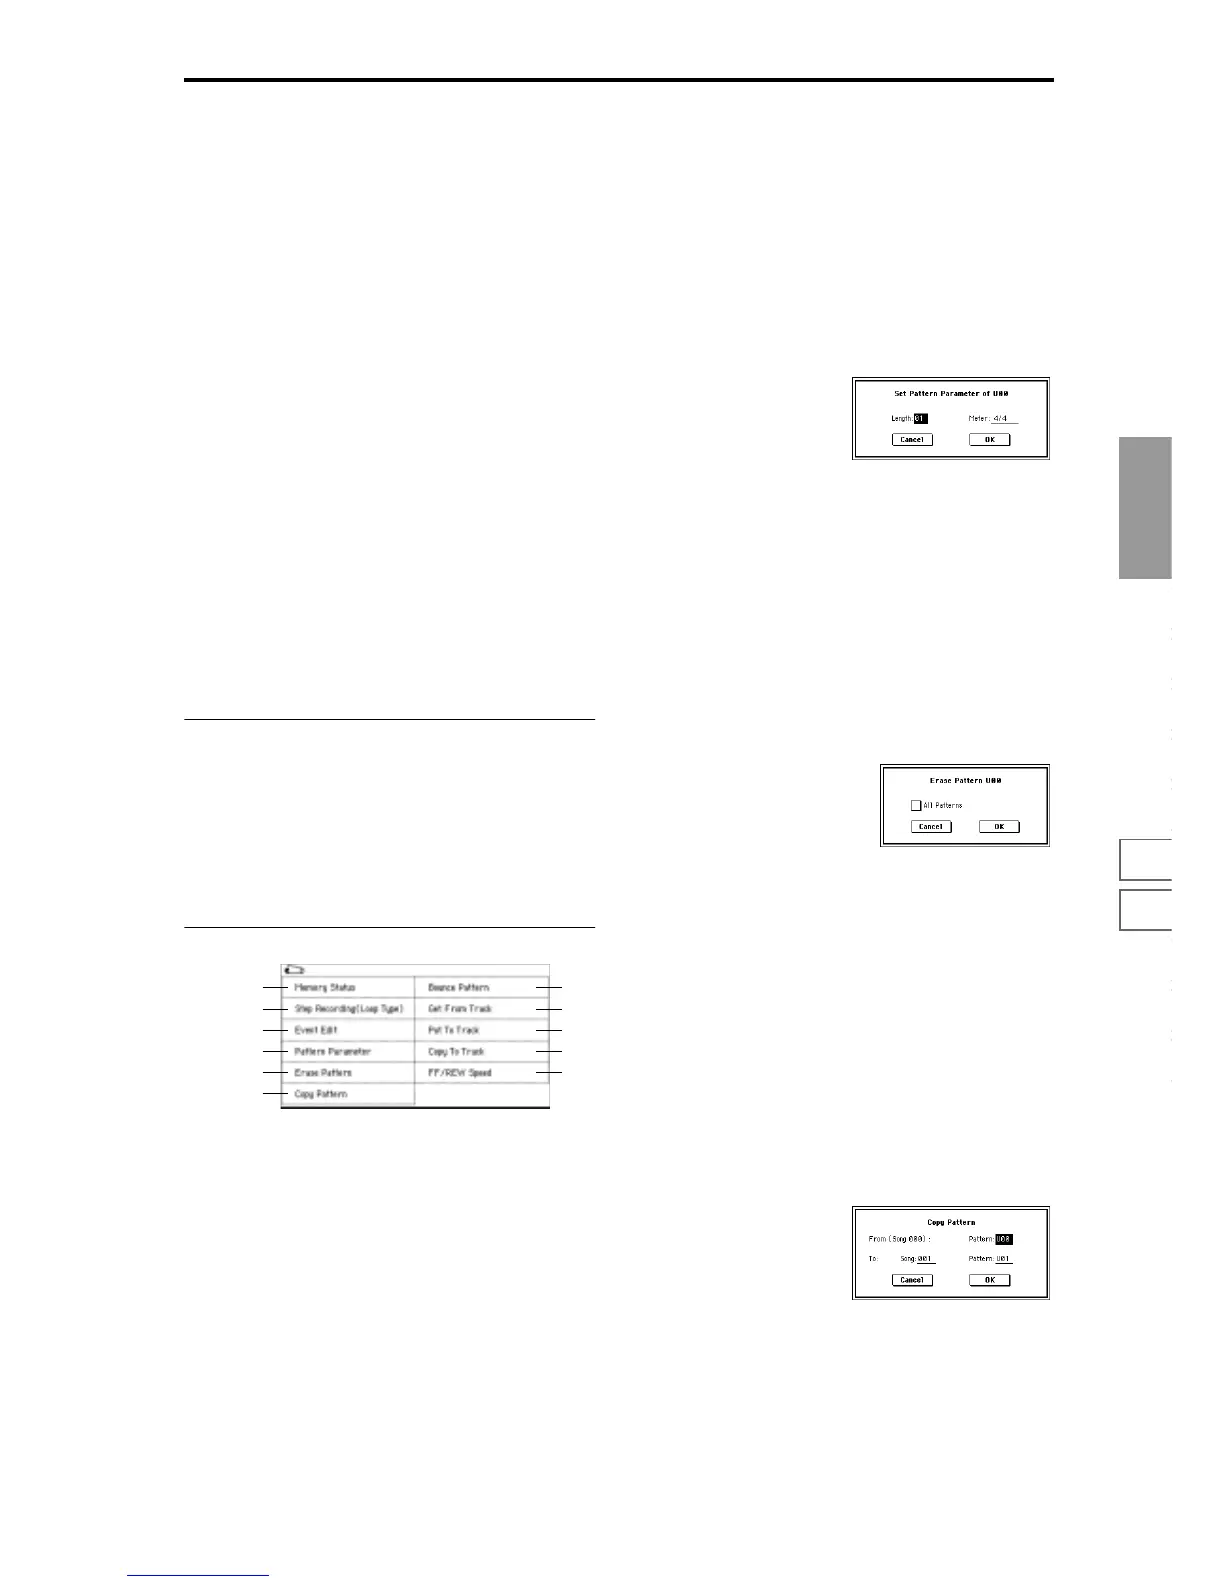
▼ 6–1: Page Menu Command
6–1A: Step Recording (Loop Type)
Here you can perform step recording into a pattern.
This is available when a user pattern is selected.
1 In “Pattern” and “Pattern Select,” specify the pattern. By
default, the pattern length is one measure. If you wish to
change the number of measures in the pattern, set the
“Pattern Parameter” (6–1C).
2 The remaining steps are the same as when step recording
on a track. Refer to steps
2 and following in “Step
Recording” (5–1A). However, step recording a pattern
differs from step recording a track in that when you reach
the end of the pattern, you will return to the beginning
and continue recording, in this way continuing to add
more data.
6–1B: Event Edit
Here you can edit individual events of the musical data in a
pattern. Use “Pattern” and “Pattern Select” to specify the
pattern, and then select this command.
The remaining steps are the same as when Event Editing a
track.
☞“Event Edit” (5–1B).
6–1C: Pattern Parameter
This command specifies the number of measures and the
time signature of the selected pattern.
1 Use “Pattern” and “Pattern Select” to specify the pattern.
2 Select this command to open the following dialog box.
3 In “Length,” specify the number of measures in the pat-
tern.
4 In “Meter,” specify the time signature of the pattern.
However, this time signature is only temporary, and
when you “put” the pattern in a track of a song, the pat-
tern will play according to the time signature of that mea-
sure.
5 To execute the Pattern Parameter settings, press the OK
button. To cancel, press the Cancel button.
6–1D: Erase Pattern
This command erases the musical data from the selected
pattern.
1 Use “Pattern” and “Pattern Select” to specify the pattern.
2 Select this command to open the following dialog box.
3 If you check “All Pattern,” all user patterns in the song
will be erased.
If “All Patterns” is not checked, only the pattern speci-
fied in
1 will be erased.
4 To execute the Erase Pattern command, press the OK
button. To cancel, press the Cancel button.
6–1E: Copy Pattern
This command copies the settings and musical data of the
selected pattern to another pattern.
User patterns belong to a particular song, but you can use
the Copy Pattern command to use a pattern in another song.
Also, while preset patterns cannot be edited, you can copy a
preset pattern to a user pattern and then edit and save it as a
user pattern. Be aware that when you execute the Copy Pat-
tern operation, the pattern settings and musical data of the
copy destination will be erased.
1 Select this command to open the following dialog box.
2 In From: “Pattern,” specify the copy source pattern. (By
default, this will be the song and pattern that was
selected in the tab page.)
3 In To: “Song” and “Pattern,” specify the copy destination
song and pattern. For “Pattern,” only user patterns U00–
U99 can be specified.
4 To execute the Copy Pattern command, press the OK
button. To cancel, press the Cancel button.
0–1A
6–1A
6–1B
6–1C
6–1D
6–1E
6–1F
6–1G
6–1H
6–1I
0–1H