REPAIR INSTRUCTIONS, PART 1
Page 143
13. Remove the fan assembly as follows:
a. Loosen the eight fan assembly
mounting nuts and capscrews. Refer to
Figure 120.
b. While supporting the fan assembly,
remove the nuts from the capscrews
and remove the assembly.
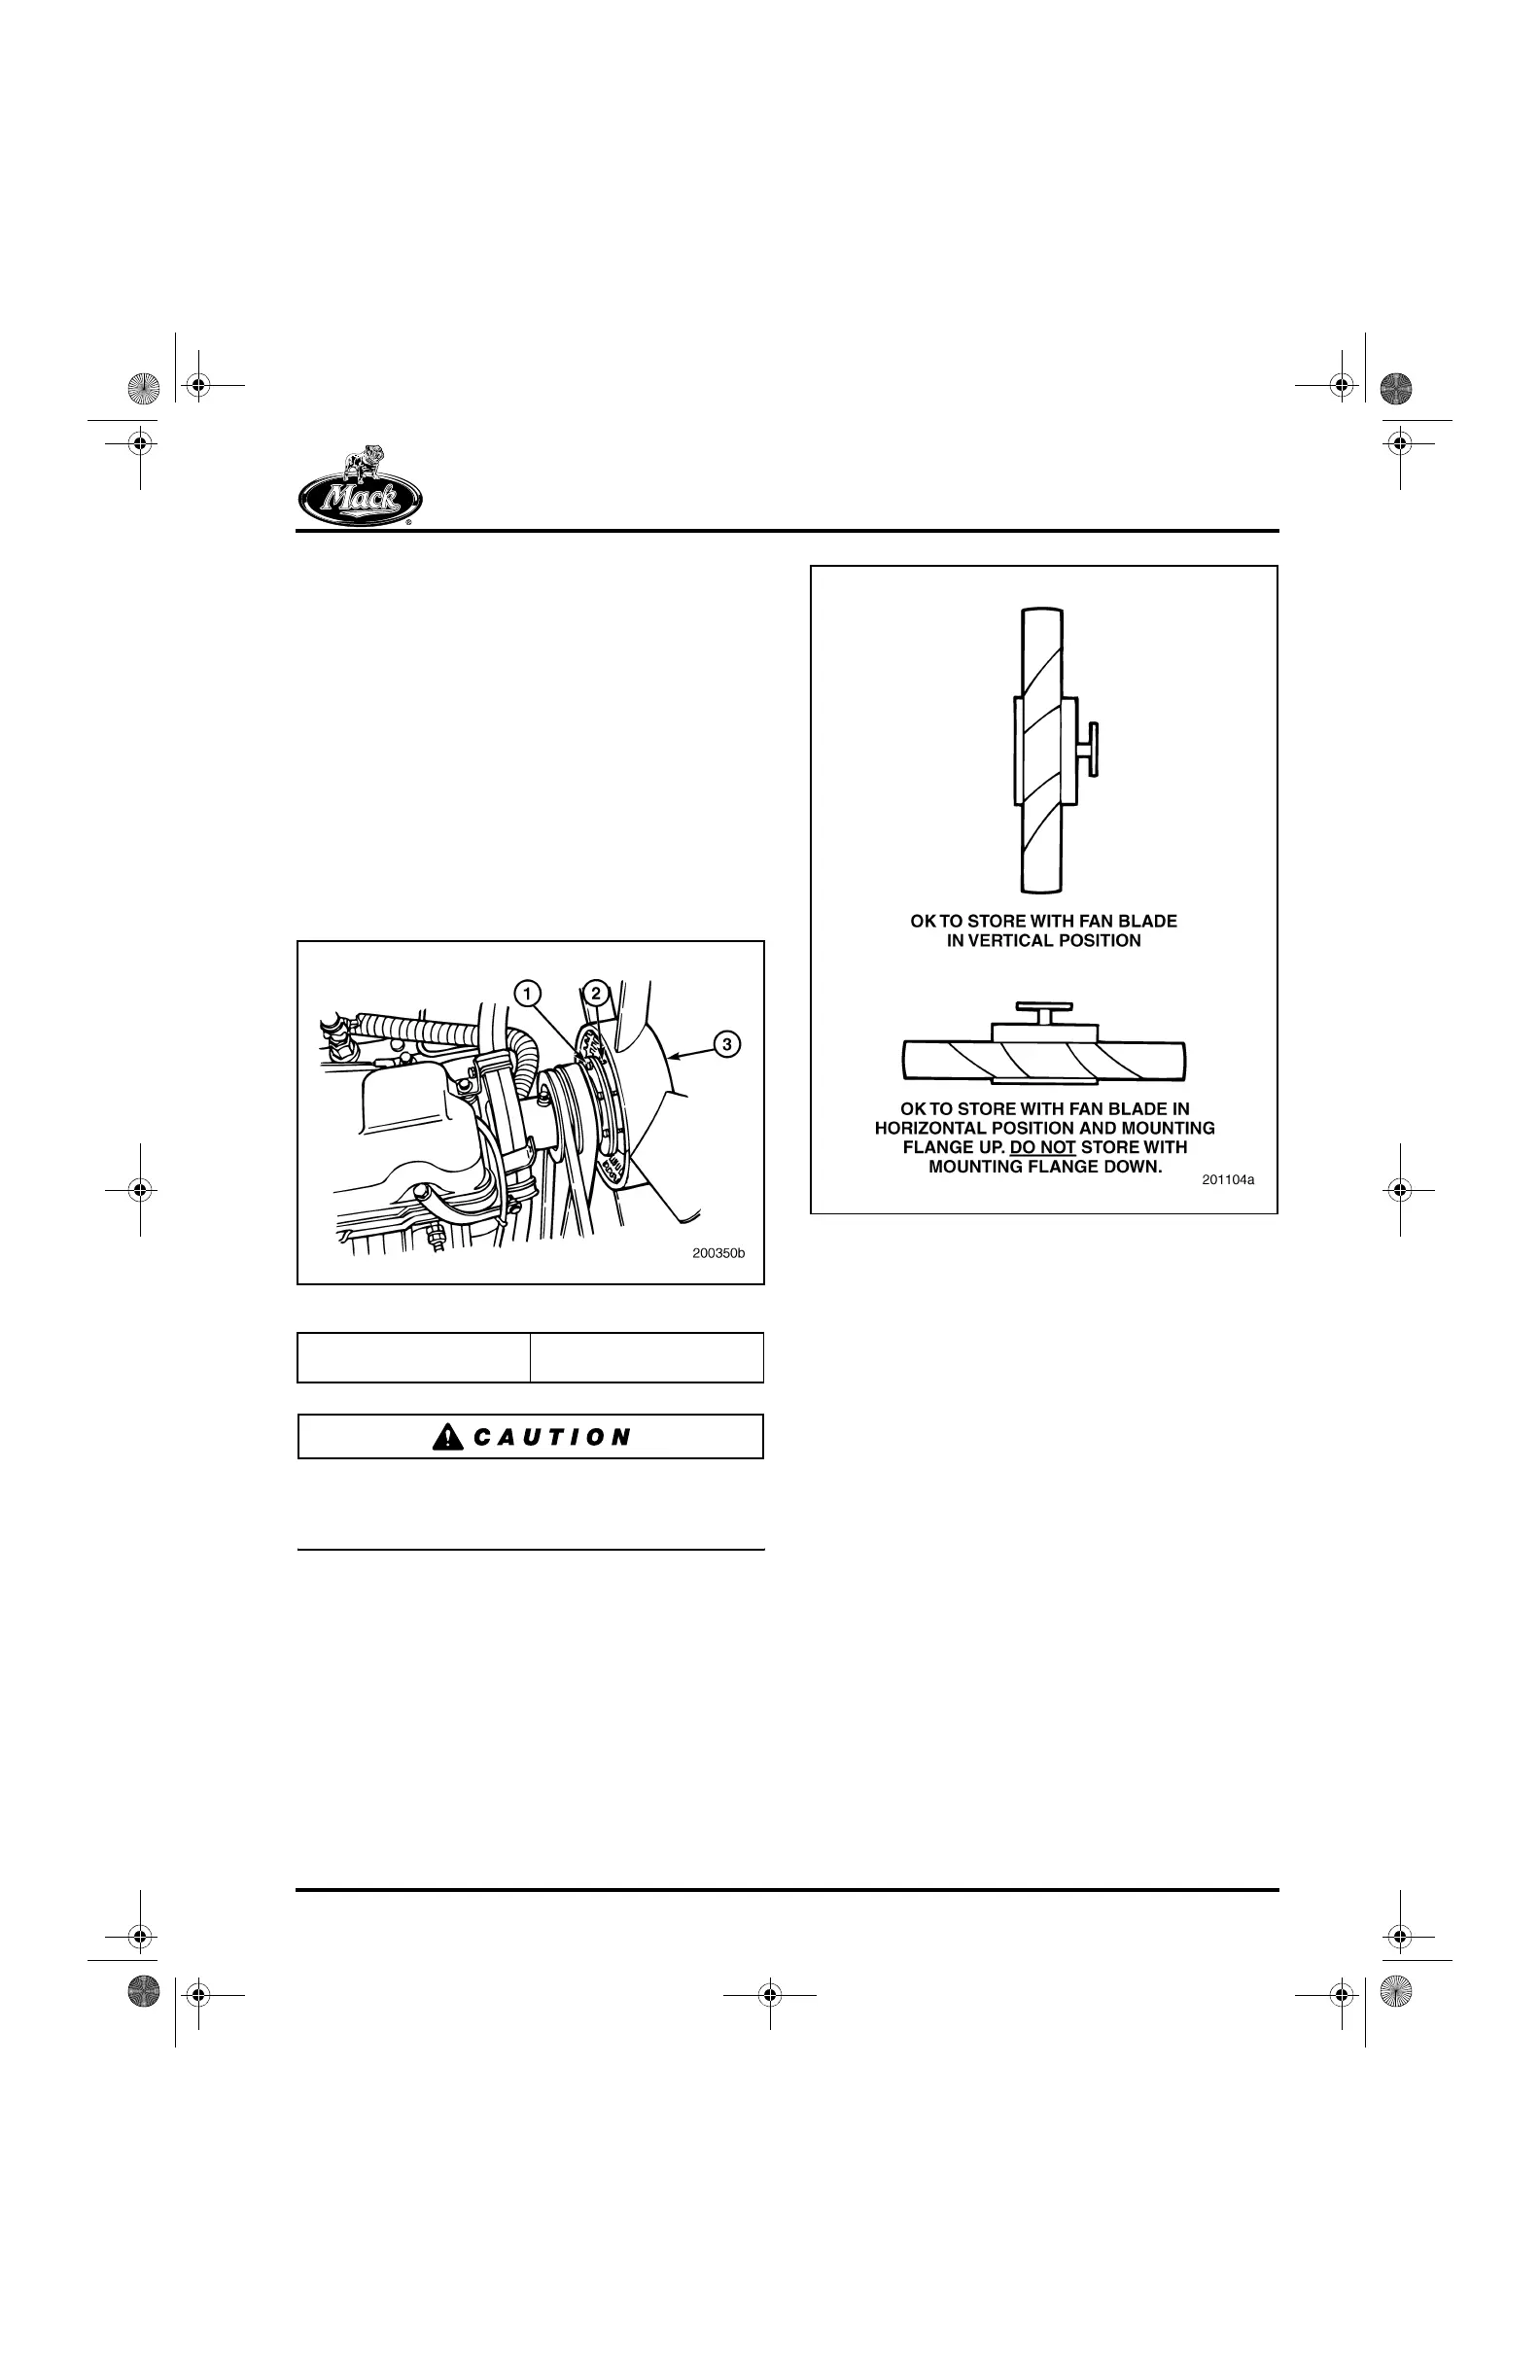
c. If the fan assembly is equipped with a
viscous drive, be sure to store the
assembly either horizontally, with the
fan face down (hub flange up), or
vertically, as shown in Figure 121. This
will prevent fluid leaking from the
assembly.
120
Figure 120 — Fan Assembly Removal
Do not store the assembly horizontally with the
fan face up (hub flange down). Fluid in the
viscous drive reservoir can leak out.
121
Figure 121 — Viscous Fan Drive Assembly Storage
14. Obtain a lifting device (chain fall or engine
hoist) and support the radiator.
15. Remove the retaining bolts from the radiator
support mounts.
16. Remove the radiator from the vehicle, using
the lifting device and an assistant, if
required.
17. Disconnect the heater hoses and A/C
refrigerant lines, if applicable, from
connections at the lower dash panel behind
the engine.
1. Capscrew
2. Nut
3. Fan Assembly
5-111.bk Page 143 Monday, July 10, 2006 2:26 PM